Table of Contents
ToggleI still remember the first time I baked these at home, the kitchen smelling like butter, spice, and warm fruit. I wanted a simpler take on my favorite pie that still felt bakery-quality and shareable.
My version uses a tender shortbread crust, spiced filling, optional streusel, and a glossy caramel ribbon that makes each slice sing. You’ll get the nostalgia of caramel apple pie without rolling dough, and the bars travel well to potlucks and game days.
Read on for a straightforward recipe with clear steps: pre-bake an 8×8 crust at 300°F for 15 minutes, add the filling, then bake at 350°F for 30–35 minutes. Cool 20 minutes, chill 2 hours for clean slices; refrigerate up to 3 days or freeze for three months.
I’ll share pro moves—chill the pan, cut with a warm knife, and pick tart-sweet apples—so your salted caramel apple treat looks as good as it tastes.
A cozy fall welcome to my caramel-kissed apple bars
The first bite of these caramel-kissed bars brings warm cinnamon, a tender shortbread crust, and a sweet-salty ribbon of salted caramel that lingers. I bake them when the air chills and the house fills with pie-like aroma, but without the fuss of rolling dough. They slice cleanly and vanish at gatherings, so they’re my go-to when I want bakery polish at home.
I favor a mix of tart Granny Smith with juicy Honeycrisp or Pink Lady. That combo gives each square layered texture and bright flavor, so the filling feels lively, not cloying.
The aim is simple: neat bars, glossy topping, and edges that hold even when served warm. I keep the steps streamlined so beginners feel confident and pros save time.
Settle in with a pan in the oven and enjoy a foolproof autumn bake that fills your kitchen with the scent of apple pie and caramel.
| Apple Variety | Sweetness | Texture in bars | Best use |
|---|---|---|---|
| Granny Smith | Tart | Holds shape, adds brightness | Balances sweetness |
| Honeycrisp | Sweet | Juicy, tender after baking | Adds juicy contrast |
| Pink Lady | Sweet-tart | Firm, aromatic | Layered flavor and aroma |
Why you’ll love this easy, bakery-worthy recipe
I set out to make a dessert that looks like it came from a bakery but fits a weeknight schedule. This recipe uses a no-roll shortbread base and a spiced filling so you get consistent results with little fuss.
Prep is quick: pre-bake the crust 15 minutes at 300°F, then bake the assembled pan 30–35 minutes at 350°F. Chill the pan 2 hours for clean cuts. If you double the batch to a 9×13, plan 45–55 minutes in the oven.
- Effortless bakery quality: no-rolling shortbread plus a glossy finish gives polished squares.
- Weeknight-friendly timing: short active prep, a 15-minute pre-bake, then 30–35 minutes and tidy-up time while the pan chills.
- Scalable and reliable: make an 8×8 for family dessert or double for a crowd without changing texture.
- Balanced crowd-pleaser: I use granny smith with a sweeter apple so the flavor stays bright, never cloying.
| Pan Size | Active Prep | Oven Time | Chill |
|---|---|---|---|
| 8×8 | 15–20 minutes | 30–35 minutes | 2 hours |
| 9×13 (double) | 25–30 minutes | 45–55 minutes | 2 hours |
| Notes | Adjust ingredients proportionally; chill for clean slices; cool before adding any glaze. | ||
If you want a similar twist, try a related caramel bar variation that uses different ingredients and texture profiles.
Ingredients you’ll need for salted caramel apple bars
A quick ingredient check helps the bake go smoothly. I list exact amounts below so you can measure and move through each step without guessing.
Shortbread crust essentials
- 1/2 cup (113g) unsalted butter, melted
- 1/4 cup (50g) granulated sugar
- 1 teaspoon pure vanilla extract
- 1/4 teaspoon salt
- 1 cup (125g) all-purpose flour
Spiced apple filling
- 2 large apples, peeled and thinly sliced about 1/4 inch (about 3–4 cups sliced)
- 2 tablespoons all-purpose flour
- 2 tablespoons granulated sugar
- 1 teaspoon ground cinnamon
- 1/8 teaspoon ground nutmeg
Streusel or crumb topping option
- 1/2 cup (43g) old-fashioned rolled oats
- 1/3 cup (70g) packed brown sugar
- 1/4 teaspoon ground cinnamon
- 1/4 cup (31g) all-purpose flour
- 1/4 cup (56g) cold unsalted butter, cubed
Homemade caramel or store-bought
Use a thick, pourable caramel. Homemade caramel made with warm cream yields a glossy finish that drips nicely across the top, but a good store-bought caramel works too.
Pan and prep notes: line an 8×8-inch pan with parchment, leaving an overhang for easy lifting. Stir the crust in a bowl until moistened crumbs form, toss apples in a separate bowl to coat, and keep the streusel chilled until you’re ready to sprinkle.
| Component | Key tip | Amount |
|---|---|---|
| Crust | Mix until just combined | 1/2 cup butter; 1 cup flour |
| Filling | Slice apples 1/4-inch | 2 large apples; 2 Tbsp flour |
| Streusel | Keep butter cold | 1/2 cup oats; 1/4 cup butter |

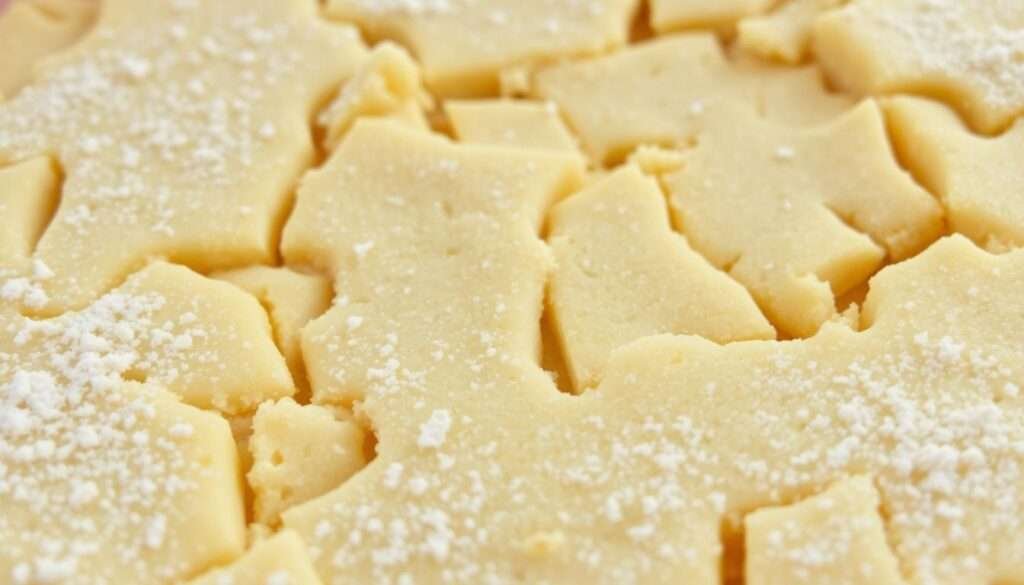
The shortbread crust that stays tender yet sturdy
A dependable shortbread crust starts with simple ratios and a quick melt-and-stir method that saves time and yields consistency.
I stir melted unsalted butter with sugar, vanilla, salt, and all-purpose flour until the mixture holds together. Then I press it firmly into a lined 8×8 pan so the base is even and level.
Bake the crust 15 minutes at 300°F so it sets without deep color. Look for lightly set edges; the crust will finish baking later under the filling and topping.
- I use a melt-and-stir shortbread so the dough comes together without a mixer and avoids dry patches.
- Pressing the crust firmly prevents crumbling and makes clean slices of the bars.
- A brief pre-bake keeps juices from soaking through, giving a tender but sturdy bottom.
If you double to a 9×13, add about three minutes to the pre-bake so the center sets properly.
| Step | Action | Why it matters |
|---|---|---|
| Mix | Stir melted butter and flour | Even hydration prevents dry pockets |
| Press | Pack into lined pan | Creates level base for apples and caramel |
| Pre-bake | 300°F, 15 minutes | Sets structure without becoming golden brown |
Make the apple filling for deep, cozy flavor
To build bright, layered flavor, I start by prepping the fruit so every slice sings.
I thinly slice 2 large apples (about 3–4 cups total) between 1/8 and 1/4 inch. In a bowl I toss the fruit with 2 tablespoons flour, 2 tablespoons granulated sugar, 1 teaspoon cinnamon, and 1/8 teaspoon nutmeg.
Mix gently so each slice gets an even coating. Let the mixture rest a few minutes so the spices hydrate and cling. This helps the juices thicken into a glossy, not runny, apple filling when baked.
- I use a mix of Granny Smith and Honeycrisp or Pink Lady to balance tart and sweet.
- If apples are extra juicy, leave excess liquid behind when spooning over the crust.
- For more warmth, add a pinch of allspice; for brightness, a squeeze of lemon.

| Slice thickness | Result in bars | Minutes to soften |
|---|---|---|
| 1/8 inch | Soft layers, quick melding | 10–12 minutes |
| 1/4 inch | More texture, defined slices | 12–15 minutes |
| Tip | Even slices prevent gaps | Rest in bowl before building |
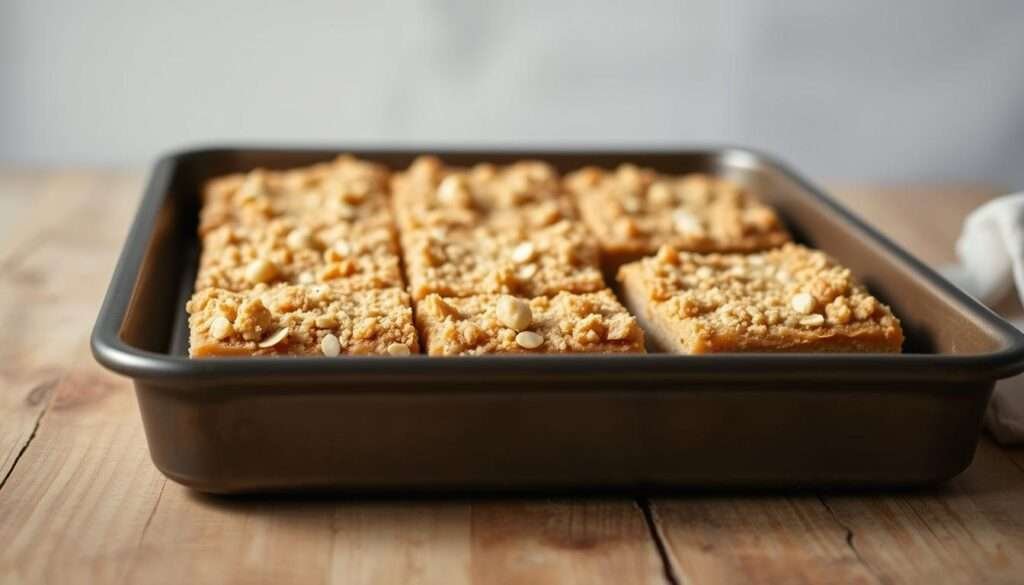
Irresistible Salted Caramel Apple Bars for Fall
These squares give pie-like comfort with less fuss and clean, bakery-style slices every time. I build a tender crust, a warmly spiced apple layer, and finish with a generous drizzle that makes each bite shine.

I use a mix of tart and sweet fruit to create depth that echoes classic apple pie, then chill the pan so the pieces slice neatly. A final scatter of flaky sea salt on the top lifts the sweetness and adds a delicate crunch.
- This is my signature fall bake: buttery crust, spiced filling, and a ribbon of salted caramel that feels celebratory.
- The contrast is key—tender fruit, crisp-edged crumbs, and a glossy finish make the bars memorable.
- For gatherings I drizzle just before serving so the sheen stays fresh and the flavors pop.
| Texture | Finish | Serving tip |
|---|---|---|
| Buttery, tender crust | Glossy salted caramel drizzle | Chill 2 hours, slice cleanly |
| Soft, spiced apple layers | Light streusel or smooth top | Finish with flaky sea salt |
| Defined edges, neat squares | Bakery-style shine | Drizzle just before serving |
Step-by-step instructions for perfect bars every time
Use this step-by-step guide to move from preheat to slice without guesswork. Follow each numbered step and the timing notes so the texture sets cleanly.
-
Prep the pan, pre-bake the crust, and set the oven
Line an 8×8-inch pan with parchment paper, leaving an overhang. Preheat the oven to 300°F and set aside the mixed crust.
-
Make and pre-bake the crust
Stir melted butter, sugar, vanilla, salt, and all-purpose flour until moistened. Press firmly into the lined pan and bake 15 minutes at 300°F. Remove and raise the temperature to 350°F.
-
Toss the apples and build the layers
In a bowl, make apple filling by combining sliced apples with flour, sugar, cinnamon, and nutmeg. Set aside while the warm crust rests a few minutes. Spoon the fruit over the crust, leaving excess liquid behind.
-
Add streusel or finish with caramel
Evenly scatter the streusel or leave the top plain. The topping should form a light blanket across the apple layer so the top browns evenly.
-
Bake until golden brown and bubbling at the edges
Return the pan to the oven at 350°F and bake 30–35 minutes, until the topping is golden brown and the edges are bubbling.
-
Cool, chill, and slice cleanly
Cool 20 minutes at room temperature, then transfer to the fridge and chill at least 2 hours so the bars set. Use the parchment overhang to lift the slab and slice into 12–16 pieces. Drizzle warm caramel before serving; for ultra-clean slices, chill longer or freeze 10 minutes.
-
Optional homemade caramel note
If you make caramel, heat sugar to a deep amber, whisk in butter, then stir in warm cream so the sauce stays pourable. Drizzle sparingly to keep neat squares.
| Checkpoint | What to look for | Timing |
|---|---|---|
| Crust set | Lightly firm, not brown | 15 minutes |
| Top | Golden brown and bubbling | 30–35 minutes |
| Chill | Firm for clean slices | 2 hours |
If you want a full recipe reference or extra tips, see the original recipe.
Tips, variations, and pro moves for next-level flavor
A handful of pro moves will lift the flavor and make slicing stress disappear. These simple tweaks cover apple choice, swaps, scale, and storage so your bars look and taste their best.
Best apples and quick swaps
I like to mix granny smith with Honeycrisp or Pink Lady to keep the filling bright and balanced. Avoid soft McIntosh; they break down too much during baking.
Substitutions that work
Swap brown sugar types freely in the streusel. For gluten-free needs, use a trusted 1:1 baking flour in the crust and topping. Dairy-free butter will work, though the crust may be slightly softer.
Scaling, pans, and bake-time notes
Double the recipe for a 9×13 pan. Pre-bake the base about 18 minutes and extend the final bake to 45–55 minutes, until the top is golden and the apples are tender.
Slicing, serving, and finishing touches
Line the pan with parchment every time for easy lifting and clean edges. Chill fully before cutting; for ultra-clean slices, freeze the slab 10–15 minutes.
Serve slightly warm or at room temperature and finish with a pinch of flaky sea salt on the top to lift flavor.
- Caramel pro move: use a candy thermometer and a heavy-bottomed pot so the sauce stays drizzle-ready.
- Store in an airtight container in the fridge up to 3 days, or freeze up to 3 months in a sealed container.
- Reheat individual slices briefly so the caramel softens without overcooking the crust.
| Topic | Quick tip | Why it helps |
|---|---|---|
| Lining | Use parchment | Neat lift and clean slices |
| Chill | 2+ hours or freeze 10–15 minutes | Firm bars for tidy cuts |
| Storage | Airtight container, fridge or freezer | Keeps texture and extends life |
Utensils and tools you’ll need, plus why they matter
Good tools make a big difference when you want neat slices and reliable texture. I list the essentials I reach for when I follow this recipe so you can nail timing, temperature, and finish every time.
How each tool helps you nail texture, timing, and caramel
These items cover prep, bake, and finishing steps. From measuring flour to testing caramel, each tool reduces guesswork and protects the crust and filling.
| Tool | Usage | Why it matters | Quick tip |
|---|---|---|---|
| 8×8 metal baking pan | Holds the crust and layers | Conducts heat evenly for a crisp crust and uniform bars | Line with parchment for easy lift |
| Parchment & mixing bowls | Line pan; mix crust, filling, streusel | Prevents sticking and avoids overworking ingredients | Use large and medium bowls for staging |
| Spatula, whisk & pastry blender | Press crust, fold apples, cut butter | Controls texture of crust and crumbly streusel | Keep butter cold for streusel |
| Heavy pot & candy thermometer | Make caramel with cream | Even heat and accurate temperature prevent scorching | Stir gently and watch temp closely |
| Scale, oven thermometer, knife, rack | Measure cups precisely, confirm oven temp, slice, cool | Consistent ingredients, true oven temp, clean cuts, airflow to avoid soggy bottoms | Weigh flour and chill before slicing |
Nutrition facts per serving
I like to know the rough calories and how long something keeps; here are the practical details per piece.
Estimated per serving (1 bar): about 260–310 calories. The range depends on how much caramel drizzle you add and how you slice the pan.
- Typical macro note: carbs come mainly from flour, sugar, and apple; fat comes mostly from butter and cream; small fiber if you include oats in the streusel.
- Sodium and calcium vary with salted toppings and butter choice. Use unsalted butter to lower sodium.
- To reduce calories, skip or cut back on the caramel topping, or cut the slab into 20 smaller slices instead of 16.
- Food safety: after chilling at least 2 hours, store leftovers in an airtight container in the refrigerator up to 3 days. Bring to room temperature briefly before serving for the best texture.
- Allergens: contains wheat (flour) and dairy (butter, cream in caramel).
- Note: these values are estimates; exact nutrition depends on brands, measuring, and portion size.
| Metric | Per serving (est.) | Impact | Storage tip |
|---|---|---|---|
| Calories | 260–310 kcal | Varies with caramel and slice size | Keep in airtight container, fridge |
| Key macros | Carbs > Fat > Protein | Carbs from sugar, apples, flour; fat from butter/cream | Slice smaller to lower per-piece calories |
| Allergens & notes | Wheat, dairy | Sodium varies; use unsalted butter to reduce salt | Chill 2+ hours; serve at room temperature if desired |
Bake it, share it, and savor the season
Make a batch that travels well, slices cleanly, and still tastes like a cozy pie at home. Chill the pan so the crust firms and the pieces cut neatly.
Drizzle warm salted caramel on the top just before serving for a glossy finish. Enjoy the squares warm, at room temperature, or chilled straight from the fridge.
Store leftovers in an airtight container in the refrigerator up to 3 days. I’d love your rating and a note about your apple blend or sea salt pick.
Share photos and tag me — your feedback helps others get bakery-style results from this recipe.