
Table of Contents
ToggleLast Tuesday, my neighbor stopped by for an unexpected visit. I wanted to serve a sweet treat but realized my pantry looked quite bare.
Luckily, I remembered a simple trick using just three basic items. Within twenty minutes, the house smelled amazing. I had warm treats ready to share with my guest.
I discovered that with just peanut butter, sugar, and an egg, you can create soft treats that taste incredible. This peanut butter cookies method is my favorite because it is so fast and yields professional results.
I love that these snacks are naturally gluten-free, taking very little prep work. You likely have everything you need in your kitchen right now to start this recipe in no time.
It is the perfect solution for a sudden craving or a last-minute gathering. I will show you how to master this snack so you can enjoy these cookies often.
What Makes These Peanut Butter Cookies So Special
Unlike traditional butter cookies that can be crumbly or crisp, my recipe produces a bite that stays fresh for days. I believe what truly makes these peanut butter cookies special is their incredibly soft chewy texture that you would not expect from a simple list of items.
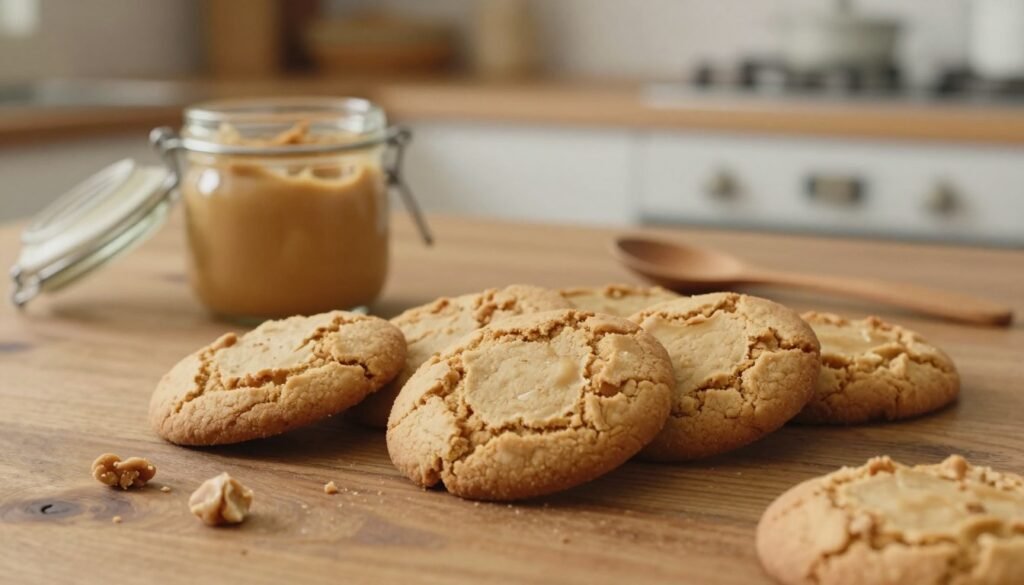
I am always amazed that despite having no flour, these treats are not dense or gluey like other flourless recipes tend to be. Using only one main ingredient keeps the cookies simple and easy for any home baker to master quickly.
The authentic peanut flavor shines through in every bite because the natural butter fats are perfectly balanced. I have found that this specific ratio creates a sweetness that does not overpower the nuttiness of the peanut.
What sets this recipe apart is how the dairy butter alternatives or oils are unnecessary for a bakery-quality finish. These cookies are naturally gluten-free, which makes them a safe and delicious option for my friends with gluten sensitivities.
| Feature | 3-Ingredient Recipe | Traditional Cookies |
|---|---|---|
| Primary Texture | Soft and Chewy | Crumbly or Crisp |
| Dietary Profile | Naturally Gluten-Free | Contains Wheat Flour |
| Preparation Style | Flourless and Dense | Light and Airy |
| Shelf Life | Stays Moist Longer | Dries Out Quickly |
Why You'll Love This Recipe
I absolutely adore this recipe because it simplifies baking without sacrificing any flavor. It provides a perfect solution when I want a homemade treat but have very little energy to bake.
Only Three Simple Ingredients
I love that this recipe requires only three ingredients that I usually have in my pantry. Using just sugar, an egg, and creamy peanut butter means I spend less time measuring and cleaning up after my work.
Ready in Less Than 30 Minutes
I appreciate how quickly these cookies come together when I am in a rush. From mixing the dough to pulling the pan from the oven, the entire process takes less than 30 minutes of my time.
Soft, Chewy, and Naturally Gluten-Free
I am thrilled that these cookies deliver a soft, chewy texture that rivals complex bakes. Since they are naturally gluten-free, I can serve them to guests with various dietary restrictions. You might also enjoy these easy vegan chocolate chip cookies for your next holiday party.
Perfect for Any Occasion
I find these treats work well for any event, from a weeknight snack to a formal bake sale. This versatile peanut butter dessert is always a crowd-pleaser regardless of the setting.
| Feature | Key Advantage | Practical Benefit |
|---|---|---|
| Preparation Speed | Under 30 Minutes | Great for last-minute guests |
| Ingredient Count | Only 3 Items | No expensive grocery trips |
| Dietary Profile | Gluten-Free | Safe for many different people |
| Texture Type | Soft and Chewy | Consistent professional quality |
Essential Tools and Preparation
I always make sure my workspace is set up with these basic kitchen items before I crack open the peanut butter. Getting everything ready first saves time and keeps the process stress-free. I find that preparation prevents any surprises once I start mixing.
Organizing your gear also ensures that once the dough is mixed, you can move straight to portioning. I prefer to have every tool within reach on my counter. This makes the entire experience much more enjoyable.
Kitchen Tools You'll Need
To make these simple treats, you do not need any fancy or expensive gadgets. I rely on common items that most people already have in their kitchen cupboards. Using the right tools makes the workflow much smoother, and I often use a lightweight bowl to keep things manageable.
Mixing Equipment
I always start by gathering my mixing equipment. This includes a large bowl for combining the three main ingredients. I usually use a wooden spoon or a flexible spatula to stir the mixture.
The dough comes together so easily that I rarely need to pull out an electric mixer. This simple approach reminds me of a delicious 1-bowl peanut butter cup dump cake recipe I often make. You can use a clean mixing bowl to keep the mess to a minimum.
Baking Equipment
For my baking equipment, I rely on rimmed baking sheets lined with parchment paper. This prevents the cookies from sticking and makes the cleanup process effortless for me.

I find that having a second cookie sheet allows me to prepare one batch while another is in the oven. Using a dedicated baking sheet ensures that the heat distributes evenly to every cookie. I always check that each sheet is completely flat before I start.
Measuring Tools
My measuring tools are very simple for this recipe. I use accurate measuring cups for the peanut butter and the sugar to keep the ratios perfect. I also keep a handy fork nearby for the very last step of preparation.
The fork is essential for creating the signature crosshatch pattern on the top of each cookie. This step is not just for looks; it helps the dense dough bake through properly. I never skip this part because it ensures a perfect texture.
Tool Importance and Usage Guide
| Tool | Importance | Specific Usage |
|---|---|---|
| Large Bowl | Essential | Used to combine the sugar, egg, and peanut butter. |
| Baking Sheet | High | Provides a flat surface for the cookies to bake on. |
| Metal Fork | Critical | Used to flatten the dough and create the classic pattern. |
| Measuring Cups | High | Ensures the correct balance of wet and dry ingredients. |
Exact Ingredients Breakdown
I want to share the precise details of every ingredient peanut butter requires for this simple recipe. Using the right amounts ensures your cookies have the perfect texture and flavor. It is a simple ingredient peanut base that anyone can master.
Complete Ingredients List with Measurements
This list shows the exact quantities for your batch. I recommend measuring every cup peanut carefully for consistent results. This allows the richness to be the star of the show.
| Ingredient | Measurement | Usage Tip |
|---|---|---|
| Peanut Butter | 1 Cup | Choose commercial spreads |
| Sugar | 1 Cup | White or brown sugar works |
| Large Egg | 1 Piece | Room temperature is best |
Choosing the Right Peanut Butter
Selecting the best ingredient peanut butter is crucial for the dough’s stability. I’ve found that commercial spreads like Skippy or Jif produce the most reliable cookies. These brands have the right balance of fats and solids.

Creamy vs. Chunky
I usually prefer creamy peanut butter for a smooth finish. However, chunky butter adds a delightful crunch to every bite if you enjoy extra texture. Measuring your cup peanut butter accurately is key to a good bake.
Natural vs. Commercial Spreads
Commercial brands contain stabilizers that help the cookie hold its shape. If you use natural varieties, stir the oil in well so the ingredient peanut solids are fully blended. This cup peanut portion makes about a dozen cookies.
Sugar Selection Tips
The type of sugar you use changes the cookie’s final bite. I find that white sugar creates a crisper edge. However, brown sugar adds moisture and caramel notes to the ingredient peanut butter mix.
Learning how to bake gluten-free and delicious desserts at is easy when you start with these simple pantry staples. Each cup peanut butter provides a rich and salty profile. Most people prefer using white sugar for a classic look.
If you use white sugar, the cookie is much crunchier and holds its shape well. One cup peanut butter and one large egg are all you need to begin. This cup peanut portion ensures the dough stays manageable. Using a fresh egg ensures the dough holds together perfectly.
3-Ingredient Peanut Butter Cookies: Quick and Easy Dessert Recipe - Step-by-Step Instructions
I have found that following a specific order ensures the best texture for every batch. These clear steps will guide you through the process of making these delicious treats from start to finish.
Step 1: Preheat Your Oven to 350°F
I begin by setting my oven 350 degrees Fahrenheit. I always preheat oven racks to ensure the temperature is stable before I start. This helps the heat distribute evenly across the trays.
Step 2: Prepare Your Baking Sheets
While I preheat oven settings, I line two baking sheets with parchment paper. This step is essential to keep the cookies from sticking to the metal surface. It also makes cleaning up my kitchen much faster later on.

Step 3: Combine All Ingredients
I place one cup of peanut butter, the sugar, and one large egg into a large bowl. I check to see that the egg is at room temperature for a better cookie dough consistency.
Step 4: Mix Until Well Combined
I use a flexible spatula to mix the three ingredients together. I stir until the dough looks smooth and completely uniform with no streaks of egg visible.
Step 5: Chill the Dough (Optional but Recommended)
I like to refrigerate the dough for about ten minutes. This cooling period makes the cookie dough less sticky and much easier for me to handle.
Step 6: Roll Into Golf Ball-Sized Portions
I scoop out a level tablespoon of the dough at a time. I roll each portion between my palms to form smooth balls. I make sure all the balls are roughly the same size for even cooking.
Step 7: Create the Signature Crosshatch Pattern
I place the balls two inches apart on the tray. I dip a fork in water and press it down on the balls. I rotate the tool to create a pattern that helps the cookies stay flat.
Step 8: Bake to Golden Perfection
I slide the tray into the oven and bake minutes usually totaling eight to ten. I keep the oven closed but watch until the edges are slightly brown. I check at the eight bake minutes mark and add more bake minutes if needed, keeping my oven 350 setting steady.
Step 9: Cool Completely on Baking Sheet
I remove the baking tray and let the cookies sit on the parchment paper for 30 minutes. They will firm up as the edges cool. Waiting is important so the cookies do not break when I lift them.
Pro Tips for Perfect Cookies Every Time
I have found that a few small adjustments can turn a good batch into the best cookies you have ever tasted. These methods help me get a consistent and delicious result with every peanut butter cookie I pull from the oven.
Don't Skip the Fork Pattern
The fork pattern is essential for this cookie because the dough does not spread on its own while baking. I often dip my fork in hot water first to keep it from sticking to the creamy butter mixture.
This simple step ensures that each dough ball is flattened properly. It allows the heat to reach the center so the treat bakes evenly all the way through.
Watch the Baking Time Carefully
I watch the baking time like a hawk whenever I prepare a butter cookie. I always check the tray at the 8-minute mark to prevent any burning on the bottom of the tray.
If you wait too long, the peanut oils and sugar will become bitter. Catching them when the edges are just set is the secret to a soft texture.
Let Them Cool Completely
Patience is the most important factor once the tray leaves the oven. These cookies are extremely soft when warm and will crumble into pieces if you move them too soon.
I wait at least 30 minutes for them to firm up before serving. They are a great alternative to mouthwatering slutty brownies when you need a quick dessert.
Adjusting for Softer or Crispier Cookies
I love how I can control the final cookie by swapping my ingredients. For soft cookies, I use brown sugar and pull the tray out at the minimum time.
If I want a crisp peanut snack, I use white sugar instead. This adds a nice crunch to the peanut bits and brings out a rich butter flavor.
| Desired Result | Sugar Choice | Baking Strategy |
|---|---|---|
| Soft & Chewy | Brown Sugar | Bake for 8-9 minutes |
| Crisp & Crunchy | White Sugar | Bake for 10-11 minutes |
| Perfectly Balanced | Half & Half | Bake for 9 minutes |
Storage and Reheating Instructions
Properly managing your leftovers helps maintain that perfect chewy texture we all love. I find that these treats are often even better the next day if you keep them correctly.
Room Temperature Storage
I store my cooled cookies in an airtight container at room temperature. They stay fresh and delicious for 3 to 5 days.
I’ve noticed the cookies become even chewier the day after baking. They maintain that perfect texture for several more days when sealed tight.
Freezing Unbaked Cookie Dough
For advance preparation, I love freezing unbaked cookie dough. I roll the mixture into balls and create the signature fork pattern first.
I freeze them on a sheet until solid, then transfer them to a freezer-safe container. This method keeps the batch fresh for up to 2 months.
Freezing Baked Cookies
I also freeze already-baked cookies in an airtight container. I place parchment paper between layers to prevent any sticking.
When I am ready for a snack, I let them reach room temperature naturally. This keeps them tasting great for many days after the initial bake.
| Storage Method | Shelf Life | Best Usage |
|---|---|---|
| Countertop | 3-5 Days | Daily Snacking |
| Freezer (Dough) | 2 Months | Fresh Baking |
| Freezer (Baked) | 2 Months | Long-term Storage |
Reheating Instructions
When I use frozen dough, I let it sit at room temperature while the oven preheats. I bake it as usual, just adding one extra minute to the timer.
To refresh baked cookies, I give them a quick 5-second microwave burst. This makes them warm and soft again, just like they were fresh from the oven.
Delicious Variations and Customizations
I find that customizing this simple recipe allows me to create a brand-new dessert every time I bake. The basic peanut butter base is so flexible that it welcomes many different flavors and textures. I often think about what my family likes most before I start mixing my ingredients.
Experimenting with different additions helps me keep my baking routine fresh and exciting. I can keep things simple or dress them up with rich chocolate depending on my mood. These small changes make a big difference in the final result of my treats.
Chocolate Chip Peanut Butter Cookies
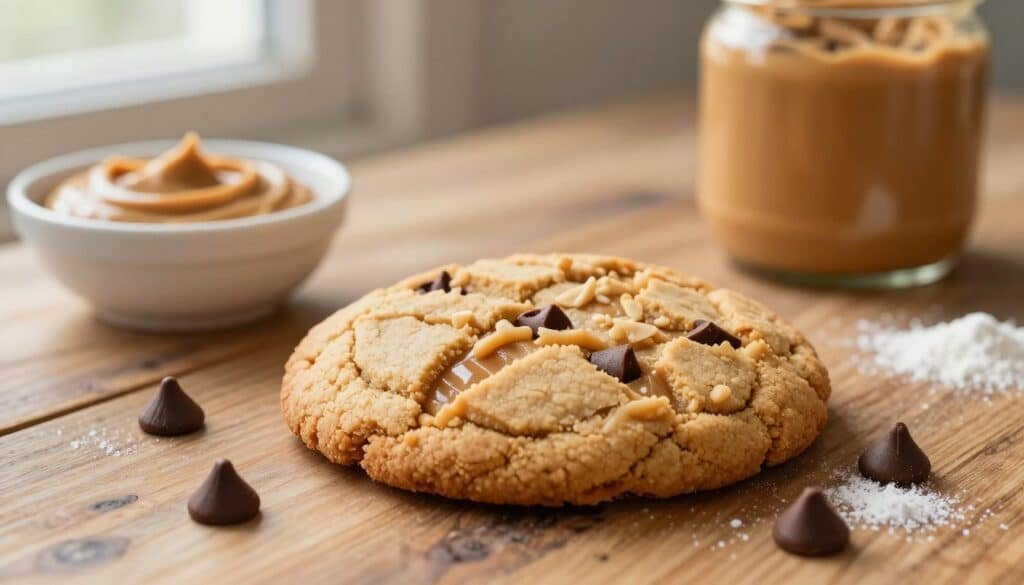
I love transforming these into chocolate chip peanut butter cookies by pressing mini chocolate chips into the tops. I find that these chips melt slightly during baking, creating pockets of gooey chocolate throughout each bake. Adding chocolate chips is a simple way to elevate the flavor without changing the fundamental recipe.
I enjoy how the mini chips stay intact inside the chip cookies during the cooling phase. This simple change turns them into my favorite chocolate chip cookies without any extra effort. I find that the balance of salty and sweet makes these chip cookies an instant hit at any gathering.
Cinnamon Sugar Coating
For a warm, spiced variation, I roll my dough balls in cinnamon sugar before creating the fork pattern. This adds a delightful sweet-spicy coating to the peanut butter treats. The sugar adds a nice crunch that complements the soft interior of the peanut butter base.
Chopped Nuts and Sprinkles
I sometimes press chopped nuts like pecans or walnuts into the tops along with colorful sprinkles. This is my go-to choice for festive occasions or children’s parties. These little additions provide a nice variety in texture and look beautiful on a plate.
Chocolate-Dipped Cookies
My favorite elegant variation involves partially dipping cooled cookies in melted chocolate. I let them set on parchment paper for a bakery-style finish that looks very impressive. These chocolate-dipped peanut butter cookies taste incredible and look beautiful on a serving tray.
They even rival the richness of vegan magic cookie bars found in high-end bakeries. I recommend using high-quality chocolate to ensure the best results for your cookies. The smooth chocolate perfectly complements the nutty base of the dough.
I always choose a dark chocolate or a rich chocolate for dipping to balance the sweetness. The dark notes of the cocoa pair wonderfully with the salty notes in the dough. It creates a sophisticated snack that everyone seems to enjoy.
| Variation Type | Main Addition | Occasion |
|---|---|---|
| Chocolate Chip | Mini chocolate chips | Everyday Snacking |
| Cinnamon Sugar | Cinnamon and Sugar | Holiday Gatherings |
| Nuts and Sprinkles | Walnuts or Pecans | Birthday Parties |
| Chocolate Dipped | Melted dark chocolate | Special Occasion Gifts |
Final Thoughts and More Easy Dessert Recipes from Cuisines-Corse.com
I hope this comprehensive guide shows how rewarding it is to bake these 3-ingredient peanut butter cookies at home. This recipe is a personal favorite because it delivers consistent results with a simple ingredient list and very little cleanup. You can go from a craving to enjoying warm treats in exactly 30 minutes.
This ingredient peanut butter snack is naturally gluten-free and contains no dairy. It provides a source of healthy fat from the nuts and fits vegetarian diets perfectly. I love how this ingredient peanut butter option saves time during a busy work week.
If you liked this, please explore more easy recipes on Cuisines-Corse.com. You might love our irresistible cinnamon roll cookies for your next weekend baking session. Our other ingredient peanut snacks focus on good fat and bold, traditional flavors.
Try our chocolate strawberries for another quick dessert. These ingredient peanut butter bars use similar ingredient peanut flavors for a great no-bake treat. These recipes prove that simple ingredient peanut sweets are delicious for any special occasion.
Every recipe here balances fat and flavor perfectly for your whole family. We have many ingredient peanut recipes for you to try today. One final ingredient note is to use natural varieties to avoid extra fat or processed sugar. These recipes are simply the best for beginners.
| Recipe Title | Prep Time | Main Feature |
|---|---|---|
| 3-Ingredient Peanut Butter Cookies | 30 Minutes | Gluten-Free |
| Chocolate Covered Strawberries | 15 Minutes | Low Effort |
| Peanut Butter Chocolate Bars | 20 Minutes | No-Bake |
| Chewy Peanut Butter Brownies | 45 Minutes | Rich Texture |