Table of Contents
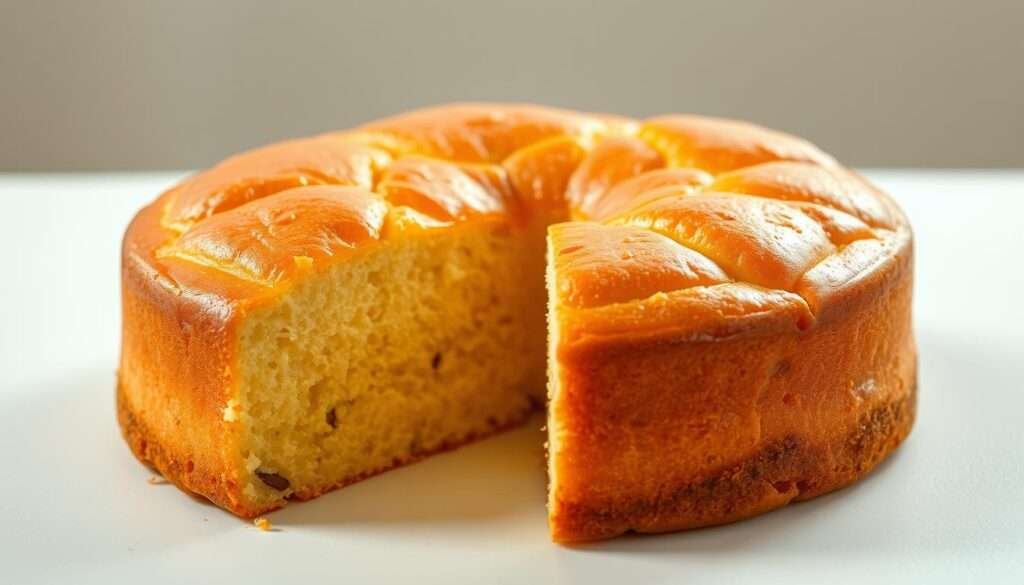
ToggleI still remember the first time I pulled this cake from the oven — the kitchen filled with warm vanilla and the top turned a tender golden that invited me to taste. That aroma made me feel at home and convinced me this simple recipe could become a staple in any baking routine.
This butter-forward bake uses pantry staples and a straight creaming method to create a fine crumb and gentle texture. I’ll show a quick 9×9-inch weeknight method and a patient loaf-pan approach that rewards slow baking with an elegant crust.
You can expect a tender slice with subtle vanilla warmth, a lightly crackled top, and reliable cues for doneness. I promise clear steps, tips for make-ahead prep, and swaps that keep this cake approachable for first-time bakers.
Ready to bake along? I’ll walk you through ingredients, step-by-step technique, smart tools, and variations so you get consistent results every time.
A Buttery French Favorite, Fresh From My Oven
When I slide a pan from my oven and that vanilla note drifts through the house, I know I’ve made something worth sharing. The french butter loaf perfumes my kitchen with a warm, café-like mood that feels both simple and special.

Served with coffee, a slice hits the sweet spot between casual and refined. The top bakes to a lightly crackled crust while the interior keeps a tender, bouncy crumb that shows the best texture.
- I use room temperature ingredients so the batter blends smoothly and the rise is even.
- A light sprinkle of sugar before baking lifts the crust and adds a gentle sparkle.
- Through the oven glass I watch for a gentle dome, even color, and a soft spring to the touch.
- Well-greased corners give clean slices that are ready to share with tea or afternoon guests.
This simple butter cake lets subtle flavors shine, and the next sections walk through exact steps so you can get the same result at home.
Classic French Butter Cake - Rich, Moist & Buttery Bliss!
I quick-sprinkle sugar over the batter, then slide the pan into the oven. A crackled, golden crust forms and the house fills with warm vanilla and toasted sugar notes.
I love how a few pantry items become a french butter cake that feels both nostalgic and fresh. Creaming the butter and sugar builds air so the crumb bakes fine and even, never heavy.
What makes this cake special right now
Sour cream keeps the interior tender from edge to center. The creamed method gives the right structure so slices lift cleanly and cut neatly.
The aroma, crumb, and golden crust you can expect
At 350°F for 30–35 minutes in a 9×9-inch dish you get clean slicing and a balanced texture. For loaf pans, a low 315°F bake deepens the crust and yields an extra-tender interior when cooled right away.
- Signature aroma: warm butter and vanilla that signals a silky crumb.
- Quick sugar sprinkle = delicate, lightly crackled golden crust.
- Sour cream adds plush moisture and keeps slices soft the next day.
| Bake Style | Temp | Time | Result |
|---|---|---|---|
| 9×9-inch pan | 350°F | 30–35 min | Even crumb, clean slices, modest crust |
| Loaf pans (two) | 315°F | 50–60 min | Thicker crust, extra-tender interior |
| Serving | Warm | Serve soon | Aroma and flavor are most vivid |
Why You’ll Love It
A few simple steps turn pantry staples into a tender loaf you can rely on any day of the week. This recipe uses familiar ingredients and a straight creaming method, so the process stays approachable and repeatable.
Unfussy technique with pantry ingredients
I follow standard steps: cream butter and sugar, add eggs one at a time, fold in dry ingredients, then stir in sour cream. This keeps the bake steady and beginner-friendly.
Melt-in-your-mouth texture and delicate vanilla aroma
The creaming creates structure while sour cream adds plush softness. The flavor is gentle and pairs well with light toppings like powdered sugar or fresh berries.
Perfect for coffee breaks, brunch, or dessert
Serve a slice with coffee or dress it up with whipped cream for dessert. It travels well and stays appealing the next day.
Reliable results with simple, repeatable steps
- Easy to master—clear cues for doneness make success likely each time.
- Uses common ingredients you probably have on hand.
- Quick-to-master method that saves time without skimping on flavor.
- Adaptable: add citrus zest or almond extract for a small twist.
Ingredients
Measuring ingredients precisely makes the difference between a good loaf and a great one. Below I list everything for the 9×9-inch square-pan version and a few quality notes to help you get an even crumb.
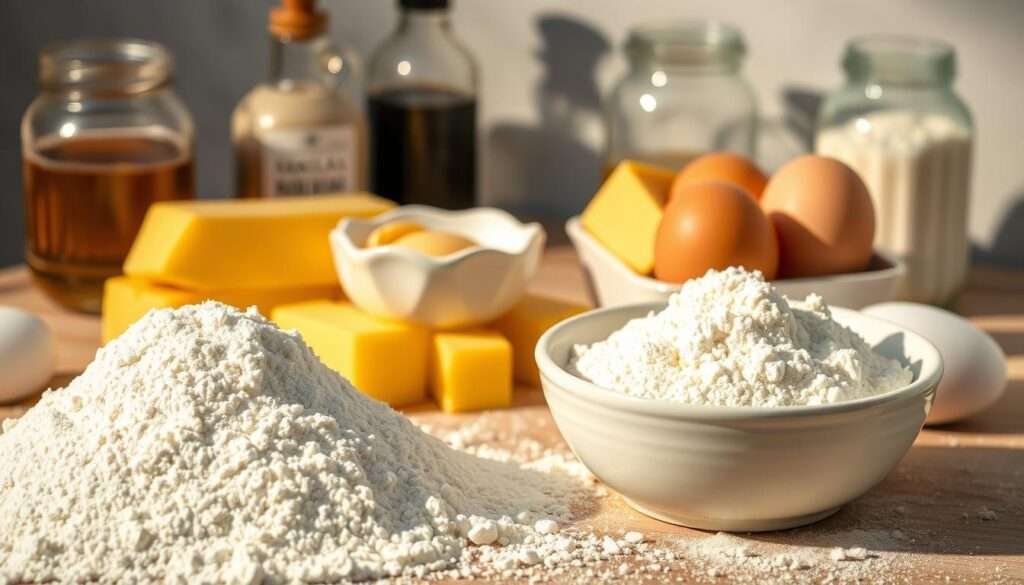
For the loaf
- 1 cup granulated sugar
- 1 cup unsalted butter (2 sticks), melted and cooled
- 3 eggs, room temperature
- 2½ teaspoons vanilla extract
- 2 cups cake flour, sifted
- 2 teaspoons baking powder
- 1 teaspoon salt
- 1 cup sour cream
Quality notes
I use high-quality unsalted butter and real vanilla extract. Sifting the cake flour gives an extra-fine crumb. I let eggs sit at room temperature so they blend smoothly and help the fat incorporate evenly.
Optional flavor twists
Tweak the batter with a teaspoon of lemon or orange zest, a drop of almond extract, or a cocoa variation by replacing part of the flour with cocoa powder.
| Ingredient | Amount | Why it matters |
|---|---|---|
| Sugar | 1 cup | Balances sweetness and helps a crackly top |
| Unsalted butter | 1 cup (2 sticks) | Provides fat for texture and flavor control |
| Eggs | 3 | Build structure and gentle lift |
| Cake flour | 2 cups, sifted | Keeps crumb fine and light |
| Sour cream | 1 cup | Adds lasting tenderness and a soft crumb |
Step-by-Step Instructions
I like to get my station ready first: greased pan, sifted flour, and a clear plan. These steps keep baking calm and predictable.

-
Preheat and prep
I preheat oven to 350 degrees and grease a 9×9-inch dish so the loaf releases easily and bakes evenly.
-
Cream the butter and sugar
In a bowl, cream the cooled melted butter with sugar until pale and slightly fluffy, about 1 minute on medium.
-
Add eggs and extract
I add eggs one at a time, mixing fully after each, then stir in the vanilla extract so the batter is smooth and uniform.
-
Combine dry ingredients
Sift flour, baking powder, and salt, then add to the batter just until mix combined. Stop when no streaks remain to avoid overmixing.
-
Fold in sour cream
Gently fold in sour cream so the batter stays airy and the crumb bakes tender.
-
Pan, sugar, and bake
Spread the batter prepared into the pan, smooth the top, and sprinkle a light layer of sugar. Bake for 30–35 minutes and check that a toothpick inserted near the center comes clean or with a few moist crumbs.
-
Cool and slice
Let the loaf cool in the dish for a short time so the structure sets, then slice and serve. Watch the minutes in your oven; small timing changes affect the final texture.
If you want another loaf-style idea, try this old-fashioned banana bread approach for a similar, reliable bake.
Tips, Variations, and Make-Ahead
When the loaf’s top turns golden and the kitchen smells like toasted sugar, I know it is close. I look for a delicate, crackly sugar crust and test by inserting a toothpick inserted near center. For a 9×9 bake at 350°F, the toothpick usually comes clean or with a few moist crumbs at 30–35 minutes.
I keep a few easy swaps on hand. I use crème fraîche in place of sour cream for a tangier note. A scraped vanilla bean or a whisper of almond extract lifts flavor. I sometimes replace a small portion of flour with cocoa for a chocolate riff.

For a thicker crust and tender crumb, I bake in two 9×5-inch loaf pans at 315°F for about an hour, then turn them out immediately to preserve the crust. Watch oven temperature and minutes closely; start checking early so the batter and mixture stay tender. If I add eggs too quickly or overwork the batter, the crumb loses its fine texture.
- Serve simply with powdered sugar, fresh berries, or whipped cream alongside coffee.
- Store slices airtight at room temperature up to 2 days; refrigerate if the room runs warm.
- Freeze well-wrapped for 1–3 months; thaw at room temperature and warm briefly to revive aroma.
| Action | When | Result |
|---|---|---|
| 9×9 pan | 350°F — 30–35 minutes | Even crumb; toothpick comes clean or with a few moist crumbs |
| Two loaf pans | 315°F — ~60 minutes | Thicker crust; turn out immediately to keep crisp |
| Make-ahead | Room or freezer | Store airtight 2 days room; freeze 1–3 months |
Utensils and Tools You’ll Need
I always set out my bowls, mixers, and pans before I even touch the sugar. A neat station keeps the batter steady and helps me watch the oven without scrambling.
Below I list the basic tools and how I use each. These keep the mixture even and make clean release simple.
Mixing and measuring
I use a sturdy stand mixer or a hand mixer to cream the butter and sugar quickly. I set out two mixing bowls so wet and dry ingredients stay separate until they combine.
Bakeware and prep
I choose a 9×9-inch baking dish for the standard method. When I want a crisper top, I use two 9×5-inch loaf pans. I butter and flour pans well for easy release.
- I pass flour through a sifter for a lump-free batter.
- I smooth the top with an offset spatula for an even rise.
- I cool on a wire rack so steam does not soften the crust.
| Tool | Purpose | My tip |
|---|---|---|
| Stand or hand mixer | Cream butter and sugar | Use medium speed for about 1 minute to aerate the batter |
| Mixing bowls (at least 2) | Hold wet and dry ingredients | Keep one dry for sifted flour and one for the wet cups |
| 9×9-inch dish or loaf pans | Baking the loaf | Grease corners and flour for clean release; bake by degrees and minutes listed in the recipe |
| Sifter / fine-mesh sieve | Remove lumps from flour | Clean and dry after use to avoid clumps next time |
| Offset spatula & wire rack | Smooth tops; cool cake | Use spatula to level batter; cool 10–20 minutes on rack |
Nutrition Facts and Your Turn to Bake
I keep nutrition simple so you know what a single slice delivers. Per serving (1 of 12): about 320 calories; 20g sugar; 18g fat (11g saturated); 36g carbs; 4g protein; 105mg cholesterol; 280mg sodium; 1g fiber.
Store slices airtight up to 2 days at room temperature. Chill if your room is warm and freeze wrapped for 1–3 months. A brief warm-up revives the butter aroma after freezing.
This french butter cake balances a noticeable butter profile with a fine crumb and soft vanilla notes. For best results, add eggs slowly, scrape the bowl, and keep the batter prepared gently mixed.
Try the loaf-pan variation or bake the 9×9 at 350 degrees for a classic crust. For quick serving ideas, dust with powdered sugar, add fresh fruit, or offer a spoon of cream.
Bake it this week, share a slice, and tell me how your oven version turned out. For extra storage and reheating pointers, see these helpful storage and reheating tips.