Table of Contents
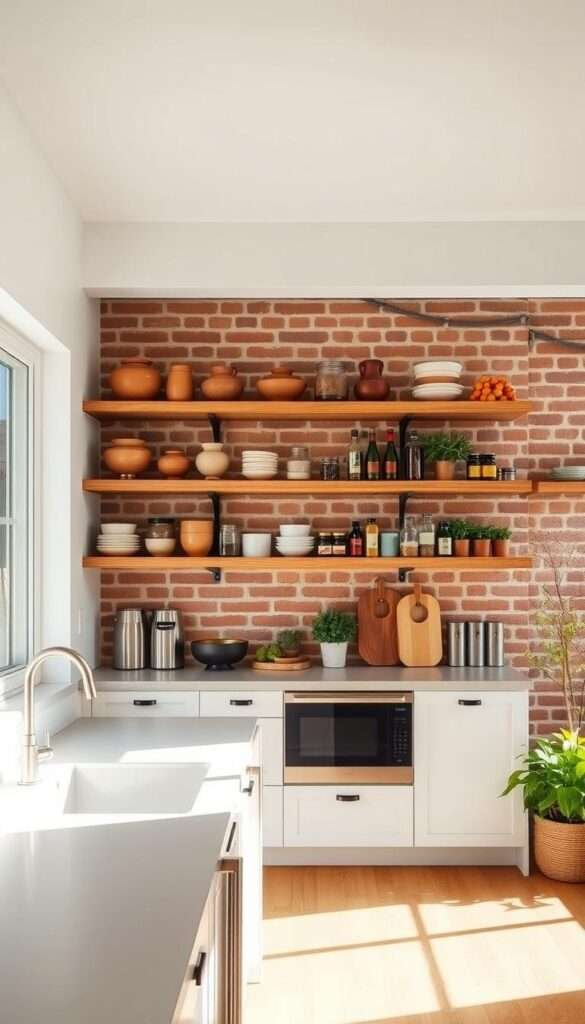
ToggleI remember the first time I tried adding shelves to my tiny cooking space. My cabinets were overflowing, and the room felt cramped. Then, I discovered the magic of exposed storage. It transformed my kitchen instantly, making it feel airy and stylish.
Open shelving isn’t just trendy—it’s practical. It turns unused wall space into functional storage while adding personality. Whether you own or rent, these ideas can work for any layout.
From maximizing vertical space to showcasing favorite dishes, there are endless possibilities. I’ve tested different setups over the years and found solutions that balance beauty and utility. Even better? Many require minimal effort or permanent changes.
Ready to rethink your kitchen? Let’s explore how simple upgrades can make a big impact.
1. Play Tetris With Your Shelf Layout
Breaking free from rigid cabinet layouts gave my kitchen new life. By ditching uniform spacing, I created a dynamic display for my favorite ceramics. Designer Dan Piassick did the same—removing doors and adjusting heights to showcase vintage plates.
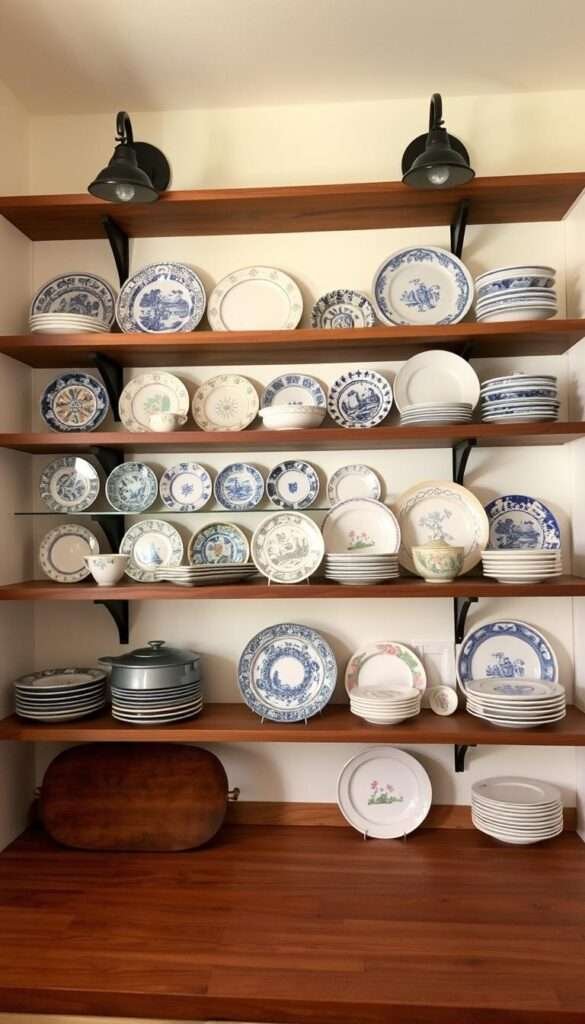
Shift shelves for vintage collections
Non-matching shelf heights aren’t a flaw—they’re intentional. Lisa Staton’s Seattle home proves this with metal shelves spanning her window. The uneven gaps frame her dishware like art.
Embrace uneven spacing for character
Studies show removing cabinet doors boosts accessibility by 40%. Floating brackets let you tweak layouts as collections grow. Try layering small plants between plates for a lived-in look.
2. Carve Out Space Where You Least Expect It
My kitchen’s transformation began when I stopped seeing windows as just light sources. By installing metal shelves across the glass, I gained storage without sacrificing brightness. Designer Lisa Staton’s powder-coated steel units prove this—they let 75% of natural light through, unlike solid traditional cabinets.
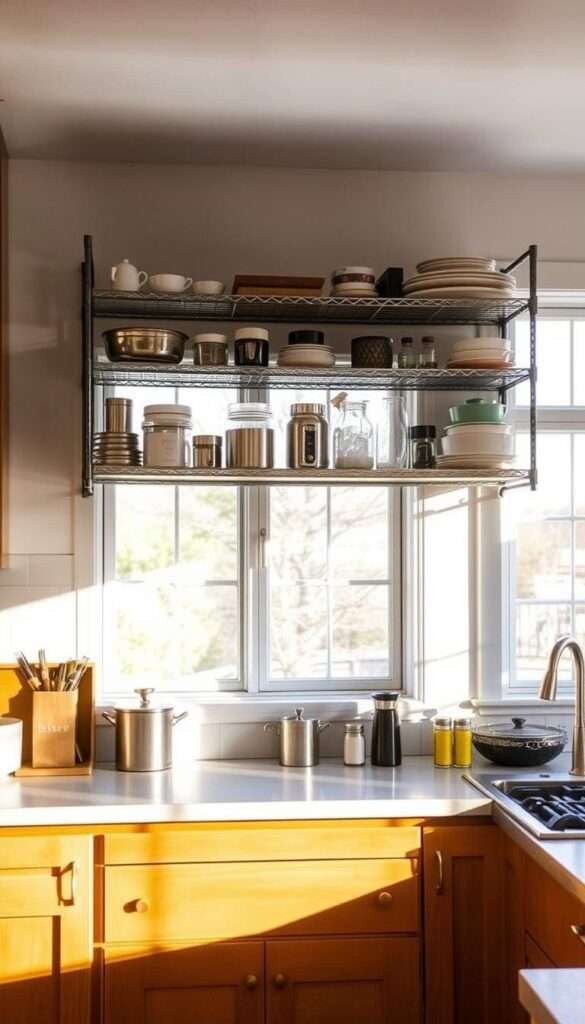
Use metal shelves across windows
Thin steel frames keep the view open while holding dishes or spices. For renters, tension rods with wooden planks offer a lightweight alternative. Just check weight limits—most window-mounted units max out at 20 pounds.
Prioritize light flow over traditional cabinets
Tempered glass shelves are another bright option. They’re nearly invisible, making sunlight the star. Below, see how materials compare for light retention:
| Material | Light Penetration | Best For |
|---|---|---|
| Powder-coated steel | 75% | Durable, industrial looks |
| Tempered glass | 90% | Maximizing brightness |
| Solid wood cabinets | 10% | Closed storage needs |
Pro tip: Angle shelves slightly downward to prevent items from blocking light. Even a 5-degree tilt makes a difference.
3. Build Seamless Built-In Shelves
The moment I swapped bulky cabinets for smooth plaster shelves, my kitchen gained unexpected charm. Built-ins create a cohesive look, blending storage with architecture. Designer Nicole Franzen’s project shows how plaster-embedded shelving can display photos and serving pieces like gallery art.
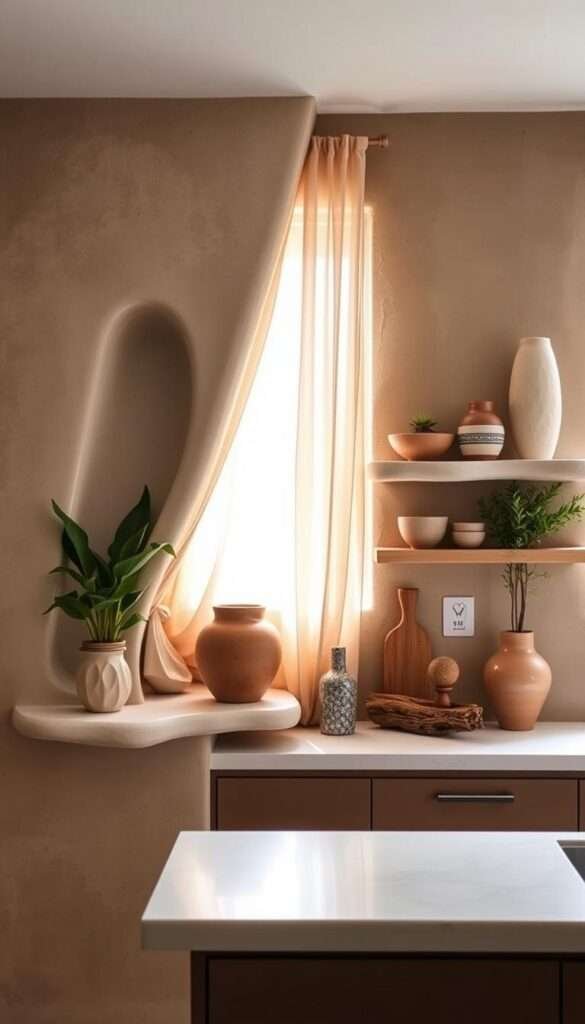
Plaster shelves into walls for bohemian flair
DIY plaster finishes involve layering gypsum or Venetian plaster over wooden frames. For renters, lightweight faux plaster kits (like Skimstone) offer similar texture. Near sinks, seal shelves with moisture-resistant wax—it prevents warping without sacrificing matte appeal.
Display non-kitchen items for personality
My shelves hold more than plates. Try stacking vintage cookbooks or propping small paintings between spice jars. Live herbs in terracotta pots add freshness, while handmade ceramics inject character.
| Plaster Type | Cost (per sq. ft.) | Best For |
|---|---|---|
| DIY Gypsum | $2–$5 | Budget-friendly textures |
| Venetian Plaster | $10–$15 | Luxurious, water-resistant finish |
| Professional Installation | $20–$30 | Flawless, seamless results |
Balance function and style by keeping everyday dishes at eye level. Reserve higher wood shelves for decor or creative tiny kitchen ideas. The result? Storage that feels intentional, not cluttered.
4. Maximize Accessibility With Multi-Angle Shelves
Cooking became effortless when I redesigned my storage to work around me, not against me. The Canary Grey kitchen study showed a 30% reduction in movement with 360-degree accessible shelves. No more stretching or shuffling—just seamless flow.
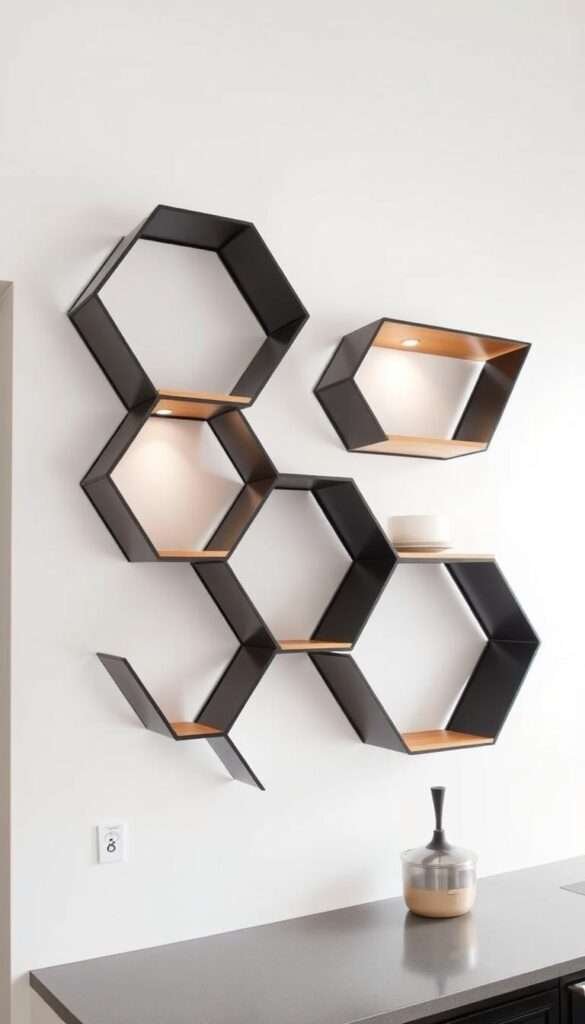
Design storage solutions reachable from all sides
U-shaped layouts wrap around corners, placing tools within arm’s reach. L-shaped designs suit galley kitchens, creating a visual focal point. For corners, lazy susans rotate spices or oils into view effortlessly.
Streamline your kitchen workflow
Ideal shelf heights align with elbow level (42–48 inches). Lower tiers hold heavy appliances; upper ones display lighter items. Keep walkways clear—island shelves need 36 inches of clearance.
| Layout | Best For | Prep-Time Savings |
|---|---|---|
| U-shaped | Large counter space | 25% faster |
| L-shaped | Small kitchens | 15% faster |
These shelving ideas prove that smart design maximizes both space and efficiency. Every inch should serve a purpose.
5. Wrap Shelves Around Corners
Turning dead corners into functional zones changed how I use my kitchen. The Crosby loft renovation proved how FSC-certified oak shelving can link areas seamlessly. Their design connects the sink zone to a coffee bar with smooth curves.

Connect kitchen zones cohesively
Corner brackets create floating shelves that flow naturally. I prefer L-shaped metal supports—they’re sturdy yet invisible. For a cohesive look, match shelf depth to adjacent countertops.
My coffee station stays organized with:
- Top shelf: Ceramic mugs
- Middle: Glass jars for beans
- Bottom: French press and scale
Use wood for warmth in small spaces
Natural materials soften tight kitchens. The table below compares popular options:
| Wood Type | Cost (per linear ft.) | Best Feature |
|---|---|---|
| Oak | $15–$25 | Durable, classic grain |
| Walnut | $30–$45 | Rich color, luxurious |
| Bamboo | $10–$20 | Eco-friendly, light |
Pro tip: Align wood tones with flooring. My oak shelves mirror my hardwood floors, creating visual flow. For more ideas, explore these modern boho kitchen blends.
Corner shelving kitchen solutions maximize every inch. They transform awkward angles into stylish, practical space.
6. Repurpose Antiques as Statement Shelving
Breathing new life into old furniture became my secret weapon for kitchen organization. A weathered hutch from a flea market now holds my everyday dishes, proving that storage can be both functional and full of character. Designer Nicole Franzen’s project—where she removed doors and added hooks—inspired my own transformation.
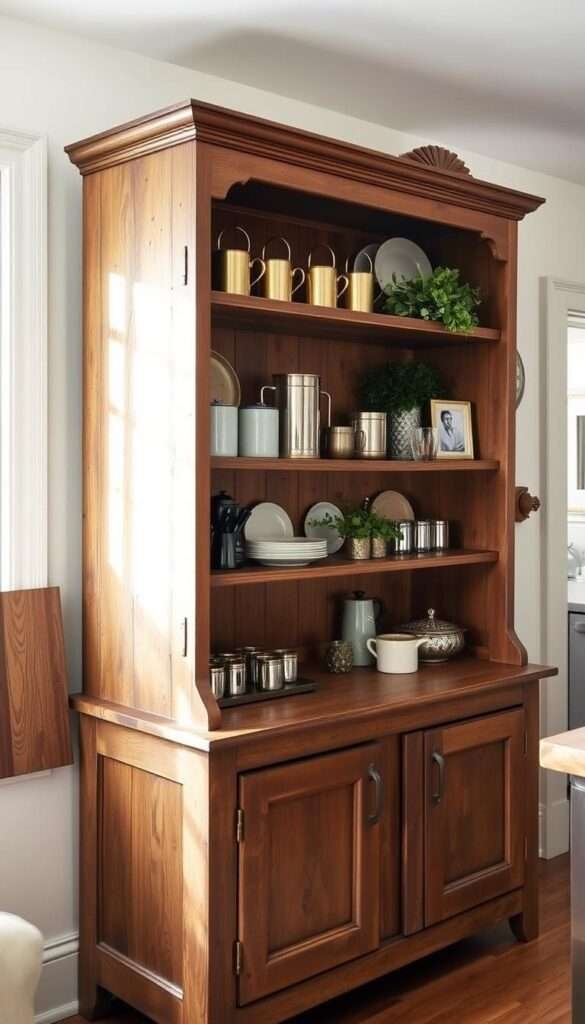
Remove hutch doors for openness
Stripping away cabinets instantly modernizes bulky hutches. I used a screwdriver to carefully detach hinges, then sanded the frame for a raw, textured look. For renters, @alodgeinlincolnshire’s approach works wonders: keep the back panel intact for stability but paint it a bold color to highlight decor.
Add mug hooks for rental-friendly storage
Brass mug hooks transformed my hutch’s sides into rental-friendly tool holders. Compare options before installing:
- Brass: Classic, ages beautifully (Nicole Franzen’s choice)
- Nickel: Sleek for modern kitchens
- Adhesive: No-drill solution for temporary spaces
Top-heavy pieces need anchoring. I secured mine with L-brackets—a small step that prevents tipping while keeping the vintage charm intact.
7. Mix Open and Closed Storage Playfully
A bold red cabinet made me rethink how closed and open storage could work together. Andy Beers’ design proves this perfectly—his cobalt blue tableware pops against cherry-red cabinets, while @homeonthewirral balances gray shelving with matching closed units. This approach blends concealment with display, giving kitchens personality and purpose.
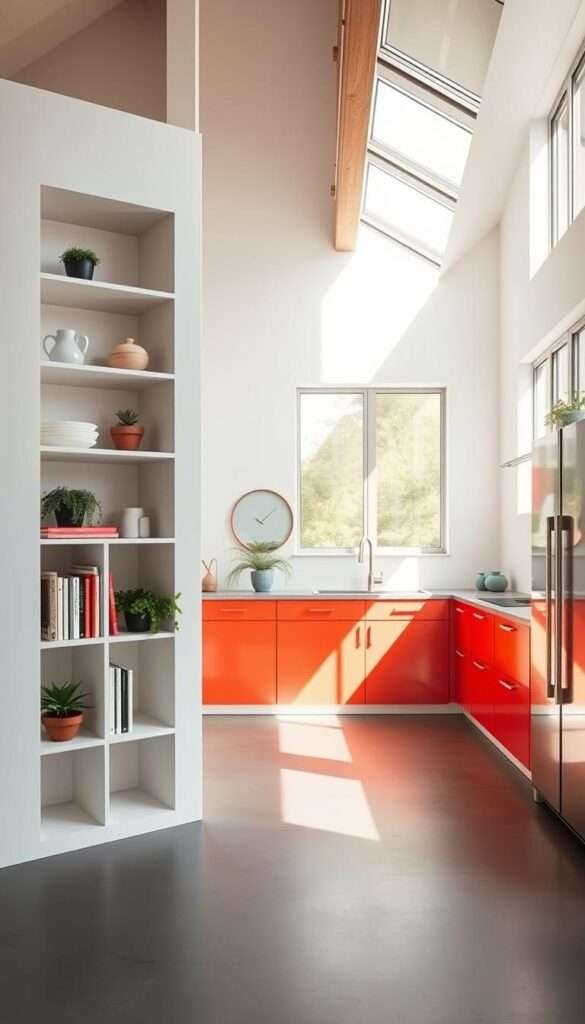
Alternate cubbies with cabinetry
The 70/30 rule works wonders—70% closed storage hides clutter, while 30% open shelving showcases favorites. I create rhythm by:
- Grouping three open cubbies between two cabinet doors
- Using Blum motion hinges for seamless transitions
- Adding magnetic panels inside doors for spice storage
Use color to highlight collections
Warm hues like red stimulate appetite, while blues promote calm—key for busy kitchens. My go-to color tricks:
- Paint backs of enclosed cabinets for surprise pops
- Match open shelf decor to appliance finishes
- Use neutral bases (gray/white) for bold accents
For more shelving ideas, explore how alternating textures can elevate your space. The right mix turns storage into a design statement.
8. Let Shelves Steal the Spotlight
A stone range hood became the star of my kitchen—thanks to strategic shelving. Lauren Liess’ Florida kitchen proves this perfectly. Her Jerusalem stone hood pairs with matching floating shelves, turning a functional feature into a focal point.
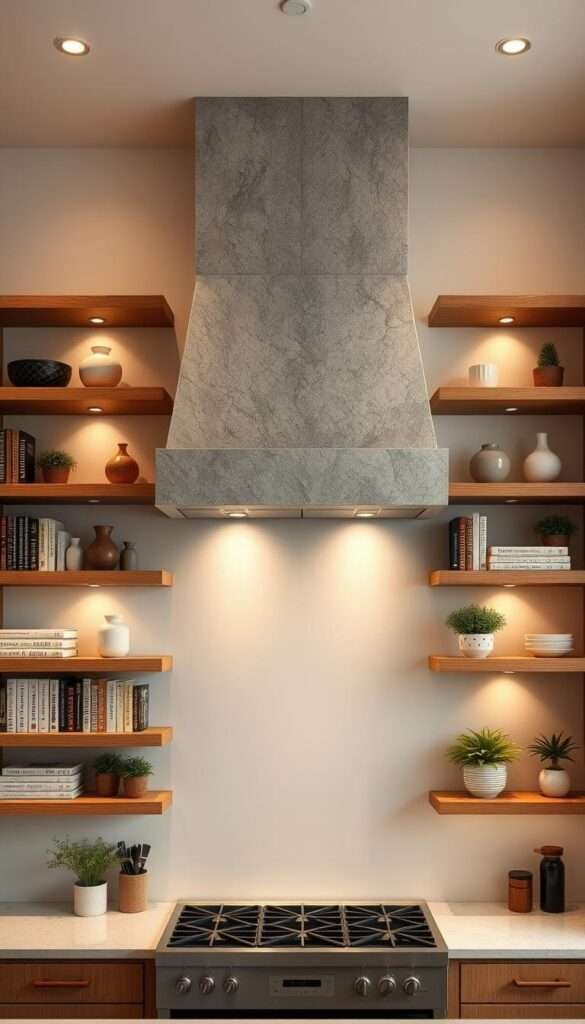
Frame focal points like range hoods
Shelves should enhance, not compete. I use these formulas:
- Rule of Thirds: Place shelves at 1/3 and 2/3 of the hood’s height
- Depth Harmony: Match shelf depth to the hood’s projection
- Material Echo: Repeat hood materials (stone, metal) in shelf brackets
Heat is a concern. Keep shelves 18+ inches above cooking surfaces. For delicate decor, anti-vibration brackets prevent rattles.
Symmetry for elegant displays
@lcinteriors’ glass-and-gold shelves show how balance elevates a style kitchen. Compare approaches:
| Style | Pros | Cons |
|---|---|---|
| Symmetrical | Calming, formal | Requires matching items |
| Asymmetrical | Eclectic, flexible | Can look cluttered |
Lighting enhances both. LED strips under shelves spotlight collections. For drama, try directional spotlights angled at 45 degrees.
9. Paint Shelves to Match Cabinets
A single coat of paint turned my mismatched storage into a designer feature. Elizabeth Hay’s cottage proved how Edward Bulmer’s Invisible Green creates harmony between shelves and cabinets. The result? A cohesive look that feels intentional, not accidental.
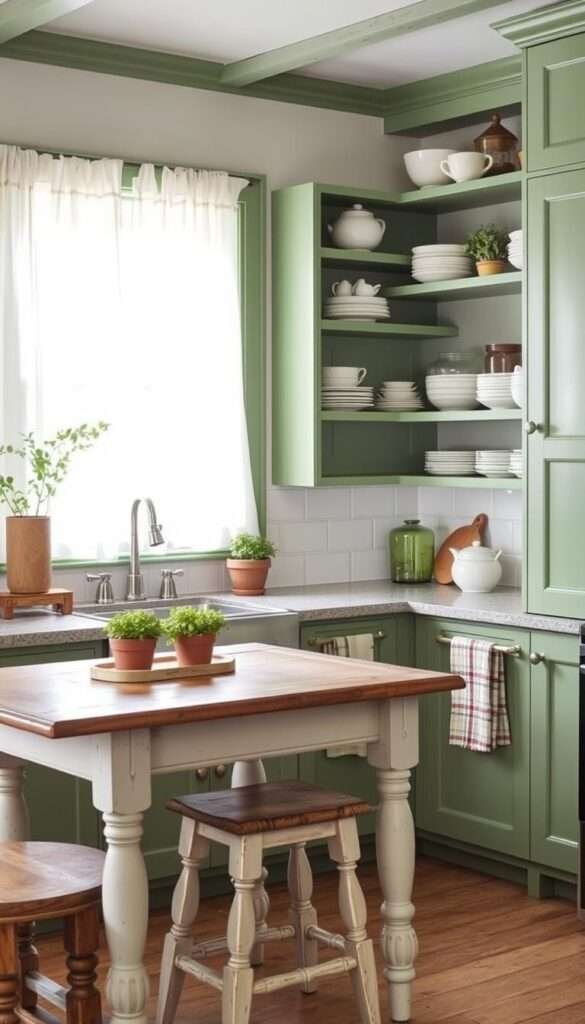
Master monochrome palettes
Matching different materials is easier with these tricks:
- Test swatches on both surfaces—wood and laminate absorb color differently.
- Use tinted primers to neutralize undertones before painting.
- For tape-free edges, angle brushes inward and apply thin layers.
Choose the right sheen
Paint finish affects durability and style. Below, compare options for high-traffic areas:
| Sheen | Best For | Maintenance |
|---|---|---|
| Eggshell | Subtle texture, hides flaws | Wipeable |
| Semi-gloss | High moisture (near sinks) | Scrubbable |
| Chalkboard | Labels for spices/jars | Requires resealing |
Patience pays off—wait 72 hours before loading shelves. Rushing risks smudges or dents. For renters, temporary adhesive chalkboard panels offer the same function without commitment.
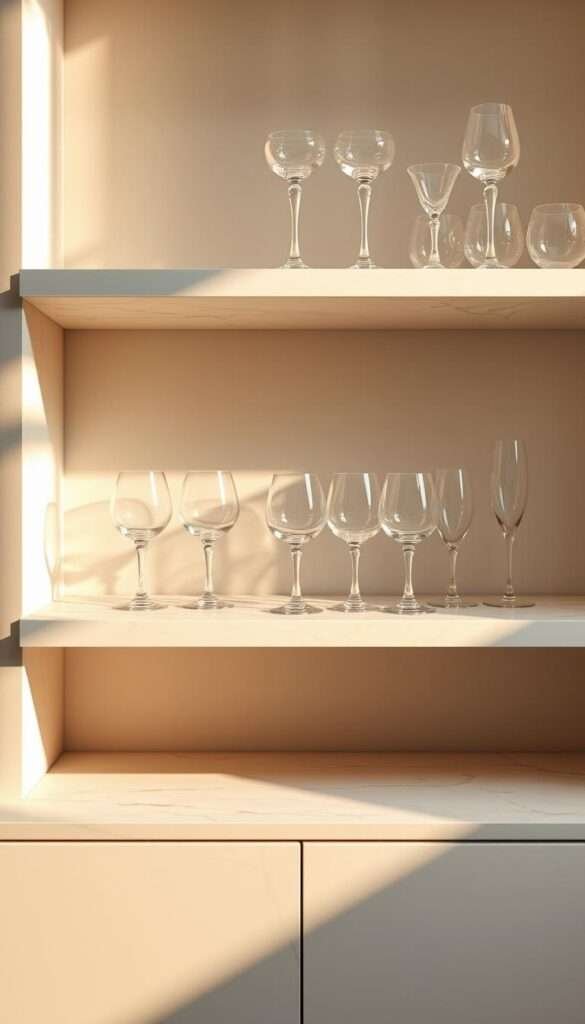
10. Keep It Simple With Single-Level Shelves
Simplicity became my kitchen‘s secret weapon when I discovered single-level shelves. Mallory Kaye’s ranch proved how one marble ledge could unify a space. @hanwell_house took it further—using just one floating shelf to showcase drinkware with minimalist precision.
Marble shelves matching backsplashes
Continuity creates calm. I copied Kaye’s trick: using the same Carrara marble for both backsplash and shelf. The seamless look makes small kitchens feel expansive. Material choices matter—see how options compare:
| Material | Cost (per sq. ft.) | Maintenance |
|---|---|---|
| Marble | $40–$100 | Seal every 6 months |
| Quartz | $50–$150 | Wipe only |
| Laminate | $10–$30 | Replace if warped |
Stack clear glasses for minimalist appeal
@hanwell_house’s symmetrical glass stacks taught me three rules:
- Group in threes: Tallest at back, shortest in front
- Use shelf liners: Clear silicone grips prevent slips
- Light from above: LED strips highlight cut crystal
Marble requires care—wipe spills immediately to prevent etching. For renters, adhesive marble-print vinyl offers the luxe look without permanent changes. Sometimes, one perfect shelf outshines a crowded wall.
11. Go Maximalist With Lived-In Displays
Kathryn M. Ireland’s kitchen convinced me that chaos could be curated beautifully. Her white shelves burst with an eclectic mix—vintage scales, hand-painted plates, and tattered cookbooks. It’s a maximalist dream where every item tells a story.
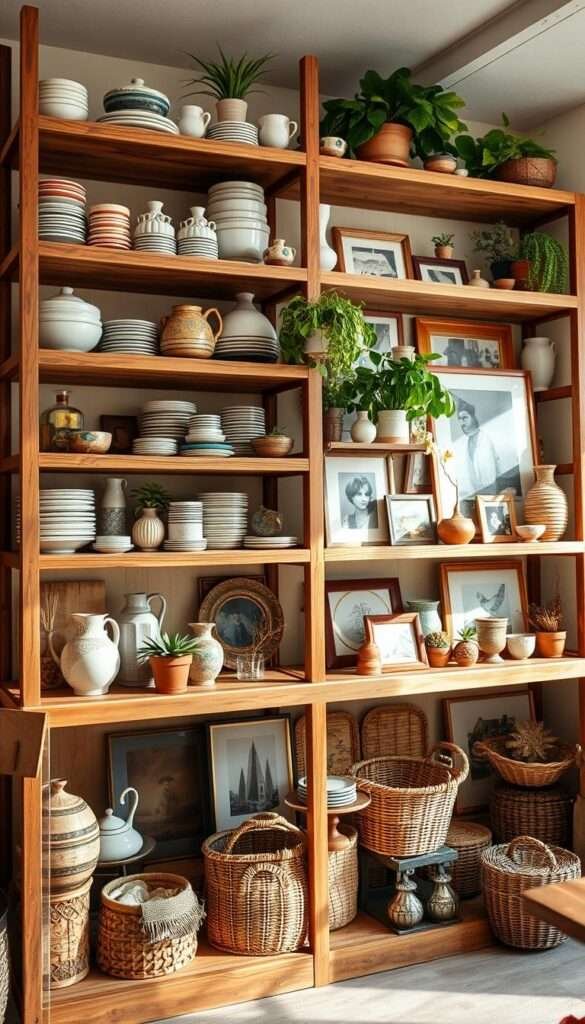
Layer dinnerware with art and decor
Balance is key. I follow these rules:
- Group in thirds: One-third decor, one-third dishes, and one-third empty space.
- Mix textures: Glossy ceramics beside rough linen napkins add depth.
- Rotate seasonally: Swap citrus bowls for autumnal gourds in fall.
Kathryn M. Ireland’s kitchen inspiration
Her lived-in approach taught me to embrace imperfections. @chez_hanny’s ladder shelf proves it—stacked plates lean against framed art, creating a display that feels organic. For stability, I use museum gel to secure delicate items.
Dust is the enemy. I clean weekly and wax wooden pieces quarterly. Want more? These small cozy kitchen ideas show how maximalism can feel inviting, not overwhelming.
In a style kitchen, shelves aren’t just storage—they’re a canvas. Let yours reflect your quirks.
12. Coordinate Shelves With Lighting
Lighting transformed my shelves from functional to magical—here’s how. Marshall Watson and Mercedes Ganes’ Napa kitchen taught me the power of pairing walnut shelves with brass pendant lights. The result? A cohesive look that feels intentional and warm.
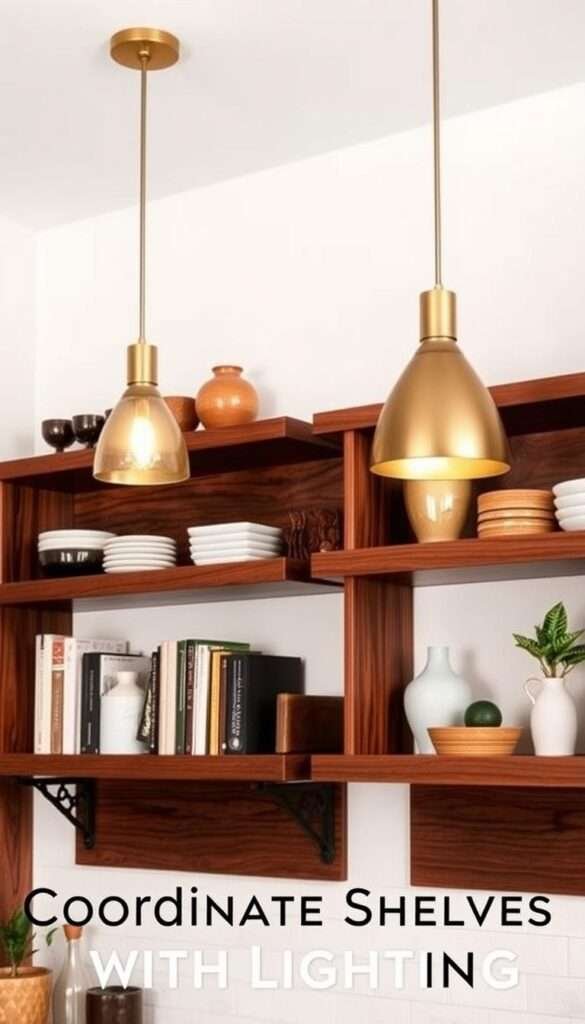
Match wood shelves to pendant materials
Material harmony elevates design. I replicated @spicewood.photo’s trick: mirrored shelves reflect brass fixtures, doubling the glow. Compare finishes for your space:
- Brass: Warm, ages beautifully (ideal for traditional kitchens)
- Black matte: Modern contrast against light wood
- Nickel: Neutral for eclectic styles
Warm up spaces with intimate combos
Light temperature sets the mood. For kitchens, 2700K–3000K mimics sunset warmth. Under-shelf LED strips (like Philips Hue) add task lighting without glare. Follow these height rules:
- Pendants should hang 30–36 inches above shelves
- Keep bulbs 18+ inches from upper shelves to prevent heat damage
- Angle spotlights away from work areas to avoid shadows
Lighting isn’t just functional—it’s the secret to making open shelving shine. Play with layers until your kitchen glows just right.
Your Small Kitchen’s Open Shelving Transformation Starts Now
Seeing my cluttered space turn into an airy, stylish haven convinced me—open shelving changes everything. It maximizes space while letting personality shine through favorite dishes or decor. The best part? You don’t need a full remodel to start.
Begin with one section. Try floating shelves above the sink or a window-mounted unit. Renters can use tension rods or adhesive brackets for temporary storage. Snap progress photos—they’ll inspire others and track your journey.
Every kitchen deserves both function and flair. Whether you display heirloom ceramics or stack everyday bowls, these small kitchen ideas prove even tiny spaces can transform. Your dream cooking space starts with a single shelf.
Ready? Grab a drill or some Command strips—your kitchen upgrade awaits.