Table of Contents
ToggleI remember waking up one morning feeling stiff and achy. My muscles protested with every movement. That’s when I realized how much my flexibility had faded over time.
Our bodies naturally lose suppleness as we age. Stress and inactivity speed up this process. This can lead to discomfort and limited mobility in daily life.
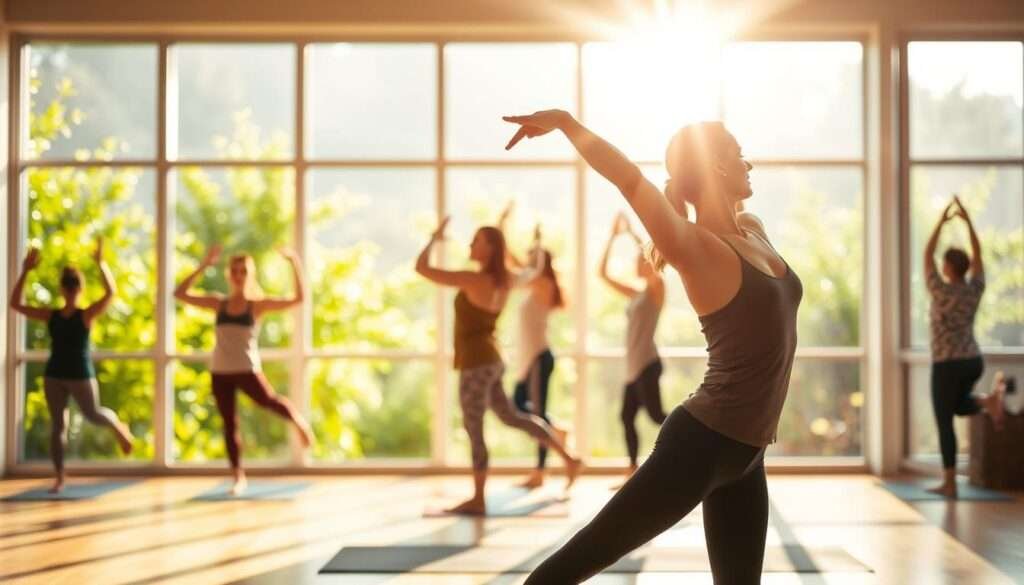
Discovering yoga transformed my physical health. The practice became my gateway to renewed freedom of movement. Regular sessions brought noticeable changes within weeks.
These carefully selected poses target key muscle groups. They help increase range of motion while building strength. You’ll also experience reduced stress and improved mental clarity.
Whether you’re new to yoga or maintaining an existing practice, these movements offer profound benefits. Let’s explore how they can enhance your overall well-being.
Why Flexibility is a Cornerstone of Health and Well-being
Many people overlook flexibility until they experience limitations. I discovered its true value when daily movements became challenging. This aspect of physical health impacts everything from bending to reach something to enjoying active hobbies.
Improved flexibility transforms how we move through life. It supports overall wellness in both obvious and subtle ways. Let’s explore why this physical attribute deserves your attention.
The Physical Benefits of Increased Flexibility
Greater range motion makes everyday activities easier. Your joints move more freely with less resistance. This natural ease of movement reduces strain during physical tasks.
Regular stretching decreases muscle tension significantly. I noticed less stiffness after incorporating simple stretches into my routine. This release of tightness makes movement more comfortable and efficient.
Better posture develops when muscles maintain proper length. Tight muscles often pull the body out of alignment. Balanced flexibility helps maintain an upright, natural position.
Reduced pain occurs when tension releases from overworked areas. Many people experience less discomfort in their back and neck. This relief comes from decreased pressure on sensitive areas.
Lower injury risk accompanies stronger, more pliable muscles. Flexible tissues handle stress better during unexpected movements. This protection extends to both athletic activities and daily life.
- Enhanced joint mobility for everyday tasks
- Reduced muscle stiffness and discomfort
- Improved spinal alignment and standing position
- Decreased back and neck discomfort
- Better injury prevention during activities
The Mental and Emotional Rewards of a Flexible Body
Physical tension release often brings mental relaxation. I find that when my muscles unwind, my mind follows. This connection between body and mind is powerful and immediate.
Stress levels decrease as physical tightness diminishes. The sensation of loosening muscles creates a calming effect. This physical-mental link supports overall emotional balance.
Improved circulation aids muscle recovery and reduces stiffness. Better blood flow helps tissues receive nutrients and oxygen. This physiological benefit supports both physical and mental recovery.
The psychological ease that comes with comfortable movement is undeniable. Feeling limber contributes to confidence in daily activities. This positive mindset extends beyond physical capabilities.
| Physical Benefits | Mental & Emotional Benefits |
|---|---|
| Greater range of motion | Reduced stress levels |
| Decreased muscle tension | Improved mental relaxation |
| Better posture alignment | Enhanced mood |
| Lower injury risk | Increased body awareness |
| Improved circulation | Better sleep quality |
For those seeking additional support, TriggerPoint foam rollers help release deep muscle tension. Their massage balls target specific areas like shoulders and back. These tools complement flexibility work beautifully.
This foundation of wellness prepares us for exploring specific methods. Next, we’ll examine how certain practices build lasting suppleness.
How Yoga Uniquely Builds Sustainable Flexibility
When I first stepped onto my mat, I didn’t realize yoga would become my path to lasting suppleness. This practice goes beyond temporary stretches to create enduring change. The approach integrates physical postures with mental focus for comprehensive results.
Yoga vs. Basic Stretching: The Three A's
Traditional stretching often focuses on isolated muscle groups. Yoga engages both major and supporting muscles simultaneously. This comprehensive engagement creates balanced development throughout your entire system.
The Three A’s framework distinguishes this practice from basic routines. Alignment ensures each pose works optimally for your body. Attention keeps you mentally present throughout the movement. Awareness connects physical sensations with mental observations.
- Alignment: Using props like Gaiam blocks supports proper form
- Attention: Maintaining focus on breath and sensation
- Awareness: Noticing subtle changes in range of motion
| Practice Aspect | Basic Stretching | Yoga Practice |
|---|---|---|
| Duration | Short-term holds | Sustained engagement |
| Muscle Engagement | Isolated groups | Comprehensive system |
| Mental Focus | Often minimal | Integrated awareness |
| Injury Prevention | Limited consideration | Built-in alignment focus |
Setting Realistic Expectations for Your Flexibility Journey
Progress in range of motion develops gradually over time. I noticed meaningful changes after several weeks of consistent practice. Your body needs adequate time to adapt to new movement patterns.
Hugger Mugger straps can help bridge flexibility gaps safely. These tools allow gradual improvement without forcing movement. Patience with your current abilities creates sustainable progress.
Regular practice yields better results than occasional intense sessions. Small daily improvements accumulate into significant transformation. This consistent approach prevents pain while building genuine capability.
Next we’ll explore how supportive gear enhances your practice experience. The right equipment makes proper alignment more accessible.
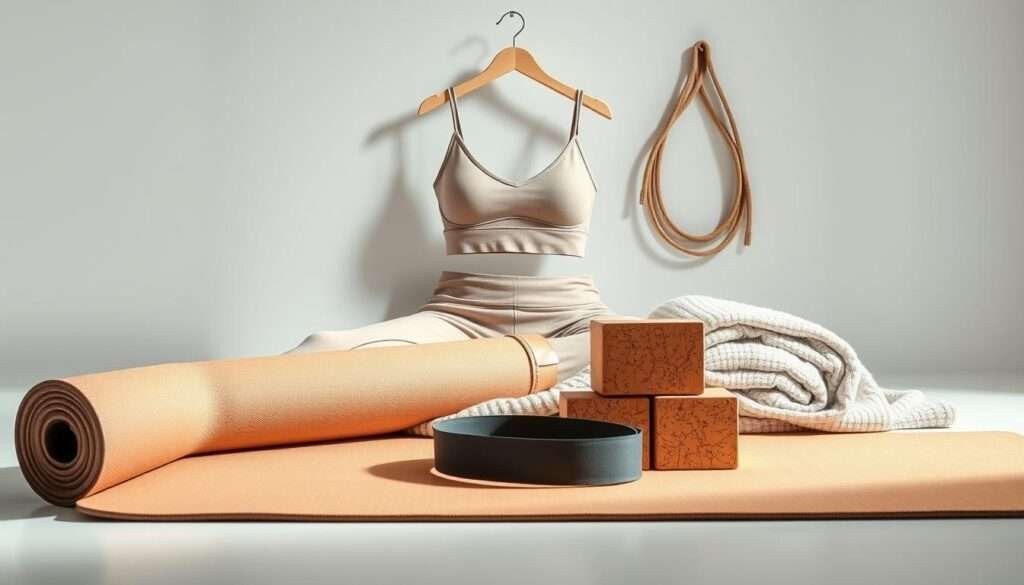
Essential Gear for Your Practice: Supporting Your Flexibility Goals
Finding the right equipment transformed my practice experience. Quality gear provides stability and support during poses. It helps maintain proper alignment while building range of motion.
Investing in thoughtful tools makes sessions more effective. They bridge gaps in current ability while preventing strain. This approach allows gradual progress without discomfort.
Yoga Mats with Alignment Guides
My Lululemon Reversible Mat became an instant favorite. Its clear markings help position hands and feet correctly. This visual guidance ensures optimal placement in standing poses.
Alignment lines prevent strain on knees and joints. They create a roadmap for balanced weight distribution. Proper form reduces the risk of pain during practice.
Quality mats offer both cushioning and grip. This combination supports stability in various positions. Your body feels secure while exploring new movements.
- Visual guides for hand and foot placement
- Enhanced stability during balance poses
- Reduced joint pressure through proper alignment
- Improved confidence in trying new positions
The Role of Blocks, Straps, and Bolsters
Manduka blocks changed how I approach forward folds. They bring the ground closer when flexibility is limited. This support allows deeper stretches without forcing.
YogaDirect straps help in poses like Cow Face. They bridge the gap between hands when shoulders are tight. Gradually, range of motion improves with consistent use.
Bolsters provide comfort in restorative positions. They support the body during longer holds. This relaxation helps release deep muscle tension.
| Equipment Type | Primary Benefits | Recommended Brands |
|---|---|---|
| Yoga Blocks | Height adjustment, stability support | Manduka, Gaiam |
| Stretching Straps | Extended reach, gradual progression | YogaDirect, Hugger Mugger |
| Bolsters | Comfort support, deep relaxation | Manduka, Hugger Mugger |
| Alignment Mats | Proper positioning, injury prevention | Lululemon, Jade Yoga |
These tools make practice yoga accessible to all levels. They honor your current abilities while encouraging growth. The right gear supports your journey over time.
Next we’ll explore how to listen to your body’s signals. Safety remains paramount when developing new flexibility.
Practicing Safely: Listening to Your Body's Wisdom
Early in my journey, I learned that true progress comes from respecting my limits. Pushing too hard often led to setbacks instead of gains. This understanding transformed how I approach each session.
Your body communicates constantly during movement. Learning its language prevents strain and supports growth. This awareness becomes your most valuable tool.

Knowing When to Modify and When to Rest
I once strained my shoulder by ignoring discomfort in a twist. Now I immediately ease up when feeling sharp sensations. This simple adjustment keeps my practice sustainable.
Modifications honor your current abilities while building strength. ProSource knee pads offer cushioning for sensitive joints. They make kneeling positions more comfortable.
Rest days are equally important for development. Muscles need recovery time to adapt to new ranges. Listen when your system requests pause.
- Release any pose causing sharp or intense pain
- Use chairs for support in standing balances
- Shorten hold times when muscles fatigue
- Take extra rest days during menstrual cycles
- Hydrate well before and after sessions
Important Precautions and Contraindications
Certain health conditions require professional guidance. Always consult your doctor before starting a new routine. This precaution protects your overall well-being.
Some medications affect balance or blood pressure. Share your complete health history with instructors. They can suggest appropriate modifications.
| Condition | Precaution | Modification |
|---|---|---|
| High blood pressure | Avoid inversions | Focus on gentle forward folds |
| Pregnancy | Skip deep twists | Use bolsters for support |
| Knee injuries | Limit kneeling poses | Place cushion under joints |
| Asthma | Monitor breathing pace | Practice gentle breath work |
| Recent surgery | Wait for clearance | Begin with chair yoga |
These safety measures ensure positive experiences. They let you develop genuine capability without risk. Your journey toward greater mobility begins with smart choices.
Now let’s explore our first pose with these principles in mind.
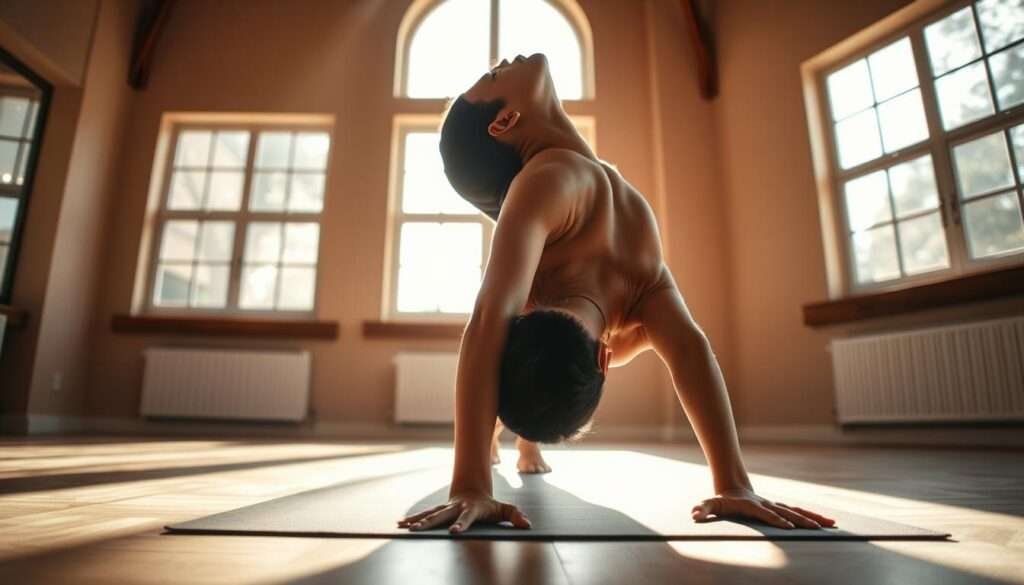
1. Downward-Facing Dog (Adho Mukha Svanasana) for Full-Body Release
My journey with this foundational posture began during a period of intense muscle tightness. It quickly became my go-to for releasing tension across my entire system. This inversion offers comprehensive benefits that few other movements can match.
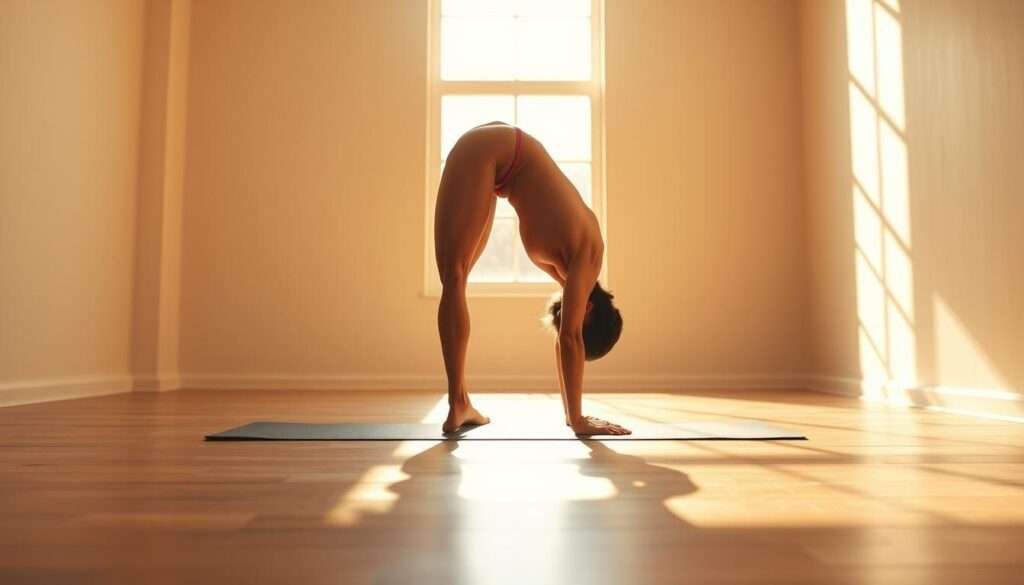
Adho Mukha Svanasana stretches multiple areas simultaneously. It targets the backs of your legs while strengthening arms and shoulders. The pose also gently decompresses the spine.
Step-by-Step Instructions for the Perfect Downward Dog
Start on all fours with wrists under shoulders. Position knees slightly behind hips. Spread fingers wide and press firmly through palms.
Curl toes under and lift knees from the ground. Slowly straighten legs while lifting hips upward. Create an inverted V shape with your body.
Pedal feet gently to release calf tension. Hold for five deep breaths while maintaining the shape. Keep pushing strongly through both hands.
- Begin with hands and knees position
- Lift hips while straightening legs
- Maintain inverted V formation
- Pedal feet to ease calf tightness
- Hold for five complete breaths
Beginner Modifications: Finding Your A-Shape
Bend knees slightly to create an A-shape rather than forcing straight legs. This modification protects hamstrings while building flexibility. Jade Yoga mats provide excellent cushioning for sensitive joints.
If heels don’t reach the ground, use a rolled mat for support. Place it under your heels to reduce calf strain. This approach allows gradual improvement over time.
| Challenge | Modification | Benefit |
|---|---|---|
| Tight hamstrings | Bent knees | Reduced strain |
| Heels lifted | Rolled mat support | Gradual stretching |
| Wrist discomfort | Fist formation | Pressure relief |
Advanced Variations: Deepening the Hamstring and Calf Stretch
Lift one leg parallel to your torso while maintaining the inverted V. Keep toes pointed toward the ground. Press through the elevated heel for deeper engagement.
Hold for five breaths before switching sides. Coordinate movement with your breathing pattern. This variation intensifies the stretch while improving balance.
Alignment Tips for External Rotation and Weight Distribution
Rotate arms externally without moving hand placement. Turn armpits toward each other while keeping palms grounded. This alignment protects shoulder joints.
Distribute weight evenly between hands and feet. Avoid sinking into shoulders or collapsing through wrists. Liforme Yoga Mats offer alignment guides for optimal positioning.
This pose prepares you beautifully for hip-opening movements like Low Lunge. It creates space throughout your entire posterior chain. Consistent practice yields noticeable improvements in overall mobility.
2. Low Lunge (Anjaneyasana) to Open Tight Hips
During a particularly stressful week, I discovered how much tension accumulates in the hip area. This simple yet powerful movement became my daily reset button for releasing stored tightness.
Anjaneyasana addresses multiple areas simultaneously. It creates space in the hip joints while strengthening the legs. The pose also encourages spinal elongation and improved posture.
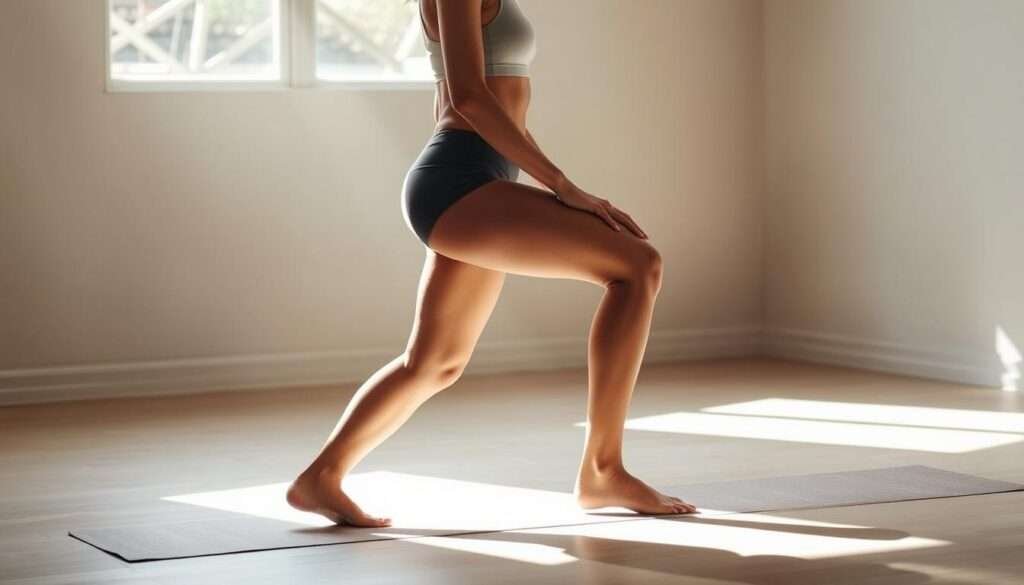
How to Step into a Stable, Hip-Opening Lunge
Begin kneeling on your exercise mat with hands resting on thighs. Step your right foot forward between your hands. Position the foot flat on the ground.
Ensure your front knee stays directly above the ankle. Keep the back knee comfortably on the floor. Distribute weight evenly through both legs.
- Start in a kneeling position on your mat
- Step one foot forward between your hands
- Keep the front knee aligned with the ankle
- Maintain the back knee on the floor
- Hold for 30 seconds before switching sides
Using a Chair for Support and Stability
For those needing extra support, place a sturdy chair in front. Rest your hands on the seat during the lunge. Hugger Mugger’s meditation chairs offer excellent stability.
This modification reduces strain while maintaining benefits. It allows gradual progress toward deeper expression. Your body can relax into the stretch safely.
| Challenge | Chair Support Method | Benefit |
|---|---|---|
| Balance issues | Hands on chair seat | Increased stability |
| Tight hips | Shorter lunge stance | Reduced pressure |
| Knee sensitivity | Gaiam knee pad under back knee | Enhanced comfort |
Alignment Focus: Keeping Your Front Knee Behind Your Ankle
Proper alignment protects the knee joint during this pose. Always monitor the front knee’s position relative to the foot. Adjust your stance if the knee moves forward.
Draw the back hip forward to maintain squared hips. This action deepens the stretch while preserving safety. Consistent practice builds genuine flexibility over time.
This hip-opening movement prepares you beautifully for shoulder-focused poses. Next, we’ll explore Cow Face Pose for upper body mobility.
3. Cow Face Pose (Gomukhasana) for Shoulder and Chest Mobility
My shoulders used to ache after long hours at the computer until I discovered this transformative pose. Gomukhasana specifically targets upper body tension that accumulates from daily activities. It creates space where we often carry stress.

This position addresses multiple areas simultaneously. It improves range of motion while releasing built-up tightness. The benefits extend beyond physical comfort to better posture alignment.
Seated Setup for Arm and Shoulder Flexibility
Begin by finding a comfortable seated position on your mat. Cross your right knee over your left, stacking them if possible. Keep your spine straight and chest open.
Extend your left arm overhead with palm facing inward. Bend your elbow, letting your hand travel down your spine. Use your right hand to gently guide the left elbow toward center.
- Sit tall with lengthened spine before starting arm movements
- Reach one arm overhead while keeping shoulders relaxed
- Use the opposite hand to gently encourage deeper stretch
- Maintain the position for thirty seconds per side
- Repeat on both sides for balanced development
Using a Strap to Bridge the Gap Between Your Hands
Many practitioners cannot clasp hands initially. This is completely normal and expected. A quality strap creates connection without forcing movement.
Manduka’s durable yoga strap offers excellent support. Hold one end in each hand behind your back. Gradually walk hands closer together over time.
| Challenge | Strap Solution | Progress Indicator |
|---|---|---|
| Cannot touch fingers | Use full strap length | Hands moving closer |
| One shoulder tighter | Adjust strap grip differently | More even flexibility |
| Discomfort in hold | Shorten hold time initially | Increased comfort duration |
Brentwood Home meditation cushions provide seated comfort. They elevate hips slightly for better spinal alignment. This support makes the pose more accessible.
Common Mistakes and How to Avoid Them
Forcing hands to clasp often creates shoulder strain. Listen to your body’s signals about appropriate depth. Progress develops gradually with consistent practice.
Hunching shoulders toward ears reduces the stretch’s effectiveness. Keep shoulders actively drawing down away from your neck. This maintains space in the joint area.
Leaning forward compromises spinal alignment. Sit upright with chest proudly open throughout. Use a wall behind you for feedback on posture.
This pose significantly reduces upper body tension when practiced regularly. It improves reaching overhead and behind your back. These gains translate to daily activities with ease.
For those seeking gentler hip opening, Eye of the Needle Pose offers similar benefits. It provides deep release while lying supine rather than seated.
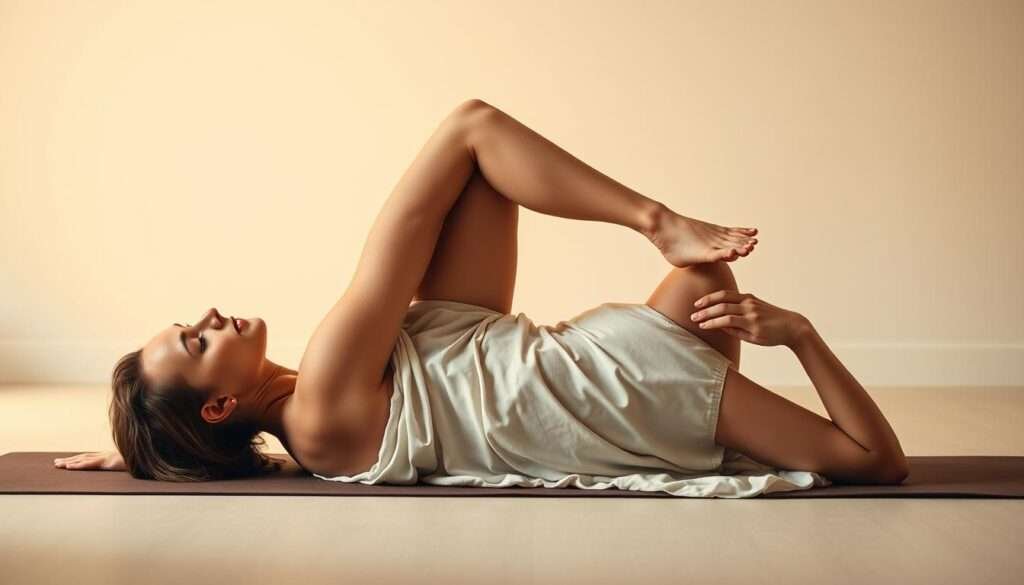
4. Eye of the Needle Pose (Sucirandhrasana) for Deep Hip Release
Chronic hip tension once made sitting uncomfortable for me. I discovered this gentle supine position during a restorative class. It became my favorite method for releasing deep hip flexor tightness without strain.
Sucirandhrasana offers gradual opening for all experience levels. You control the intensity based on your current flexibility. This approach makes it accessible while still being effective.
Gentle Supine Instructions for All Levels
Begin lying comfortably on your back with knees bent. Place both feet flat on the ground about hip-width apart. Keep your spine in a neutral position throughout the movement.
Cross your right ankle over your left thigh near the knee. Allow your right knee to open outward gently. This creates the initial hip stretch without pressure.
For deeper engagement, lift your left foot off the floor. Bring your left thigh toward your chest gradually. Reach through your legs to clasp hands behind your left thigh.
- Start supine with knees bent and feet grounded
- Cross one ankle over the opposite thigh
- Maintain both feet active throughout the hold
- Clasp hands behind the supporting thigh
- Hold for five to ten complete breaths per side
Keep your sacrum connected to your mat during the entire pose. This stabilizes your pelvis for safe stretching. The gentle pull should feel satisfying rather than painful.
Modifications for Extremely Tight Hips
If clasping hands proves challenging initially, use a yoga strap. Lululemon’s durable strap creates connection without forcing movement. Loop it around your thigh and hold both ends comfortably.
Another option keeps the supporting foot on the ground. This reduces intensity while maintaining benefits. Your body can relax into the stretch more easily.
| Challenge | Modification | Product Support |
|---|---|---|
| Cannot reach hands | Use yoga strap around thigh | Lululemon Practice Yoga Strap |
| Hip sensitivity | Keep supporting foot grounded | Hugger Mugger Meditation Cushion |
| Knee discomfort | Place bolster under bent knee | Manduka Recycled Rubber Bolster |
Hugger Mugger bolsters provide comfort under sensitive knees. They cushion joints while maintaining proper alignment. This support makes longer holds more comfortable.
Comparing Sucirandhrasana to Pigeon Pose
Both positions target hip opening but with different approaches. Eye of the Needle Pose offers gentler progression for beginners. You work against gravity rather than with body weight compression.
Pigeon Pose provides more intensity for advanced practitioners. It demands greater flexibility and strength initially. Sucirandhrasana serves as an excellent preparatory movement.
This supine variation reduces strain on knees and ankles. It allows focused attention on hip release without distraction. Many find it more accessible during tightness or discomfort.
Regular practice improves overall hip mobility noticeably. It helps alleviate discomfort from prolonged sitting. These benefits extend to better posture and walking ease.
Next we’ll explore Pyramid Pose for hamstring and hip focus. It builds on this foundation with standing engagement.
5. Pyramid Pose (Parsvottanasana) for Hamstring and Hip Flexibility
One afternoon, I noticed how tight my hamstrings felt after sitting all day. This standing forward fold became my solution for releasing that deep tension. It beautifully combines strength with stretching for comprehensive benefits.

Parsvottanasana creates length in your legs while opening your hips. The posture builds stability through proper alignment. You’ll feel a satisfying stretch along your entire back line.
Establishing a Strong Foundation and Squared Hips
Begin in Downward Facing Dog to set up your foundation. Step your right foot forward between your hands. Adjust your stance based on your height and current ability.
Position your back foot slightly outward at a 45-degree angle. This stable base supports your entire structure. Keep both hips facing forward throughout the movement.
- Start from Downward Facing Dog position
- Step one foot forward between your hands
- Turn back foot outward approximately 45 degrees
- Maintain squared hips toward the front
- Distribute weight evenly between both feet
The Role of Yoga Blocks in This Forward Fold
When I first attempted this pose, my hands floated above the floor. Gaiam foam blocks brought the ground up to meet me. They prevent straining while maintaining proper form.
Place blocks under your hands if they don’t reach comfortably. This support allows your spine to lengthen properly. You’ll experience the stretch without compromising alignment.
| Challenge | Block Solution | Recommended Product |
|---|---|---|
| Hands don’t reach floor | Place blocks at appropriate height | Gaiam Yoga Blocks |
| Balance difficulties | Use blocks for stability support | Manduka Recycled Foam Block |
| Limited flexibility | Higher block setting | Hugger Mugger Cork Block |
Using Your Breath to Deepen the Stretch Safely
Breath transforms this from a simple stretch to a meditative practice. Inhale to lengthen your spine and create space. Exhale to gently fold deeper into the position.
This rhythmic pattern prevents pushing beyond your limits. I find five complete breaths per side offers optimal release. The coordinated movement feels both challenging and calming.
Yogi Bare Paws Mat provides excellent grip during this pose. Its non-slip surface keeps your feet securely planted. This stability lets you focus entirely on your breathing pattern.
Regular practice noticeably improves your range of motion. The benefits extend to daily activities like bending and walking. You’ll move with greater ease and less discomfort.
This standing forward fold prepares you beautifully for reclining twists. Next, we’ll explore Supine Spinal Twist for spinal health and detoxification.
6. Supine Spinal Twist (Supta Matsyendrasana) for Spinal Health
After a long road trip left my back feeling compressed, I discovered the restorative power of this gentle twist. Supine Spinal Twist became my go-to solution for releasing tension along my entire spinal column. This reclining position offers profound benefits without demanding extreme flexibility.
This pose works wonders for spinal realignment and tension release. It gently rotates the vertebrae while stretching surrounding muscles. The reclining position makes it accessible for all experience levels.
Step-by-Step Guide to a Reclining Twist
Begin by lying comfortably on your mat with arms extended. Position them in a T-shape with palms facing upward. Keep both legs extended straight along the ground.
Draw your right knee toward your chest gently. Place your left hand on the outside of your right thigh. Guide the knee across your body toward the left side.
Allow your right knee to descend toward the floor naturally. Maintain both shoulders grounded throughout the movement. Hold for five complete breaths before releasing slowly.
- Start supine with arms extended sideways
- Hug one knee toward your chest
- Guide the knee across your body gently
- Keep opposite shoulder connected to mat
- Hold for five breaths before switching sides
The Detoxifying and Cleansing Benefits of Twists
This rotation creates a gentle squeezing action internally. It stimulates digestion and supports natural detoxification processes. Many practitioners report improved regularity with consistent practice.
The twisting motion encourages fresh blood flow to spinal discs. This nourishment helps maintain vertebral health over time. It’s like giving your spine a refreshing internal massage.
| Physical Benefit | Internal Benefit |
|---|---|
| Spinal realignment | Improved digestion |
| Back tension release | Lymphatic stimulation |
| Glute stretching | Toxin release |
| Hip mobility | Organ massage |
Supported Variations for a Gentler Experience
For those needing extra comfort, place a bolster under the bent knee. Manduka’s Recycled Rubber Bolster provides perfect support. This elevation reduces strain while maintaining the twist’s benefits.
If your knee doesn’t reach the floor, use folded blankets for support. Hugger Mugger’s organic cotton blankets offer ideal thickness. They bridge the gap without compromising the stretch.
Jade Yoga’s Prolite Mat provides cushioning for sensitive backs. Its supportive surface makes floor work more comfortable. This allows longer holds with greater relaxation.
Regular practice of this twist significantly reduced my back discomfort. It became an essential part of my evening routine. The gentle release prepares both body and mind for restful sleep.
This spinal twist beautifully complements hip-opening movements like Bound Angle Pose. Next, we’ll explore how that classic position creates space in tight hip areas.
7. Bound Angle Pose (Baddha Konasana) as a Prime Hip Opener
I noticed a profound shift during a period of emotional stress when I consistently practiced this gentle hip opener. Bound Angle Pose became my sanctuary for releasing both physical tightness and mental tension. This seated position offers accessible benefits for all experience levels.
Baddha Konasana creates space in your hip joints while calming your nervous system. It addresses multiple areas of tightness through gentle, sustained pressure. The pose also encourages better posture alignment over time.
Finding a Comfortable Seated Position
Begin by sitting upright with your legs extended forward. Keep your spine long and shoulders relaxed. Draw your feet toward your body slowly.
Press the soles of your feet together firmly. Let your knees fall outward naturally. Hold your feet with both hands for support.
Maintain this position for twenty-five complete breaths. Focus on deep, steady breathing throughout. Release gently by extending your legs forward.
- Sit tall with extended legs initially
- Bring soles of feet together comfortably
- Allow knees to descend toward the ground
- Hold feet with hands for stability
- Maintain for twenty-five full breaths
Using Blankets and Bolsters for Support
Many practitioners need extra support in this position. Folded blankets under outer thighs reduce strain significantly. Barefoot Yoga’s organic cotton blankets offer perfect thickness.
For elevated seating, place a cushion under your hips. Zafu meditation cushions provide ideal height adjustment. This support makes the pose more accessible.
| Support Need | Solution | Recommended Product |
|---|---|---|
| Knee discomfort | Blankets under thighs | Barefoot Yoga Organic Blankets |
| Hip tightness | Cushion under seat | Zafu Meditation Cushion |
| Forward lean | Bolster behind back | Manduka Recycled Bolster |
The Emotional Connection to Hip Flexibility
Traditional wisdom suggests hips store emotional tension. Releasing physical tightness often brings emotional clarity. Many experience feelings of lightness after consistent practice.
This mind-body connection remains powerful in modern practice. Releasing hip tension can alleviate stored stress patterns. The benefits extend beyond physical flexibility.
Hip openers improve range of motion and emotional clarity over time.
This pose beautifully prepares you for backbends like Cobra Pose. It creates space in your hips and groin area. These gains support spinal flexibility and chest opening.
8. Cobra Pose (Bhujangasana) for Spine and Chest Flexibility
I discovered this gentle backbend during a period when desk work left my upper body feeling tight. Cobra Pose became my daily solution for releasing tension across my front torso while strengthening my posterior chain. This accessible movement offers profound benefits for both structural health and overall well-being.
Bhujangasana creates space in your chest while building spinal resilience. It counteracts the forward hunch many develop from daily activities. The pose also stimulates circulation throughout your entire system.
Activating Your Core to Protect Your Lower Back
Proper engagement prevents strain during this backbend. I learned to draw my navel upward before lifting my chest. This action supports your lumbar region throughout the movement.
Keep your pubic bone pressed firmly into your mat. This stabilizes your pelvis and prevents overarching. Your lower ribs should maintain contact with the ground.
- Engage abdominal muscles before lifting
- Maintain pubic bone connection to mat
- Keep lower ribs grounded during ascent
- Distribute lift evenly through spinal segments
- Release immediately if feeling sharp discomfort
BalanceFrom’s Extra Thick Yoga Mat provides cushioning for sensitive stomachs. Its supportive surface makes floor work more comfortable. This allows focused attention on proper form.
Beginner vs. Advanced Backbend Variations
New practitioners should start with minimal elevation. Lift only your chest and hands slightly off the ground. This approach builds confidence while assessing current ability.
Experienced students can deepen their expression. Walk hands forward and straighten elbows gradually. Externally rotate arms while lifting chest higher.
| Experience Level | Recommended Variation | Safety Consideration |
|---|---|---|
| Beginner | Minimal chest lift with bent elbows | Maintain lower rib contact |
| Intermediate | Higher lift with straighter arms | Monitor neck alignment |
| Advanced | Full arm extension with deep arch | Ensure core engagement |
Manduka’s PRO Lite Mat offers excellent grip during these variations. Its non-slip surface keeps hands secure during arm adjustments. This stability supports progressive development.
How Cobra Pose Improves Posture and Circulation
Regular practice counteracts forward head positioning. It strengthens the muscles that support upright posture. Many notice improved alignment during daily activities.
Enhanced blood flow accompanies the chest opening. This circulation boost delivers nutrients to spinal tissues. The benefits extend to improved energy levels.
Backbends like Cobra Pose improve postural awareness and cardiovascular function.
This pose significantly reduced my upper back discomfort over time. It became essential for maintaining comfortable sitting periods. The combined physical benefits support long-term spinal health.
Next we’ll explore Wide-Legged Forward Bend for hamstring focus. This inversion complements backbends beautifully for balanced development.
9. Wide-Legged Forward Bend (Prasarita Padottanasana) for Hamstrings and Spine
I discovered this expansive forward fold during a hot summer practice when my entire body craved deep release. Prasarita Padottanasana quickly became my favorite method for addressing multiple areas of tightness simultaneously. This comprehensive movement offers both physical challenge and mental calm in equal measure.

This position creates length along your entire posterior chain. It targets hamstrings while encouraging spinal decompression. The inversion aspect brings fresh blood flow to your brain.
Finding the Right Stance Width for Your Body
Proper foot placement forms the foundation for this pose. I learned through trial and error what distance works best. Your height and current flexibility determine optimal stance width.
Start with feet approximately hip-width apart. Step outward gradually until you feel a gentle stretch. Most practitioners find three to four feet comfortable initially.
- Begin with feet hip-distance apart
- Step outward slowly while maintaining balance
- Find width that creates stretch without strain
- Adjust based on your height and flexibility level
- Wider stances intensify the stretch
Yogitoes Skidless Mat Towels prevent slipping during sweaty practices. Their grip technology keeps feet secure during wide stances. This support allows deeper focus on the stretch itself.
Inversion Benefits: Calming the Mind While Stretching the Body
This forward fold combines physical challenge with mental relaxation. The inverted position calms the nervous system noticeably. Many experience reduced stress after consistent practice.
Mild back discomfort often diminishes with regular engagement. The gentle traction creates space between vertebrae. This release feels particularly satisfying after long sitting periods.
| Physical Benefit | Mental Benefit |
|---|---|
| Hamstring lengthening | Reduced anxiety |
| Spinal decompression | Improved focus |
| Shoulder flexibility | Mental clarity |
| Improved circulation | Emotional balance |
Inversions like Wide-Legged Forward Bend offer both physical release and mental tranquility.
Forearm Variation for Advanced Practitioners
Experienced students can deepen their expression beautifully. Instead of placing hands flat, lower onto forearms gradually. This variation intensifies the stretch significantly.
Ensure you maintain proper alignment throughout the movement. Keep weight distributed evenly between both feet. Avoid collapsing into shoulders or wrists.
- Start with standard hand placement
- Bend elbows and lower onto forearms slowly
- Maintain equal weight distribution
- Hold for five breaths before releasing
- Return to standing gradually
Manduka’s PRO Lite Mat provides cushioning for forearm support. Its dense foam protects joints during deeper expressions. This quality gear supports progressive development safely.
This pose prepares you beautifully for restorative positions like Child’s Pose. It creates space throughout your entire back body. These gains support overall mobility and comfort.
Child's Pose (Balasana) for Integrated Relaxation and Release
During a particularly overwhelming day, I discovered the profound peace that comes from surrendering into this restorative position. Child’s Pose became my sanctuary for releasing accumulated tension throughout my entire system. This gentle posture offers both physical release and mental calm in equal measure.
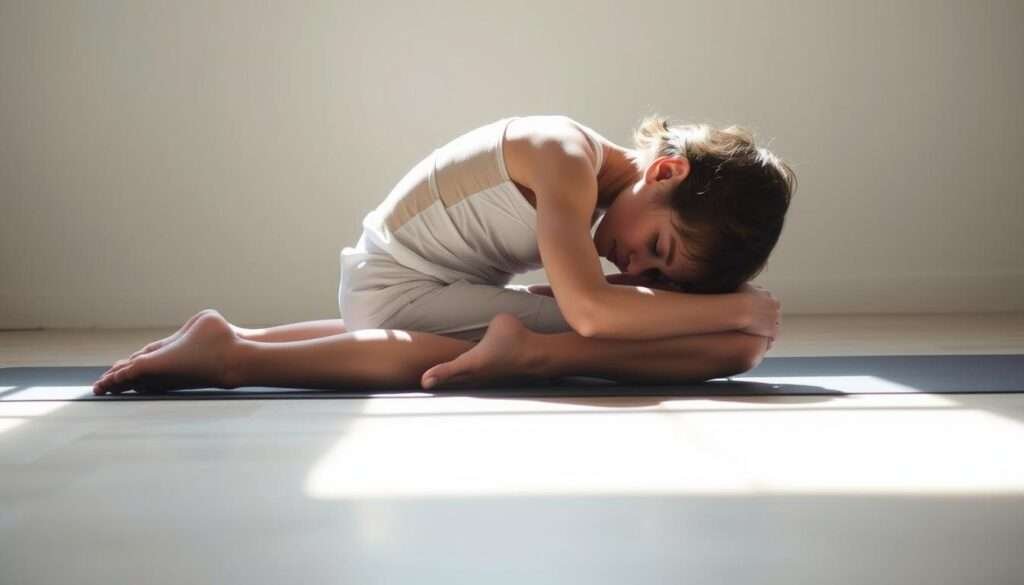
Balasana creates space in your lower back while calming your nervous system. It gently stretches your hips and thighs without demanding extreme flexibility. The folded position encourages introspection and deep breathing.
The Ultimate Resting Pose for the Lower Back and Hips
This pose provides gentle traction along your spinal column. It releases tension in muscles that often carry stress from daily activities. Many experience noticeable relief in their lower back area.
Begin in a tabletop position with knees hip-width apart. Keep your hands directly under your shoulders. Position the tops of your feet flat on the floor.
- Start kneeling with hands under shoulders
- Exhale as you push your hips back toward heels
- Keep arms extended forward with palms down
- Rest your chest between your thighs comfortably
- Hold for thirty complete breaths minimum
If sitting back fully proves challenging, use extra support. Gardeners’ Pro Kneel cushion provides excellent padding for sensitive knees. This modification makes the pose accessible for all experience levels.
| Challenge | Support Solution | Recommended Product |
|---|---|---|
| Knee discomfort | Extra cushioning under knees | Gardeners Pro Kneel |
| Tight hips | Blanket between thighs and calves | Barefoot Yoga Organic Blanket |
| Forehead doesn’t reach floor | Stacked hands or small pillow | Hugger Mugger Meditation Pillow |
Active Variations for a Deeper Side Body Stretch
For those seeking additional engagement, try the side stretch variation. From the basic position, walk your hands gradually to the left. Keep both hips grounded as you extend through your right side.
Hold for five breaths before returning to center. Repeat on the opposite side for balanced development. This movement creates length along your entire lateral line.
Active variations in Child’s Pose enhance side body flexibility and postural awareness.
Incorporating Breathwork for Maximum Relaxation
Breath transforms this from a simple stretch to a meditative practice. Inhale deeply to expand your back ribs fully. Exhale completely to release deeper into the pose.
Focus on lengthening your exhalations slightly longer than inhalations. This pattern activates your parasympathetic nervous system. The effect brings noticeable calm to both body and mind.
Regular practice of this pose significantly reduced my overall tension levels. It became an essential tool for managing daily stress. The combined benefits support both physical comfort and mental clarity.
This restorative position beautifully completes our exploration of foundational movements. Each pose contributes uniquely to your journey toward greater mobility and comfort.
Conclusion: Your Path to Greater Flexibility Starts Now
Discovering my own journey toward suppleness transformed how I approach daily movement. Consistent practice builds lasting change over time.
Key benefits include reduced pain and improved posture. Mental clarity often follows physical release. These gains support overall health.
Begin with basic equipment like a starter kit. It typically includes a mat, blocks, and strap. These tools support proper alignment.
Progress develops through regular engagement. Patience with your current abilities creates sustainable results. Each session builds upon the last.
I remain committed to my ongoing growth. Share your experiences or questions below. Let’s continue learning together.