Table of Contents
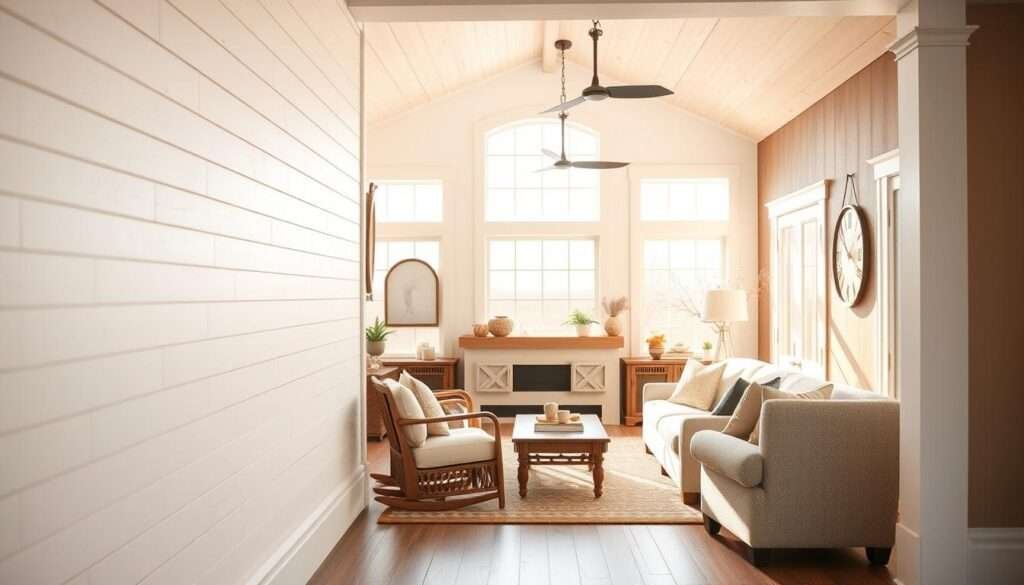
ToggleI still remember the day I nailed the first board and felt the room breathe. A plain surface became a warm, textured backdrop where my family gathered, laughed, and relaxed. That small change made our space feel like home.
By the end of this guide, you’ll have a clear plan to build a shiplap wall that adds instant character. I’ll show hero before/after photos, close-ups of the rabbet detail, and simple tables for materials, cost, and tools.
I explain what the rabbet does, why horizontal runs widen a room, and why vertical boards lift the ceiling line. I’ll cover common board widths, thicknesses, and typical U.S. costs so you can pick MDF or solid wood based on budget and style.
This project is approachable for beginners. My step-by-step flow—planning, layout, install, and finish—pairs quick bullet guides with styling ideas so the final look feels cozy and complete.
Key Takeaways
- You’ll get a confidence-boosting plan to build a shiplap wall and transform your space.
- Photos and close-ups will help you visualize before and after results.
- Simple tables explain materials, tools, and U.S. cost ranges for budgeting.
- Orientation choices affect how a room feels—wider or taller—so plan accordingly.
- The guide pairs installation steps with styling tips for a finished, cozy feel.
Why I Chose Shiplap for a Cozy Farmhouse Living Room
I wanted a backdrop that felt worn-in and welcoming the moment guests stepped through the door. My aim was to add quiet depth and a soft rhythm across a main wall, so the space reads calm and intentional.
Texture and warmth are the heart of this choice. The gentle shadow lines give a plain surface visual interest and make a simple wall feel crafted rather than busy.

Texture, warmth, and that relaxed farmhouse style feel
Light-painted boards bounce light and brighten a room on cloudy days. That reflection makes the whole area feel airier without losing the cozy aesthetic.
How shiplap solves common design challenges
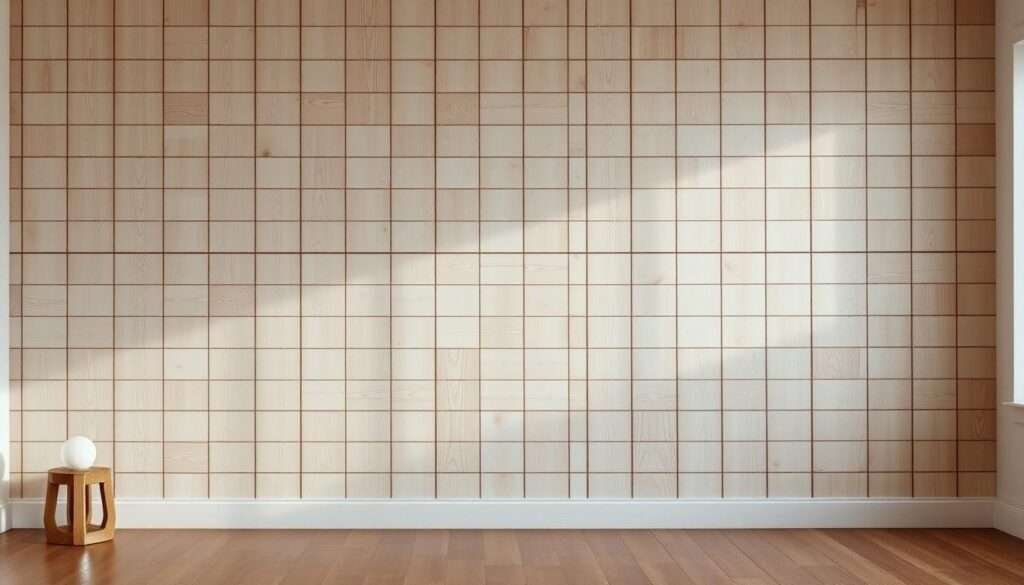
- I use horizontal runs to make narrow rooms appear wider and vertical runs to lift the ceiling line.
- It frames a fireplace naturally, turning it into a true focal point without extra fuss.
- When furniture or art is bold, the finish acts as a calming backdrop so pieces don’t compete for attention.
- Its versatility lets me shift from rustic to modern by changing color and accents.
Plan First: Materials, Sizes, Tools, and Budget That Work in the United States
Before I cut a single board, I measured the wall three times and sketched a simple plan. That initial step keeps decisions tidy and reduces waste.

Comparing common materials
MDF is smooth and paint-ready but hates moisture. Plywood is stable and strong but often needs priming. PVC/vinyl resists damp areas but lacks wood warmth. Solid wood is the most authentic and costs more.
| Material | Cost Range | Durability | Finish |
|---|---|---|---|
| MDF | Low | Moderate (avoid wet areas) | Paint-ready |
| Plywood | Mid | High | Prime then paint |
| PVC/Vinyl | Low–Mid | High (water resistant) | Limited texture |
| Solid wood (pine/cedar/poplar) | High | High | Stain or paint |
Sizing, cost, and tools
I pick 5-1/2″ boards for tighter rooms and 7-1/4″ for longer runs; thicknesses run 1/4″–3/4″ and lengths are usually 8’+. Expect installed costs of about $7–$18 per sq ft. I add 10% waste and fix any drywall seams before I work.
- Stud finder, level, miter saw
- Jigsaw, nailer, construction adhesive
- Sander, filler, caulk, primer, paint
Color Strategy: Farmhouse Living Room Paint Colors and Finishes I Love
The right hue changed how the whole space behaved under morning light. I use color to steer mood—bright and breezy, warm and calm, or deep and dramatic—while keeping a cozy aesthetic that fits both cozy farmhouse living room and modern farmhouse living room styles.
Classic white, soft neutrals, and moody tones
Classic white shiplap feels light and airy and bounces light through low-sun spaces. Painted monochromatic runs create a seamless, modern look that highlights texture without loud contrast.
Soft neutrals add warmth and pair well with warm wood accents and black fixtures for a modern twist. Deep tones work behind a fireplace or TV to hide glare and add depth while staying inviting.
Stain vs. paint: maintenance and vibe
| Finish | Maintenance | Best rooms | Visual impact |
|---|---|---|---|
| Stain + clear coat | Low; seal and reseal as needed | Rustic spaces, cabins | Highlights natural wood grain |
| Paint (primer + coats) | Medium; touch-ups, cleanable | High-traffic living areas | Uniform color, texture-forward look |
| Two-tone or accent | Medium; careful matching | Feature walls, behind focal points | Adds dimension and style contrast |
- I seal natural wood with a satin clear coat to celebrate grain without yellowing the space.
- I use matte finishes for quiet, modern spaces and satin where wipeability matters.
- Prep checklist: clean, prime painted boards, sand or seal stained boards, and test swatches by daylight and warm lamps.
- For more visual ideas, I sometimes reference a complementary project for rustic kitchen inspiration: rustic kitchen inspiration.
Shiplap Walls in Your Farmhouse Living Room: The Ultimate How-To Guide
I planned the whole install around one rule: get the first course perfectly level and everything else will align.
Prep like a pro
Measure twice, record height and width, and add 10% overage for cuts and waste.
Remove outlet covers, patch holes, clean dust, and snap a dead-level baseline. Use a stud finder and mark centers on painter’s tape.

Install with confidence
- Choose orientation: horizontal to widen the sight line or vertical to lift the ceiling.
- Sketch seam placement to avoid small filler pieces near windows and outlets.
- Start at the bottom and secure the first boards level. Use adhesive where needed and drive two nails into each stud per board.
- Mark stud centers on the cut boards to keep nailing consistent as you go.
- Cut neat openings for outlets with a jigsaw and test fit before fastening to protect drywall.
Finishing touches
Fill nail holes, sand lightly, and run a thin bead of caulk along edges and inside corners.
Prime then paint with even coats for a seamless finish. Reattach plates and add molding—baseboards, simple square trim, or crown—to frame the installation.
| Stage | Key action | Essentials |
|---|---|---|
| Prep | Measure, mark studs, baseline | Tape, level, stud finder |
| Install | Level first course, nail to studs | Adhesive, brad/nailer, jigsaw |
| Finish | Fill, caulk, paint, add trim | Filler, caulk, primer, paint |
Pro tips: use a spacer for even gaps, work from a dust-free surface before paint, and step back often to check sight lines. Plan a weekend: Day 1 prep; Day 2 install; Day 3 finish and paint.
Styling the Space: Farmhouse Living Room Ideas That Feel Cozy and Inviting
I arrange furniture around a focal point so the space feels curated from the first step inside. A painted shiplap backdrop keeps the palette calm while letting each piece sing.
Anchor the seating with a washable slipcovered sofa and a pair of spindle accent chairs. Center a rustic coffee table to ground the grouping against the shiplap wall.
- Add a farmhouse console table behind seating for lamps and baskets that hide throws and games.
- Layer textiles—linen curtains, chunky knits, and a natural fiber rug—to warm the room and add interest.
- Bring natural wood side tables or a mantle shelf to echo warm tones against painted boards.
| Layer | Function | Example |
|---|---|---|
| Seating | Comfort & scale | Slipcovered sofa, accent chairs |
| Storage | Hidden clutter | Console table + woven baskets |
| Light | Ambience & task | Sconces, floor lamp, pendant |
| Finish | Visual depth | Mirrors, art, plants |
I use mirrors to amplify light and statement lighting to emphasize the subtle lines. Shelves hold books, pottery, and greenery so decor feels personal and balanced between modern cozy living and traditional charm.
Quick styling checklist: anchor seating, layer textiles, add natural wood accents, balance lighting, and style shelves with a mix of objects. For more cozy inspiration, see a complementary kitchen project cottage kitchen ideas.
Small but Mighty: Cozy Small Living Room Layouts that Shine with Shiplap
A compact layout pushed me to choose features that stretch the eye instead of the floor. I use vertical emphasis and pared-back furniture to make modest spaces feel airy and intentional.
Smart zones and small living decor start with a scaled rug, a petite sofa, and narrow side tables so traffic flows without crowding. I float seating a few inches from the wall to improve circulation and add depth.

Light, mirrors, and vertical boards do the heavy lifting. White shiplap or light-painted boards bounce natural light. Mirrors opposite windows multiply that light and create depth. Vertical orientation draws the eye up to lift ceilings and make the space feel taller without overwhelming the plan.
- I choose narrower boards so the pattern reads refined rather than busy.
- Multi-use pieces—nesting tables, storage ottomans, and wall sconces—free floor space.
- Keep styling tight: a few larger accents instead of many small items keeps the look calm.
| Zone | Example | Why it works |
|---|---|---|
| Seating | Petite sofa + leggy chair | Scale fits traffic paths |
| Storage | Ottoman with storage, floating shelves | Hidden clutter, open floor |
| Light & height | Mirror opposite window + vertical boards | More light, taller perceived ceiling |
I also offer a printable mini floor plan for a small cozy layout you can tweak. For related small-space ideas and efficient decor, see this short guide on small kitchen decor that translates well to compact living areas: small-space decor ideas.
From Rustic to Refined: Modern Farmhouse Living Room Mixes
I mix old and new pieces until the space reads calm, layered, and intentional. That approach helps me balance cozy rustic vibes with a cleaner, modern farmhouse aesthetic.
Cozy rustic vibes with leather, wood, and matte metals
A warm leather sofa, natural wood shelving, and matte metal hardware ground a space and make a textured backdrop feel lived-in. I add rugs and chunky knit throws to soften edges and invite tactile depth.
Modern accents: black fixtures and clean lines
To refine the look, I bring in slim lighting, black-framed windows, and simple tables. Dark-painted shiplap can become a bold accent that contrasts with lighter furnishings and draws the eye toward layered lighting.
- I pair leather with matte black hardware and natural wood to bridge rustic and modern.
- Use color blocking: deep-toned shiplap for drama with pale upholstery to keep balance.
- Consider a shiplap ceiling or ceiling treatment to add architectural depth in open rooms.
- Mix one vintage trunk, one modern side table, and a tailored rug for a curated feel.
| Feature | Rustic | Refined |
|---|---|---|
| Seating | Warm leather sofa | Neutral slipcover with clean lines |
| Hardware & Lighting | Matte bronze or aged iron | Matte black, slim fixtures |
| Accent Use | Natural wood mantel and frames | Black accents and minimalist shelving |
Blend-it-your-way checklist: swap cushions and lighting to dial charm up or polish down; keep two dominant hues and a natural material accent to maintain a calm aesthetic. Layered light will always guide the eye and highlight gentle ridges for subtle interest.

Image and Content Plan: Maximum Visuals, Tables, and Bulleted Guides
I documented this project with a clear photo sequence so readers can match each step with a visual cue. I planned before/after hero shots, close-ups of rabbet and fastenings, layout diagrams (horizontal vs. vertical), and finish panels that show paint behavior under daylight and lamp light.

Where photos help most
Before/after to show impact. Close-ups for rabbet detail and nail placement. Diagrams for orientation choices and ceiling runs.
What to table and pack into a gallery
| Visual Set | Purpose | Included Tables |
|---|---|---|
| Progress sequence | Step-by-step clarity | Board sizing, coverage math |
| Detail shots | Install technique | Materials pros/cons |
| Finish panel | Color & sheen comparison | Cost ranges & tool checklist |
- Quick-guides: install steps from measure to molding; paint tips for smooth coverage; small-space hacks that add function without overwhelming.
- I include a staging checklist, photo legend, safety notes, and a printable worksheet bundle for people to use on-site.
Ready to Transform Your Living Room—Start Your Shiplap Wall Today
Pick one wall, clear a weekend, and you’ll be surprised how quickly progress grows.
I invite you to print the checklists, study the photos and tables above, and take that first measurement today. Good planning and careful installation make this DIY achievable.
Remember: horizontal boards widen a view; vertical runs lift a ceiling. Finish with filler, caulk, paint, and trim for a polished result. If a task feels complex, consult a pro for safety and fit.
Start with an accent wall to build confidence, then expand as your skills and vision grow. Your home and family will feel the warmth you add, and you’ll enjoy the pride of a job well done.
Gather tools, cue a playlist, and begin—your fresh shiplap wall is one weekend away.