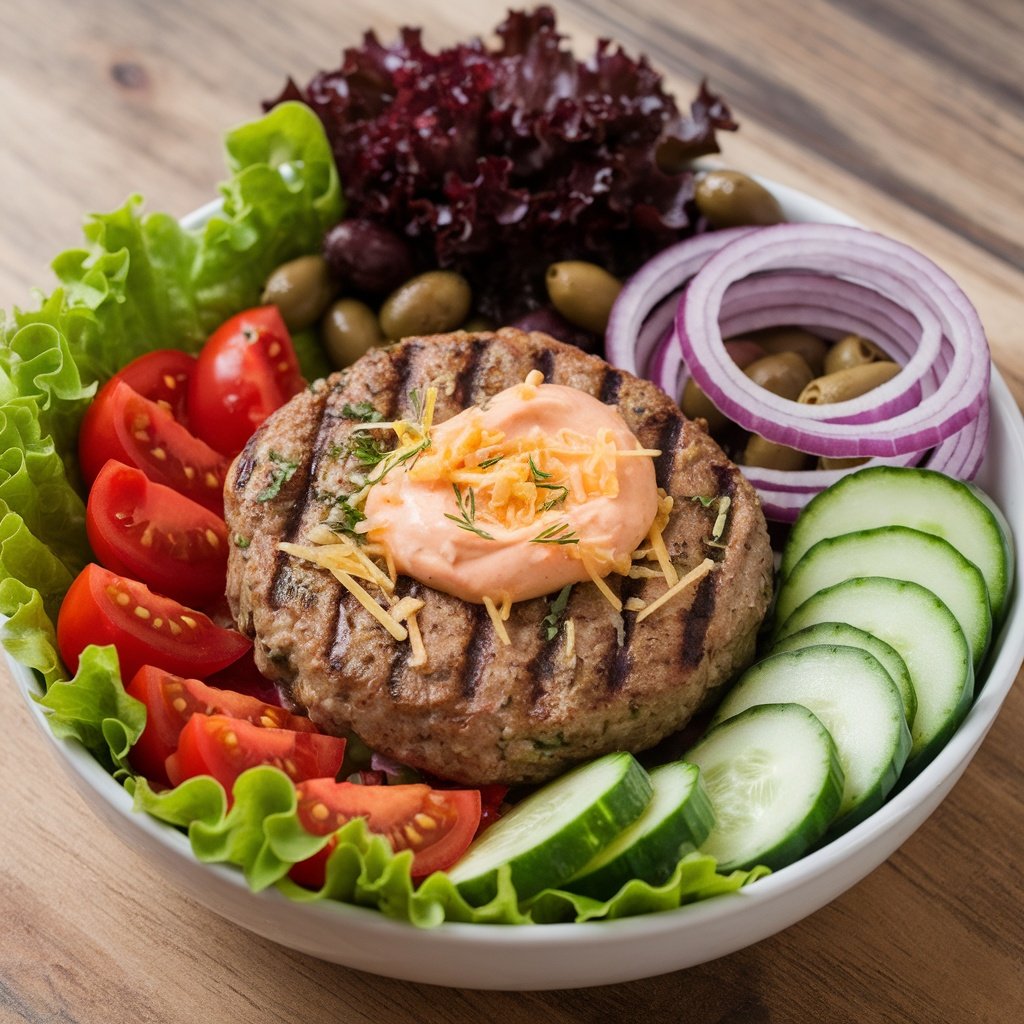
A fully loaded burger is a true delight. If you invite me to your cookout, I’ll load my burger with all the toppings. These Healthy Burger Bowls are perfect for those who love burgers but want a lower carb option.
These burgers have all your favorite toppings and a tasty burger sauce. They’re filling and delicious, without the bun.
They’re great for meal prep, too. You can enjoy them for lunches or dinners all week. We hope you enjoy them as much as we do!
Burger Bowl: A Healthy Twist on a Classic
I love how customizable these are. The recipe is based on my favorite burger toppings. But you can add or remove ingredients to suit your taste. You can even use ground turkey, chicken, or tofu to fit your diet.
Healthy Loaded Burger Bowl Recipe
Ingredients
Equipment
Method
- STEP ONE: Cook the French Fries : First, cook the french fries as the package says. For the best crispiness, use a baking sheet with parchment paper. Or, try an air fryer for even better results. Once the fries are done, set them aside to focus on the rest of the dish.
- STEP TWO: Brown and Season the Ground Beef: In a large pan over medium heat, add the lean ground beef. Mix in the onion powder, garlic powder, kosher salt, black pepper, and paprika. Cook, stirring often, until the beef is no longer pink and fully cooked, about five minutes.Drain any excess grease using a paper towel.

- PRO TIP: For added depth, you can mix in a splash of worcestershire sauce while cooking.
- STEP THREE: Make the Salad Dressing In a small bowl, mix together mayonnaise, ketchup, diced dill pickles, yellow mustard, garlic powder, and onion powder. Stir until it's smooth and the color is even.

- PRO TIP: To change the thickness, add a teaspoon of pickle juice for more tang. Or, add a splash of olive oil to make it thinner.
- STEP FOUR: Assemble the Salad BasePut the romaine lettuce in a big bowl or serving dish. Spread it out so it's even. This will hold all the toppings.
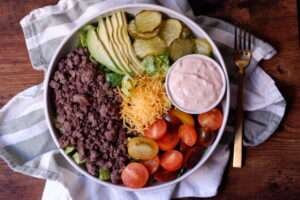
- STEP FIVE: Arrange the ToppingsArrange the juicy tomatoes, thinly sliced red onion, dill pickle chips, and freshly shredded sharp cheddar around the edges of the fresh lettuce base. This setup allows for an easy and visually appealing presentation.
- STEP SIX: Add the Cooked ComponentsTop the salad with the cooked ground beef and the crispy french fries, distributing them evenly across the bowl. This creates the hearty, satisfying layers of the burger bowl. which will give you a Internal Happiness as you are crafting your dish.
- STEP SEVEN: Drizzle the DressingUsing a spoon or a mason jar with a drizzle top, pour the homemade burger sauce over the salad. Adjust the amount based on personal preference, and serve immediately.


Notes
ADDITIONAL TIPS
- To keep ingredients crisp, store elements like the french fries and dressing separately in airtight containers if making ahead.
- For a twist on this recipe, consider substituting the french fries with roasted sweet potatoes.
- Serve with additional favorite burger toppings like crispy bacon or avocado slices for a more customizable dish.
How To Serve This Burger Bowl
Make your burger bowl even better with sides that match its bold flavors. Try air fryer sweet potato fries for a nice contrast. Their sweetness complements the savory flavors of the bowl. Or, add pineapple coleslaw for a tangy, crunchy touch. It helps balance the richness of the burger.How To Store Your Burger Bowl
MAKE AHEAD: You can prepare the cooked ground beef, homemade burger sauce, and chopped romaine lettuce ahead of time. Store each component separately in airtight containers in the fridge. Avoid assembling the full bowl until just before serving to keep ingredients like the french fries crispy and the lettuce fresh. IN THE FRIDGE: Store any leftovers in separate airtight containers. Keep the lettuce, dressing, and toppings separate to prevent sogginess. Properly stored, the ingredients will last for up to three days. Combine just before serving for the best texture. REHEATING: To reheat the ground beef, make sure it is fully thawed if previously frozen. Thaw the beef by transferring it to the fridge and allowing it to sit overnight.Once thawed, reheat in a microwave in 30-second increments, stirring between each round, or warm it in a large pan over medium heat. For french fries, use an air fryer or oven to regain their crispiness. Avoid microwaving the fries, as they may become soggy.

Nutrition
Calories: 470kcal | Carbohydrates: 8g | Protein: 27g | Fat: 37g | Saturated Fat: 14g | Cholesterol: 103mg | Sodium: 606mg | Potassium: 692mg | Fiber: 4g | Sugar: 2g | Vitamin A: 3123IU | Vitamin C: 12mg | Calcium: 196mg | Iron: 3mg
Nutrition information is automatically calculated, so should only be used as an approximation.
Tools & Equipment I used to Make this Recipe which I Felt Best for Cooking
- Air Fryer :

- LESS FAT: Now enjoy guilt-free food. Air fry with up to 75% less fat than traditional frying methods. Tested against han…
- WIDE TEMPERATURE RANGE: 105°F-400°F allows you to gently remove moisture from foods or quickly cook and crisp foods with…
- FAMILY-SIZED CAPACITY: 4-quart ceramic-coated nonstick basket and crisper plate fit 2 lbs of French fries.
2. Grill Pan :

- Nonstick & Easy to Clean: The Switzerland ILAG nonstick coating is very effective in preventing anything from sticking t…
- Sturdy & Durable: This grill pan is made of die cast aluminum, stury and no warp. The bakelite handle features comfortab…
- Versatile Griddle Pan: This is a versatile tool to sear, sauté, bake, broil, braise or fry. You can cook steak, bacon, g…
3. Knife :

- For home chefs & professionals. This Fibro Pro chef’s knife has been the top choice of both home chefs and professionals…
- Fit for all tasks. Designed to handle kitchen tasks both big and small, This durable knife’s razor sharp and laser-teste…
- Easy handling. Each knife features an ergonomic handle made from thermoplastic Elastomer (TPE) for a non-slip grip – eve…
4. Skillet :

- 𝐃𝐮𝐫𝐚𝐛𝐥𝐞 𝐂𝐨𝐧𝐬𝐭𝐫𝐮𝐜𝐭𝐢𝐨𝐧: The hard anodized exterior and forged design is built to stand the test of time. Titanium Non-stic…
- 𝐄𝐯𝐞𝐫𝐲𝐭𝐡𝐢𝐧𝐠 𝐲𝐨𝐮 𝐧𝐞𝐞𝐝: Our set includes 10 inch and 12 inch frypans, making it perfect for frying, sautéing, and searing w…
- 𝐓𝐡𝐞𝐫𝐦𝐨-𝐒𝐩𝐨𝐭 𝐓𝐞𝐜𝐡𝐧𝐨𝐥𝐨𝐠𝐲: Our unique heat indicator turns solid red when pans are properly preheated so you’ll know exactl…
The following list of cooking tools is personally tried and tested—each one carefully chosen to make preparing this recipe easier, quicker, and more enjoyable.
Some of our NEW Recipe We Suggest you to Refer
- Vegan Instant Pot Chili (High-Protein & Hearty) Meal Prep
- Vegan Teriyaki Tempeh Bowls – Simple & Delicious Recipe
- Delicious One-Pot Vegan Lentil Dal – Easy Weeknight Recipe
- Vegan Creamy Tuscan White Bean Pasta: Quick & Creamy
Disclaimer: This post may contain affiliate links. As an Amazon Associate, This means that if you click on a link and make a purchase, I may receive a small commission at no extra cost to you. I only recommend products I personally use and trust. Thank you for supporting this blog!