Table of Contents
ToggleI still remember the first time I browned chicken in a pan and watched a simple sauce turn it into comfort. That warm, buttery scent filled my small kitchen and felt like a hug after a long day. I’m sharing this recipe because it gives that same cozy payoff with minimal fuss.
This recipe is for anyone who wants bold flavor fast—weeknight cooks, busy families, and anyone who craves a restaurant-style sauce at home. I’ll show you how to get a golden sear, a silky sauce with garlic and honey, and smart serving ideas like mashed potatoes or rice.
In this guide I promise the full package: exact ingredients and measurements, the tools I use, clear step-by-step cooking, and tips for storage and reheating so leftovers stay juicy. If you want a reliable, saucy meal that feels special with little cleanup, you’re in the right place.
Why I’m Obsessed with This Skillet Recipe Right Now
When I need a fast, impressive dinner, this one-pan method is my go-to. It hits the sweet spot: bold flavor with minimal time and cleanup. The process is simple enough for a busy weeknight but still feels special.
I sear seasoned pieces about 5–6 minutes per side to build a deep, golden crust. That fond is the backbone of the sauce when I deglaze the pan. Then I bloom garlic just 30 seconds, add broth and honey, and let the sauce reduce for 5–7 minutes until glossy.
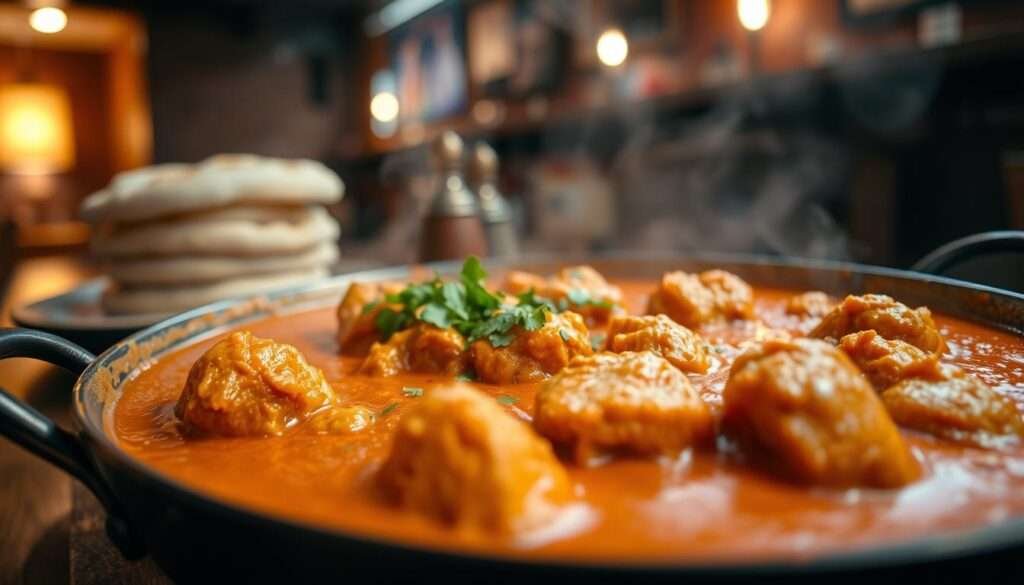
- I love that this roadhouse butter chicken vibe comes from pantry staples and one pan.
- The sauce balances rich, sweet, and savory notes in minutes, so dinner is ready fast.
- A pinch of paprika warms the dish; smoked paprika is an option when I want extra depth.
- For a steakhouse finish I sometimes melt cheese and stir in caramelized onions.

Why You Will Love This Recipe
What sold me was how quickly pantry staples turned into a sauce that felt indulgent and comforting. It’s a true weeknight hero that still reads as special when guests arrive.
Fast, family-friendly, and naturally gluten-free
I can get dinner on the table in about 25–30 minutes, and picky eaters usually approve. Use standard broth and seasonings and the sauce stays naturally gluten-free without any flour.
One-pan cleanup with big restaurant-style flavor
One pan means less time at the sink and more time at the table. The sear, deglaze, and simmer steps build deep flavor fast, so the end result tastes like you spent far more time on it.

Beginner-friendly but impressive enough for guests
The method is simple: season, sear, deglaze, and simmer. It scales well—cook in batches to preserve a strong sear when serving a crowd.
I also love that it reheats beautifully with a splash of broth, which makes it ideal for meal prep. For pairing ideas and a different spin, try this Parmesan-crusted sheet pan option for a complementary meal: parmesan-crusted chicken sheet pan dinner.
- Weekday-fast and family-approved flavors.
- No flour needed—GF by default with pantry staples.
- Scales easily; mild for kids or spiced for adults.
- Reheats well for lunches and meal prep.
Tools & Preparation Essentials
A few smart pieces of gear get this dish from pantry to plate without fuss. I’ll quickly describe what I use and why, then cover the small prep steps that make a big difference in browning and sauce texture.
Pan choice and why it matters
I reach for cast iron when I want that deep sear and fond. Nonstick is my pick for easy release and cleanup when I’m making a quick weeknight version.
Either way, a large skillet prevents crowding so the chicken browns instead of steaming. That space is the foundation of a glossy sauce.
Essential tools and measures
- Tongs — to flip without tearing and to baste with the sauce.
- Small mixing bowl and measuring spoons — for a consistent butter-mix and accurate seasoning.
- Pre-measured garlic, honey, and broth — so the sauce comes together without scrambling mid-cook.

Prep steps for even cooking
I pat the chicken dry and let it rest at room temp for 15–20 minutes. This helps it brown evenly and hit 165°F faster when finished.
I also keep the heat steady to protect the butter and garlic from scorching, and I always deglaze thoroughly to lift the browned bits into the sauce.
| Tool | Why I use it | When to choose |
|---|---|---|
| Cast iron | Deep, even sear and great fond | When I want a restaurant-style crust |
| Nonstick pan | Easy release and quick cleanup | Weeknight meals or delicate browned pieces |
| Large skillet | Prevents crowding; keeps moisture low | Family-sized batches or thicker pieces |
Importance of Each Tool & Usages [Table]
Good gear turns the same ingredients into a reliable, glossy finish every time. I pair a thoughtful pan choice with a few simple utensils to control browning and build the sauce cleanly.
I use a cast iron or nonstick skillet depending on crust needs. Tongs protect the crust and let me baste while the pieces finish. A small mixing bowl holds the butter mixture so I can add it in one smooth motion.
Measuring spoons keep paprika, pepper, and salt balanced. A wooden spoon lifts fond during deglazing without scratching the pan. These choices speed prep and make cleanup easier.

| Tool | Why it matters | How I use it | Impact on final dish |
|---|---|---|---|
| Cast iron / Nonstick skillet | Even sear vs easy release | Cast iron for deep crust; nonstick for quick weeknights | Controls browning and pan fond for the sauce |
| Tongs | Safe flipping and basting | Flip pieces and spoon sauce over chicken while simmering | Protects crust and keeps pieces intact |
| Mixing bowl | Combines fat, honey, and spices | Mix butter-honey-spice blend before adding | Ensures even seasoning and glossy glaze |
| Measuring spoons & wooden spoon | Precise seasoning; gentle deglazing | Measure spices; use wooden spoon to lift browned bits | Keeps flavor balanced and sauce silky without scratches |
Exact Ingredients & Measurements [Table]
Clear, exact ingredient amounts take guesswork out of this one-pan favorite. Below is a compact, scannable list that covers the core sauce, primary protein, and a few optional add-ins.

| Ingredient | Amount | Use | Notes / Swaps |
|---|---|---|---|
| Boneless, skinless chicken breasts (or thighs) | 4 pieces | Main protein | Use thighs for juicier results; adjust cook time |
| Butter | 4 tbsp (divided) | 2 tbsp for sear, 2 tbsp for sauce | Olive oil ok for sear; keeps 2 tbsp for glaze |
| Garlic, minced | 4 cloves | Flavor base | Use 1 tsp garlic powder in a pinch |
| Chicken broth | 1 cup | Deglaze and build sauce | Bouillon + 1 cup water works if broth is out |
| Honey | 2 tbsp | Sweet glaze in sauce | Swap maple syrup or 1 tbsp brown sugar + 1 tbsp water |
| Paprika | 1 tsp | Warm color and mild heat | Smoked paprika optional for depth |
| Dried parsley | 1 tsp | Light herb note | Garnish with chopped fresh parsley if available |
| Salt & cracked black pepper | To taste (approx. 1 tsp salt; 1/2–1 tsp pepper) | Seasoning | Adjust for sodium in broth |
| Optional toppings | Shredded cheddar or Monterey Jack; caramelized onions | Finish / richness | Add after simmering; melt briefly under lid |
I include small swaps so you can deliver consistent results even when a pantry item runs out. Notes in the table point out which butter goes to sear versus which goes into the sauce, and I flag easy alternatives for honey and broth.
Texas Roadhouse Butter Chicken Skillet
I nail this dish by focusing on heat and timing so the crust and sauce both shine. I keep steps short and clear so you can follow along while you cook.
Season and sear over medium heat to golden brown
I season skinless chicken on both sides with salt, cracked black pepper, and paprika so the crust carries flavor into the sauce.
I melt 2 tbsp butter in a large skillet over medium heat and sear chicken 5–6 minutes per side until golden brown, then remove the breasts to rest.
Deglaze and build the sauce: butter, garlic, honey, broth
I drop the heat, melt the remaining 2 tbsp butter, and bloom garlic about 30 seconds. I add 1 cup broth and 2 tbsp honey, scraping up every browned bit to enrich the sauce.
Simmer, glaze, and optional cheese-onion finish
I return the chicken and simmer 5–7 minutes until the sauce slightly thickens and coats the spoon. For a steakhouse finish I add caramelized onions and shredded cheese, cover briefly to melt, then garnish with parsley.
Doneness cues: 165°F internal temp and silky sauce
I check doneness with a thermometer (165°F). The sauce should be glossy and cling to the chicken before serving.

| Step | Time | Cue |
|---|---|---|
| Sear chicken | 5–6 minutes per side | Deep golden brown crust |
| Simmer in sauce | 5–7 minutes | Sauce slightly thick, glossy |
| Final finish | 1–2 minutes | Cheese melted, thermometer 165°F |
Step-by-Step Instructions with Pro Tips
I focus on heat control and spacing first; those two things make the rest almost effortless. Follow tight timing and simple cues for a glossy sauce and even cooking.
Set the pan to medium heat and sear without crowding
I preheat a large skillet over medium heat, then pat breasts dry and let them sit at room temperature for 15–20 minutes. This helps them brown evenly and shortens cook time.
I give each piece space so I sear chicken instead of steaming it. Don’t flip too soon—let a deep crust form for 5–6 minutes per side.
Bloom garlic without burning; deglaze for flavor
After removing the pieces, I lower the heat slightly before adding butter and garlic so the garlic blooms but does not scorch.
I deglaze with 1 cup broth, scraping the fond with a wooden spoon to pull all the browned bits into the sauce. Then I whisk in 2 tbsp honey and bring the sauce to a light simmer.
Return the meat, spoon the sauce, and rest before serving
I return the breasts to the skillet and spoon sauce over each piece. Simmer until the internal temperature reaches 165°F and the sauce clings to the spoon.
I cut the heat to skillet low for about a minute and baste for a glossy finish. Rest the pieces off heat for a couple of minutes so juices settle, then plate and spoon extra sauce over the top.
| Step | Key Cue | Pro Tip | Time |
|---|---|---|---|
| Sear | Deep golden crust | Preheat pan; space pieces | 5–6 minutes per side |
| Deglaze & simmer | Fond lifted, light simmer | Lower heat for garlic; scrape thoroughly | 5–7 minutes |
| Finish & rest | 165°F; glossy sauce | Baste on low heat; rest 2–3 minutes | 1–3 minutes |
Serving Ideas, Variations, and Sides
I plan sides so the sauce becomes the star with every forkful. A warm bed of mashed potatoes soaks up the glaze, and steamed rice does the same for a lighter plate.
I often serve it over mashed potatoes, rice, or buttered noodles. Toast or thick cut bread works great to mop up extra sauce at dinner.
- I like roasted veggies or green beans when I want a bright, lighter side.
- For a quick salad, crisp greens add contrast to the glossy sauce.
- If I want extra sauce at mealtime, I double the butter-honey-broth mix so sides are generously coated.
Easy flavor twists and veg add-ins
To change the flavor, I swap in smoked paprika or add a pinch of cayenne for heat. A splash of cream or coconut milk softens the sweet-savory mix for a richer finish.
I also fold in mushrooms for earthy depth, stir in fresh spinach toward the end, or add sliced zucchini for a gentle, saucy bite. A squeeze of lemon brightens the whole dish, and I finish with chopped parsley for color.
| Side | Why it works | Best pairing tip |
|---|---|---|
| Mashed potatoes | Absorbs sauce; adds creaminess | Use butter and a splash of milk for silkiness |
| Steamed rice | Neutral base that highlights flavor | Short-grain rice holds sauce well |
| Roasted vegetables | Offers texture and brightness | Toss with olive oil and a pinch of paprika |
| Toasted thick bread | Great for mopping sauce | Serve warm with garlic rubbed on top |
Storage & Reheating Instructions
A good storage routine makes this dish feel like fresh dinner all over again. Cool the skillet pieces fully at room temperature before packing to keep the sauce from becoming watery.
I let the chicken cool completely, then transfer it into an airtight container so condensation doesn’t dilute the glaze. Pack the sauce alongside the breasts rather than pouring it on top if you plan to freeze.
Fridge, freezer timelines, and thawing
Refrigerate in an airtight container for 3–4 days. For longer storage, freeze up to 2 months.
If frozen, thaw overnight in the fridge before reheating. This prevents temperature shock and keeps the breasts tender.
Gentle reheating for best texture
Reheat on low in a skillet low and add a splash (about 1/4 cup) of broth to loosen the sauce and restore gloss. Warm slowly until just heated through—avoid boiling to keep the meat moist.
- If pressed for time, microwave in short one-minute intervals at medium power, stirring the sauce between bursts.
- Avoid high heat; too much heat tightens the breasts and separates the sauce.
- After reheating, freshen with chopped parsley and taste for seasoning before serving over potatoes or rice.
| Storage | Timeline | Reheat tip |
|---|---|---|
| Fridge (airtight container) | 3–4 days | Skillet low + 1/4 cup broth |
| Freezer | Up to 2 months | Thaw overnight, reheat gently |
| Quick microwave | Immediate | Medium power, short intervals, stir between |
For a quick reheated dinner, pair with warm potatoes or steamed rice. For a bright finish, squeeze a little lemon and sprinkle parsley before serving. If you want a tangy twist, try the zesty lemon-pepper version here: zesty lemon-pepper chicken.
Final Thoughts & More Skillet Comforts to Try
This recipe has become my go-to when I want big, comforting flavor with almost no fuss. It gives a true roadhouse butter chicken vibe in one pan, perfect for a weeknight meal or a low-effort dinner that still feels special.
I love how flexible the method is: keep it simple on Tuesday, or add cheese and caramelized onions when I want to impress. The result is a glossy, lick-the-spoon finish that makes the whole family smile.
If you want more skillet comforts, try these similar recipes on cuisines-corse.com: Creamy Garlic Chicken Skillet, Honey Butter Chicken Bites, Paprika Chicken with Pan Sauce, Buttery Lemon Chicken Thighs, Cheesy Skillet Chicken and Rice, Garlic Herb Chicken Breasts, and Honey Garlic Butter Shrimp (skillet).
Save this recipe, make it soon, and tell me your favorite side to serve with it. I can’t wait to hear how you make this dish your own at home.