Table of Contents
ToggleI still remember the night I turned a noisy taco stand into a cozy skillet dinner for my family. The kids loved the crunch, I loved how easy cleanup was, and we all kept reaching for seconds.
This post tells that story and gives you everything you need to bake a crowd-pleasing casserole tonight. Expect a clear tools list, a tidy ingredients table, step-by-step directions, and foolproof storage and reheating tips.
I offer two oven routes: a quick 375°F skillet bake for a fast sizzle and a 350°F cast-iron method for a classic finish. Both use seasoned ground beef, black beans, tomato sauce, creamy cheese, and a crunchy chip topping for texture.
Make-ahead and freezer-friendly options are covered, plus pro tips on when to add chips and cheese so every serving stays crisp and melty. Final thoughts and similar dishes appear on cuisines-corse.com to help plan your next dinner.
Why I’m Craving This Walking Taco Casserole Right Now
When I need dinner fast, I reach for this one-pan twist on taco night that always delivers. It blends familiar seasoning, melty cheese, and a crunchy chip finish so it feels like a party but cooks like a weekday meal.
All the taco vibes, none of the fuss
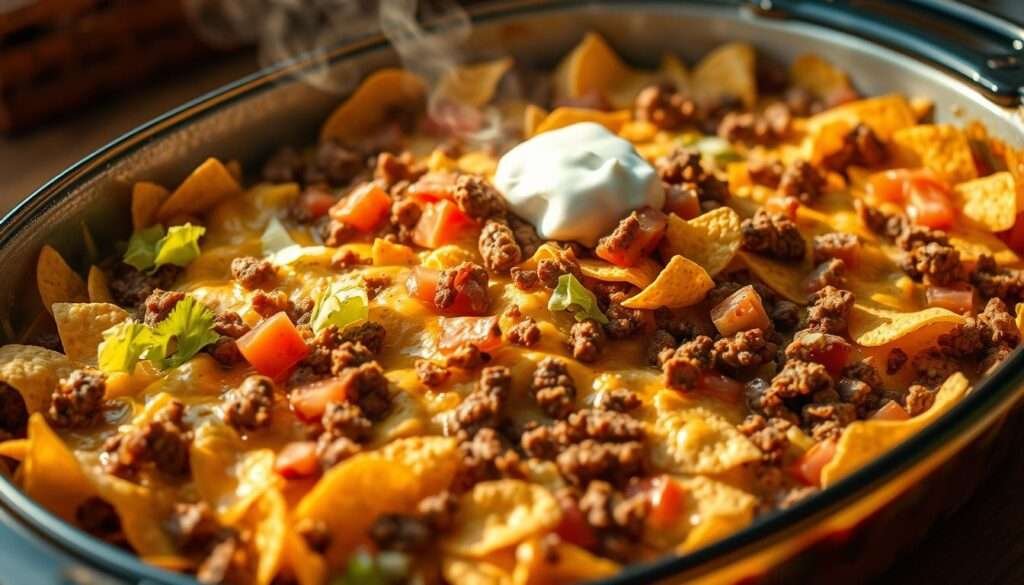
I love that this walking taco casserole captures savory ground beef, beans, and cheese without juggling individual bags. One skillet or casserole pan means less prep and almost no cleanup.
Weeknight-ready in about 30 minutes
This is a true 30-minute bake. Brown the beef, stir in seasoning and beans, top with cheese, then finish with crushed Fritos for crunch. Choose 375°F for a quick 10–15 minute sizzle or 350°F for a 15-minute cast-iron finish.
Make-ahead and freezer-friendly for busy days
I often assemble ahead and chill, then bake when I’m ready. For freezing, I skip the chips until bake time; if you cook from frozen, add about 15 minutes to the bake time.
- Familiar taco seasoning keeps flavor simple and family-friendly.
- Add toppings fast—lettuce, tomato, cilantro, avocado—for freshness.
- Leftovers reheat well; add fresh chips before warming to restore crunch.
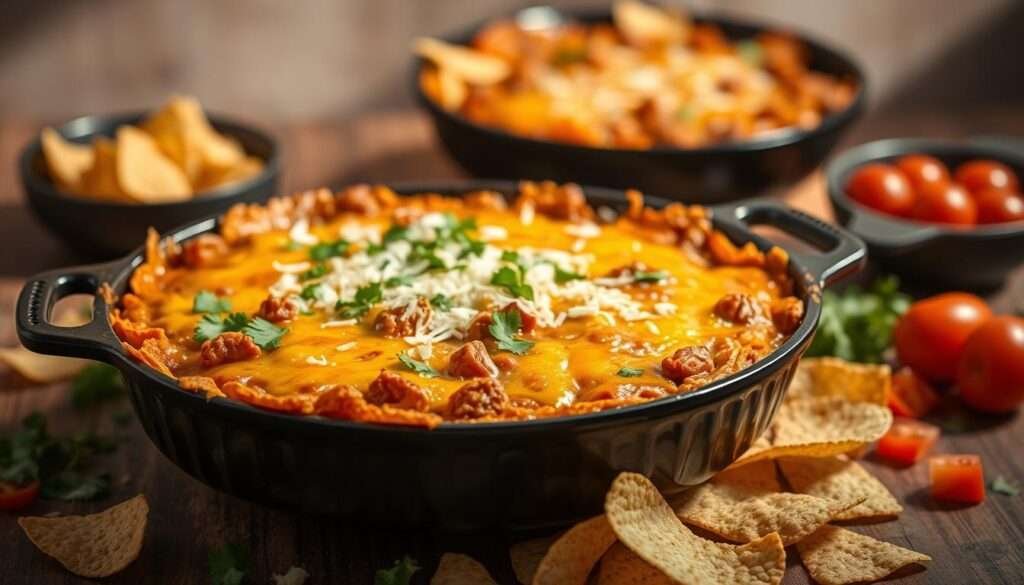
Indulge in the ultimate comfort food with our Walking Taco Casserole recipe
This dish started as a fridge-forage project and became a go-to for busy nights. I built two clear paths so you can pick creamy or bright flavors depending on mood and pantry stock.
What makes my version special in the present kitchen
I keep the ingredients pantry-friendly: lean ground beef, onions, beans, tomato sauce or salsa, and cheese. That means you can pull this together any night without a special grocery run.
I use an oven-safe skillet or cast iron so the base goes from stovetop to oven with no extra pans. One route is a 375°F skillet method with cream cheese and tomato sauce for silkiness. The other is a 350°F cast-iron bake that leans on salsa, green chilies, cumin, and smoked paprika for a brighter profile.
To protect crunch, I time the Fritos finish so chips stay crisp on top while cheese melts below. I balance seasoning with either a homemade blend or a packet, and I adjust heat by picking mild or medium salsa and cutting back on chili powder.
| Feature | Creamy Skillet (375°F) | Cast-Iron Bake (350°F) |
|---|---|---|
| Main additions | Cream cheese, tomato sauce, black beans | Salsa, diced green chilies, cumin |
| Texture tip | Stir in cheese for silkiness; top with Fritos late | Layer cheese, bake, then add chips for crunch |
| Best for | Fast weeknight sizzle | Classic casserole finish for sharing |
For a related twist, try this chicken burrito casserole if you want a lighter protein swap: easy chicken burrito casserole.
Tools and Preparation
I like to gather my tools first so the stove-to-oven handoff is seamless. A quick setup saves time and keeps every step focused on flavor.
What I set out on the counter
I place an oven-safe skillet or cast iron, a sturdy spatula, and measuring cups and spoons within reach. I also chop an onion and put out my taco seasoning, drained black beans, and grated cheese.

Quick prep timeline before the oven heats
- Preheat the oven to 375°F for the skillet-to-oven pan or 350°F for the cast-iron route so it’s ready when the filling is done.
- Dice onions finely so they soften fast and blend into the ground beef base.
- Drain and rinse black beans, grate cheese, and portion chips so you can add them at the right time.
- Line up spices or a taco packet and keep oven mitts near the handle before you transfer the casserole.
- Keep heat at medium to soften onions, then raise it to brown the ground efficiently without steaming.
Importance of Each Tool & usages in Table format
I pick gear that helps me control texture, speed, and flavor. Good tools make it easy to get a browned base, a melty middle, and a crisp top.
How each item helps me nail results

| Tool | Why I use it | How it changes results |
|---|---|---|
| 10″ cast-iron or oven-safe skillet | Browns beef evenly and moves straight to the oven | Better sear, deeper flavor, even bake for the casserole |
| 9×9 or 9×13 casserole dish (optional) | Assemble ahead and refrigerate; good air flow in oven | Smoother set, consistent timing when baking from cold |
| Firm spatula & measuring cups/spoons | Breaks up meat, spreads layers, measures seasoning | Uniform texture, balanced seasoning, even cheese melt |
| Mixing bowl for toppings & foil | Organizes fresh garnishes; foil protects while reheating | Faster plating and moist reheats without burning the top |
| Kitchen scale (optional) & chip measure | Precision for cheese and chips so crunch is balanced | Consistent portions; chips complement, not overwhelm |
- I preheat the oven fully so cheese melts and fillings bubble without overcooking.
- I manage stovetop heat to avoid greasy spots and to bloom seasoning properly.
- Reserve chips until the end for a crisp top and add foil when reheating to keep moisture.
Exact Ingredients in Table format with precise amounts
I keep an exact ingredient list on hand so I can assemble this one-pan dinner without guessing. Below are precise amounts for a 9×9 or 10″ skillet bake plus quick pantry swaps if you’re missing something.
| Ingredient | Amount | Notes |
|---|---|---|
| Ground beef (90% lean) | 1 lb | Balanced fat for flavor without excess grease |
| Olive oil | 2 tsp | For softening onions and blooming spices |
| Yellow onion, finely diced | 1/2 medium (1/2 cup) | Softens quickly, adds savory base |
| Kosher salt, garlic powder, chili powder, smoked paprika | 1 tsp, 1 tsp, 1/2 tsp, 1/2 tsp | Or 1 packet taco seasoning + 1/3 cup water |
| Black beans, drained | 1 (15-oz) can | Pinto or kidney beans swap fine |
| Tomato sauce or salsa | 1 (15-oz) can or 1 cup salsa | Smooth (sauce) or chunky (salsa) |
| Cream cheese (optional) | 2 tbsp | Adds light cream for richness |
| Shredded cheese (Mexican blend or Colby Jack) | 2 cups | Melts smoothly for a gooey finish |
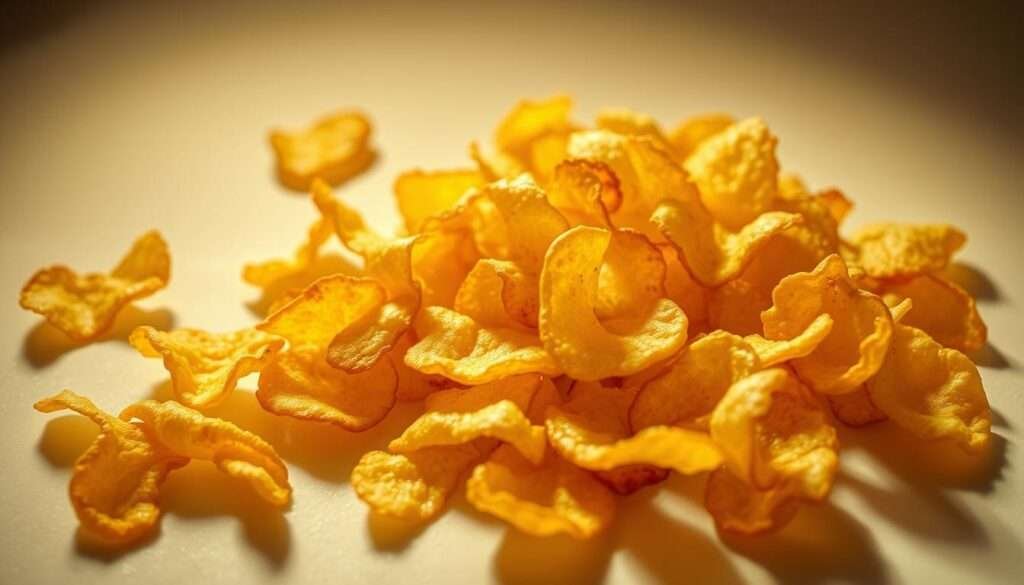
| Fritos or corn/tortilla chips | 2 cups | Corn chips or tortilla chips both work |
Smart swaps from my pantry
- Use 1 packet taco seasoning + 1/3 cup water instead of individual spices for speed.
- Swap pinto beans if you don’t have black beans; texture stays similar.
- Replace Fritos with crushed tortilla chips for slightly milder corn flavor.
- Omit cream and add extra salsa if you want a brighter, less creamy finish.
Step-By-Step Instructions
Start by preheating so your skillet goes from stove to oven without wasted minutes. I set the oven to 375°F for the quick route or 350°F for the cast-iron finish before I touch a pan.
Skillet-to-oven method (375°F) for extra sizzle
- Heat 2 tsp oil and soften the onion about 3 minutes over medium heat.
- Raise heat and brown 1 lb ground beef about 5 minutes, breaking it up. Season with salt, garlic powder, chili powder, and smoked paprika as it cooks.
- Stir in drained beans and tomato sauce; simmer 5 minutes so flavors meld.
- Remove from heat and fold in 2 tbsp cream cheese plus 1 cup shredded cheese so the interior turns silky.
- Smooth the beef mixture, sprinkle the remaining 1 cup cheese on top, then add chips. Bake 10–15 minutes at 375°F until edges are bubbling and cheese melted.
Cast-iron route (350°F) for a classic finish
- Brown the ground beef and onions, then add taco seasoning plus 1/3 cup water; simmer 5 minutes.
- Mix in beans, salsa, diced green chilies, cumin, and smoked paprika; stir to combine.
- Top the mixture with cheese and chips before placing in a 350°F oven. Bake about 15 minutes until cheese is melted and bubbly.
When to add chips and get cheese melted, gooey, and crisp
I add chips on top right before baking so they stay crisp. For extra crunch, reserve a handful and sprinkle them on during the last 3–5 minutes of bake time.
| Method | Pre-bake steps | Bake temp & time |
|---|---|---|
| Skillet-to-oven | Saute onion 3 min; brown beef 5 min; simmer 5 min; fold in cream cheese | 375°F — 10–15 minutes until bubbling and cheese melted |
| Cast-iron bake | Brown beef; add seasoning + water; stir in salsa and beans | 350°F — ~15 minutes until cheese is bubbly and top is set |
Pro Tips: Crunch Control, Variations, and Make-Ahead Magic
A little planning makes the difference between soggy chips and a delightfully crisp top. I hold back a fresh handful of chips for the last five minutes so each portion stays crunchy while the cheese melts beneath.
I like mixing fritos with crushed Doritos or tortilla strips for contrast. That blend gives one bite a salty crunch and the next a flavored kick. It’s a great way to use partial bags and keep texture layered.
- I assemble the filling ahead but skip chips and the final cheese. Refrigerate covered, then top and bake for best texture.
- To lighten it, I use lean ground meat, extra beans, and modest cheese in the base while keeping a melty top layer.
- To add heat, I stir in diced jalapeños, green chilies, or swap in a medium-hot salsa for more kick.
- For leftovers, I reheat and add a fresh chip layer to restore crunch before serving.
| Goal | Quick fix | Why it works |
|---|---|---|
| Keep chips crisp | Add a handful in last 5 minutes | Prevents steam softening from the filling |
| Layer flavor | Mix fritos + Doritos + tortilla strips | Combines salty, seasoned, and light corn textures |
| Make ahead | Assemble filling cold; add chips before baking | Maintains peak texture and shortens bake time |
| Lighten or spice | Use extra beans, lean meat, or add jalapeños | Balances calories and allows control over heat |
Taco Toppings & Serving Ideas
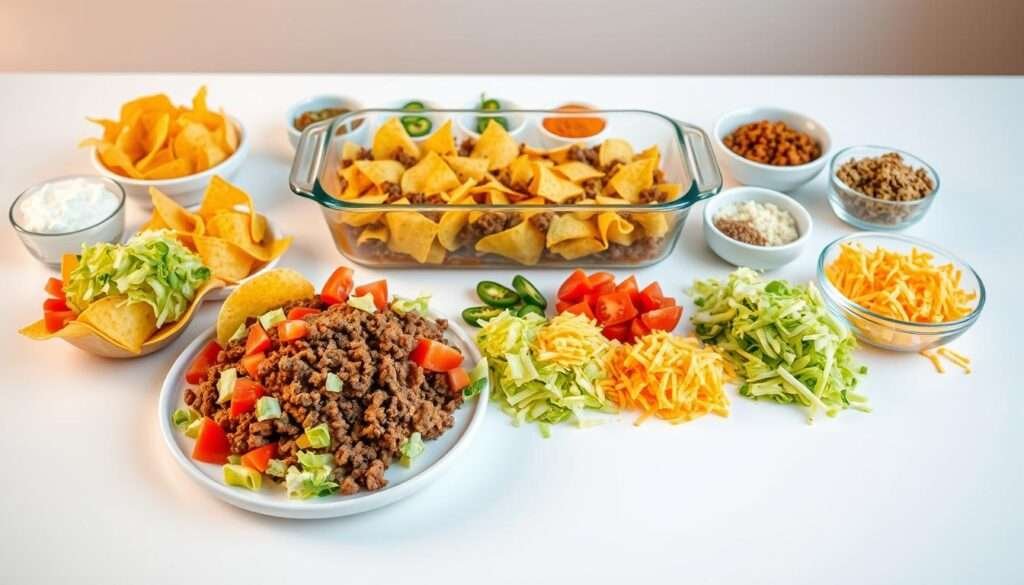
Lay out a few fresh bowls and you turn a simple bake into a lively, customizable meal. A small toppings bar keeps things casual and lets each person finish a hot casserole just how they like it.
The fresh bar
I set out shredded lettuce, diced roma tomatoes, and bright cilantro for crisp color and crunch.
I also fan sliced avocado on a plate so guests can add creamy bites to their taco portions.
Saucy extras and mix-ins
- I put out sour cream, chunky salsa, guacamole, and hot sauce so everyone controls heat and tang.
- Quick-pickled jalapeños and black olives bring salty, briny pops that lift the savory filling.
- I keep a bowl of tortilla chips on the side for scooping and extra crunch at the table.
- A small cup of seasoned corn—street-corn style or simple kernels with lime—adds sweet-savory contrast.
| Build | What I offer | Why it works | Serving idea |
|---|---|---|---|
| Fresh | Shredded lettuce, tomatoes, cilantro, avocado | Adds crunch, acidity, and coolness to hot casserole | Let guests top their portion for texture balance |
| Saucy | Sour cream, salsa, guacamole, hot sauce | Controls creaminess, spice, and brightness | Small spoons so people mix flavors freely |
| Pops & sides | Pickled jalapeños, black olives, tortilla chips, corn | Briny, salty, and crunchy notes that wake up each bite | Serve chips on the side; offer rice or salad as a full meal |
| Finish | Extra cheese, lime wedges, cilantro | Final hit of richness and acid to brighten plates | Keep a small cheese bowl and lime on the table |
I like this spread for casual gatherings. It turns a single casserole into a mini taco bar and keeps everyone engaged. For a fuller meal, add Mexican rice, a simple salad, or cauliflower rice for a lighter plate.
Storage & Reheating Instructions
A quick cooling step saves texture and keeps flavors bright for later. I let the pan sit until it reaches room temperature before I cover or refrigerate.
Refrigerate safely in an airtight container
I transfer cooled portions into an airtight container and refrigerate. Stored this way, the casserole stays good for up to 3 days.
I label containers with the date and a short note about oven time so future me doesn’t guess.
Freeze unbaked or baked—what works best
For best crunch, I freeze unbaked versions without chips and keep extra cheese tucked in. Freeze up to 3 months.
To bake from frozen, I preheat the oven and add about 15 minutes to the normal time so it heats through.
Reheating notes and bringing back the crunch
I reheat covered at 350°F until the cheese melted and bubbling appears around the edges—that tells me it’s hot through.
To restore crispiness, I uncover near the end and add fresh chips for the last few minutes. If I need speed, I microwave, then finish in the oven for a few minutes to re-crisp the top.
| Step | Action | Why it helps |
|---|---|---|
| Cool | Bring to room temp before sealing | Prevents condensation that soggifies chips |
| Fridge | Store in an airtight container up to 3 days | Keeps flavor and texture steady |
| Freeze | Freeze without chips; label with date | Maintains crunch when baked later |
| Reheat | 350°F covered, then add chips uncovered | Heats through and restores top crunch |
For a different protein I like, try swapping to a chicken version like this chicken divan casserole for similar make-ahead convenience.
Time, Yield, and Nutrition Snapshot
I keep a simple timing plan so feeding a family never becomes a guessing game. This short snapshot helps me decide which oven route to use and how much to serve.
Servings, calories, and protein-forward details
I plan for about 30 minutes from start to finish. That includes browning, mixing, and a 10–15 minute bake at 375°F, or about 15 minutes at 350°F for the cast-iron method.
- Yield: roughly 6 servings — great for family dinner and next-day lunches.
- Calories per serving: roughly 418–620 depending on chips and cheese choices.
- Protein: about 26–53 g per serving thanks to ground beef and beans.
- Fat: ranges near 19–42 g; use lean beef and lighter cheese to lower totals.
- Carbs and sodium shift with chip type, beans, and seasoning; choose low-sodium beans when you can.
| Item | Quick stat | Why it matters |
|---|---|---|
| Total time | ~30 minutes | Fast enough for weeknights, choose skillet for speed |
| Servings | About 6 | Portions for dinner + leftovers |
| Nutrition range | 418–620 kcal; 26–53g protein; 19–42g fat | Adjust chips, cheese, and beef to meet goals |
Final thoughts and other comforting bites from cuisines-corse.com
I love how a simple skillet can turn pantry staples into a lively, shareable meal. This walking taco casserole wins when I time the chips at the end, balance seasoning, and pick either 375°F for a quick sizzle or 350°F for a gentler oven finish.
I always finish with fresh toppings—tomatoes, lettuce, and cilantro—to lift the rich beef and beans and to contrast the crunchy corn chips and melty cheese. It scales well for dinner with friends and reheats nicely for lunches.
Want more ideas? Try these similar dishes on cuisines-corse.com:
Cheesy Taco Skillet Bake
Easy Taco Pasta Casserole
One-Pan Beef Enchilada Casserole
Black Beans and Corn Fiesta Salad
Creamy Chicken Tortilla Bake