Table of Contents
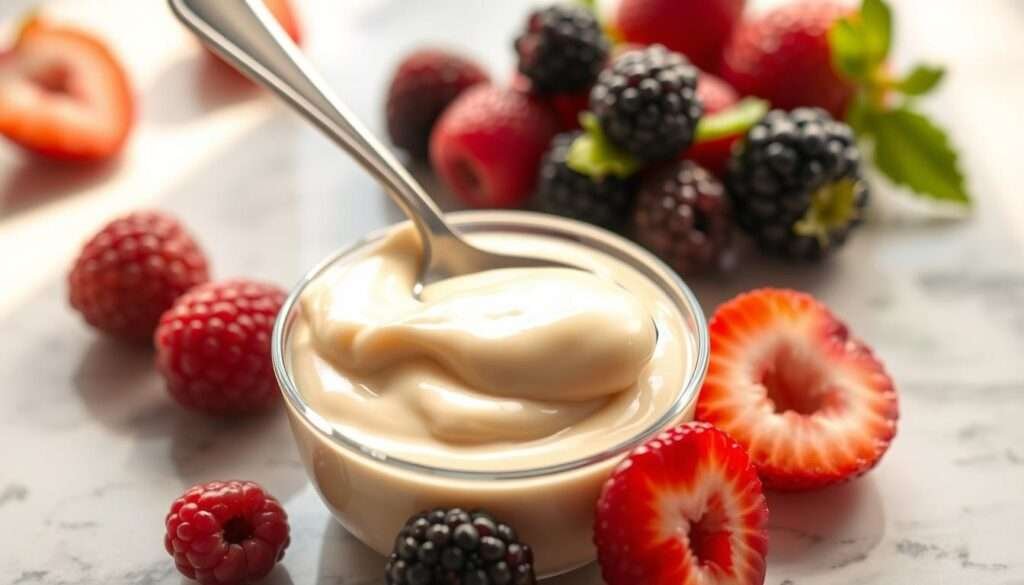
ToggleEver finish a tough workout and crave something sweet but still nutritious? I’ve been there. One evening, after lifting weights, I stared at my fridge, wanting a dessert that wouldn’t undo my progress. That’s when I whipped up my first batch of chocolate protein pudding—creamy, satisfying, and packed with 45g protein per serving.
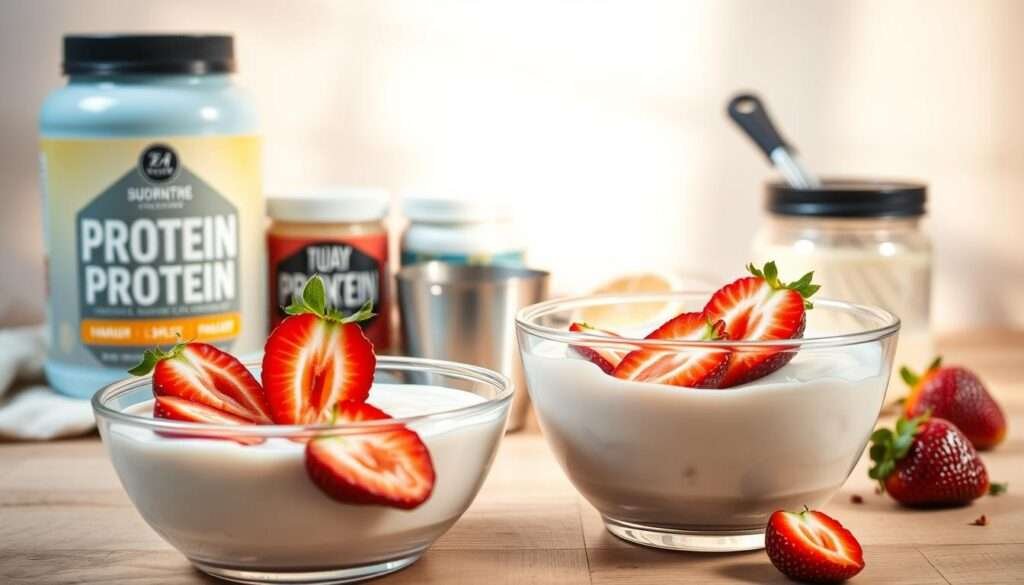
This recipe uses just five simple ingredients: Greek yogurt, protein powder, cocoa powder, maple syrup, and a splash of milk. It takes five minutes to prepare—no cooking required! Unlike store-bought options filled with additives, this version keeps things clean and customizable.
Whether you need a post-workout refuel or a guilt-free midnight snack, this treat fits the bill. Plus, with flavors like vanilla or strawberry, you’ll never get bored. Ready to dive in? Let’s get mixing!
Why You’ll Love This Protein Pudding
Tired of sacrificing flavor for fitness goals? This recipe changes everything. It’s the perfect blend of indulgence and nutrition, with 54g of high-protein satisfaction in every spoonful (thanks to casein powder!). Even the chocolate version clocks in at just 81 calories when made with Fairlife shakes.
Creamy, High-Protein, and Ready in Minutes
Forget store-bought options loaded with stabilizers. This version whips up in 5 minutes with ingredients you already know—Greek yogurt, cocoa, and a splash of milk. During testing, three variations (vanilla, chocolate, and strawberry) all scored rave reviews for texture and taste.
Compared to traditional pudding, it’s a game-changer: twice the protein, half the fat, and no refined sugar. Need more lean protein-packed meals? This pairs perfectly with savory dishes.
No Weird Ingredients—Just Real Food
The probiotics in Greek yogurt boost gut health, while maple syrup adds natural sweetness. At under $1 per serving, it’s a steal next to $3 supermarket cups. As Marissa, a fellow fitness enthusiast, put it: “My favorite protein pudding recipe—no bloating, all flavor!”
What Makes This Protein Pudding Special
What if your dessert could fuel muscle recovery while tasting like a treat? This recipe delivers 45 grams protein per serving—more than two eggs or a chicken breast. The magic comes from combining Greek yogurt with quality powder for maximum absorption.

More Power in Every Spoonful
Here’s how three versions stack up nutritionally:
| Flavor | Calories | Protein | Carbs | Fat |
|---|---|---|---|---|
| Chocolate | 210 | 45g | 12g | 3g |
| Vanilla | 195 | 43g | 10g | 2g |
| Strawberry | 225 | 44g | 15g | 4g |
Make It Your Own
Switch up the flavor with these easy tweaks:
- Chocolate lovers: Add cocoa powder and crushed almonds
- Peanut butter fans: Mix in powdered PB and banana slices
- Berry boost: Blend with freeze-dried strawberries
For plant-based diets, Nuzest powder creates the same creamy texture. I’ve found casein gives thickness, while whey stays lighter—perfect for vegan chocolate smoothie bowls when you want variety.
Protein Pudding Ingredients
Quality ingredients make all the difference in a guilt-free treat. Whether you prefer classic chocolate or a plant-based twist, each component adds flavor, texture, and nutrition. Here’s what you’ll need and how to customize it.
Exact Measurements for Every Version
This table compares three ways to make it—original, vegan, and a 2-ingredient shortcut:
| Version | Greek Yogurt | Protein Powder | Sweetener | Liquid |
|---|---|---|---|---|
| Original | 1 cup (Fage) | 1 scoop whey | 1 tbsp maple syrup | 2 tbsp milk |
| Vegan | 1 cup (Siggi’s) | ½ scoop Nuzest | 1 tbsp agave | 3 tbsp almond milk |
| 2-Ingredient | 1 cup vanilla yogurt | — | — | — |
Easy Substitutions for Dietary Needs
Swap ingredients without losing flavor or texture:
- Greek yogurt: Use full-fat for creaminess or dairy-free alternatives like coconut yogurt.
- Cocoa powder: Opt for Dutch-processed for richer chocolate taste.
- Maple syrup: Replace with honey or sugar-free syrup for lower carbs.
- Milk: Almond, oat, or cashew milk work equally well.
Pro tip: For a vanilla version, skip the cocoa and add 1 tsp vanilla extract. Brands like Clean Simple Eats offer great unflavored powders for neutral bases.
Step-by-Step Instructions
Want a dessert that’s both quick and packed with nutrients? Follow these easy steps to whip up a creamy treat in no time. Whether you’re a beginner or a pro, these tips ensure perfect results every time.
Whisk Ingredients Together
Start by adding Greek yogurt and cocoa powder to a bowl. Use a hand mixer for a lump-free texture—about 30 seconds on low speed. Gradually add protein powder while mixing to avoid clumps.
Pro tip: Room-temperature ingredients blend easier. If your mix is too thick, add milk one tablespoon at a time. For more high-protein recipes, check out our favorites.
Adjust Consistency and Chill
Transfer the mix to small jars or a serving dish. Chill for at least 30 minutes—this thickens it naturally. Too thin? A pinch of xanthan gum or chia seeds helps.
For grab-and-go prep, layer with granola in mason jars. Store in the fridge for 3-4 days. Enjoy cold for the best texture!
Tools You’ll Need
Simplify your prep with these must-have kitchen essentials. Whether you’re a beginner or a pro, the right tools ensure smooth mixing and perfect consistency every time.
Essential Mixing Tools
Start with a sturdy whisk and a deep mixing bowl. I prefer stainless steel bowls—they’re durable and easy to clean. For precise portions, measuring cups and spoons are non-negotiable.
Here’s a quick comparison of must-haves vs. nice-to-haves:
| Essential Tools | Optional Upgrades |
|---|---|
| Mixing bowl (KitchenAid) | Milk frother |
| Graduated measuring cups (OXO) | Kitchen scale |
| Rubber spatula | High-speed blender |
Storage and Prep Shortcuts
Wide-mouth mason jars double as mixing containers and storage. For travelers, the jar-shaking method works—just add ingredients, seal, and shake!
- Cleaning tip: Soak tools immediately to avoid dried-on powder.
- Budget swap: Use a fork if you don’t own a whisk.
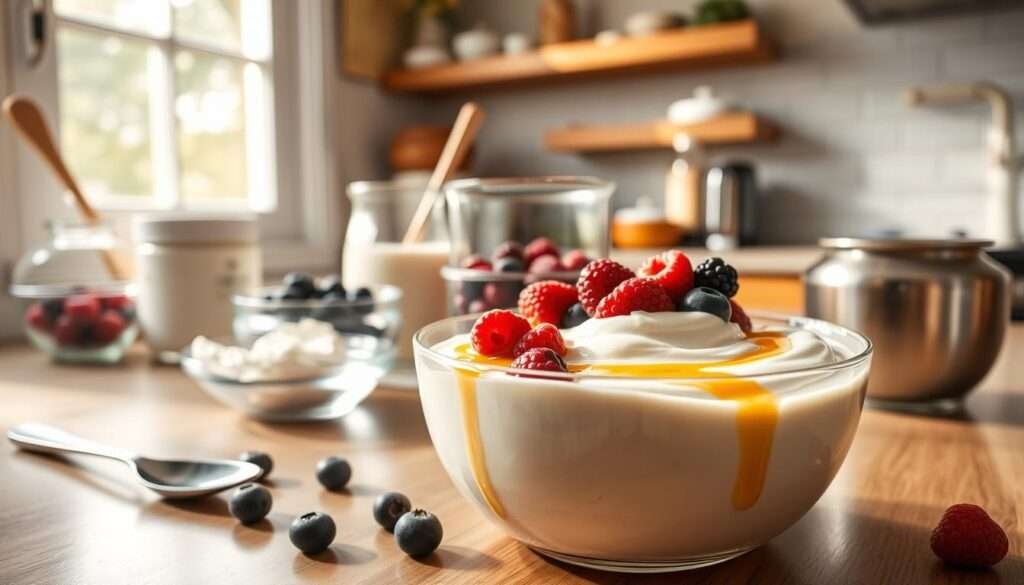
Creative Serving Ideas
Turn your healthy snack into a gourmet experience with these creative twists. A few toppings and smart prep tricks can make each bite feel indulgent.
Toppings to Try
Texture contrasts take this dish to the next level. Try these toppings for crunch or sweetness:
- Crunchy: Granola, Fiber One brownie crumbles, or toasted coconut flakes
- Creamy: Almond butter swirls or coconut whip
- Sweet: Dark chocolate chips, date caramel, or citrus zest
Here’s how flavors pair perfectly:
| Base Flavor | Best Toppings | Extra Boost |
|---|---|---|
| Chocolate | Crushed almonds + sea salt | Dash of cinnamon |
| Vanilla | Fresh berries + whipped cream | Nutmeg sprinkle |
Meal Prep Tips
Meal prep becomes effortless with these hacks:
- Layering: Alternate pudding and granola in jars for grab-and-go parfaits.
- Freezing: Portion into silicone molds for single servings; thaw overnight.
- Daily toppings: Prep bases ahead, add fresh fruit or nuts before eating.
For parties, serve in elegant ramekins with a mint garnish. Leftovers? They’ll keep for 3 days chilled.
How to Store Leftovers
Got leftovers? Here’s how to keep them fresh and delicious. Proper storage locks in flavor and texture, so your treat stays satisfying for days. Whether you’re meal prepping or saving a single serving, these tips ensure zero waste.
Fridge vs. Freezer: What Works Best
For short-term storage, the fridge is your best friend. Use airtight glass containers (like Mason jars) to prevent odors. Leftovers stay fresh for 3–4 days—just give it a quick stir before eating.
To freeze, portion into silicone muffin tins or freezer bags. Thaw overnight in the fridge, then blend briefly to restore creaminess. Frozen batches keep for up to 3 months—ideal for grab-and-go snacks.
Pro Tips for Perfect Texture
- Glass vs. plastic: Glass prevents staining and retains cold better.
- Label flavors: Use masking tape to note dates and varieties like chocolate or vanilla.
- Revive frozen batches: Add a splash of milk when blending for smoother consistency.
Food safety matters too! Dairy-based mixes should never sit at room temperature for more than 2 hours. For more storage hacks, check out this easy chicken salad recipe with similar guidelines.
Time to Enjoy Your Protein Pudding!
Ready to transform your snack game with a guilt-free delight? This protein pudding recipe packs 45g of fuel per serving—with half the sugar of traditional dessert. Swap ice cream for the chocolate version and save 12g of fat!
Share your creations on Instagram and tag @eatingbirdfood. Pro tip: Enjoy post-workout for recovery or as a midday craving crusher.
Rate this recipe below and tell me your favorite twist! For more high-energy snacks, explore our full collection here. Don’t forget to grab the printable recipe card—it’s meal prep magic.