Table of Contents
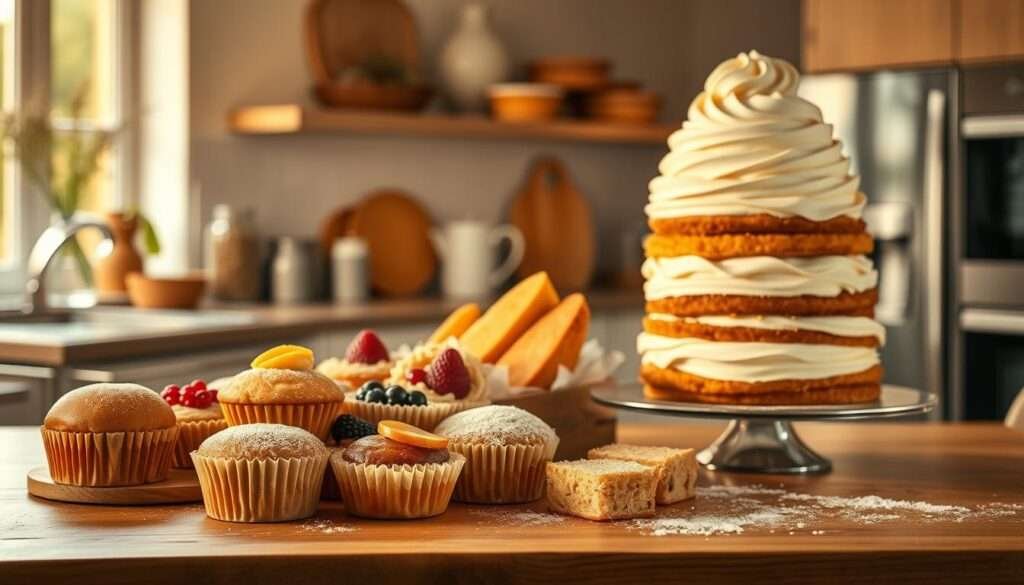
ToggleI never thought a simple cake could heal small moments—until I learned which swaps truly work. I started by choosing naturally flourless favorites and gentle no‑bake wins. That meant pavlova, crème brûlée, and a flourless chocolate cake that became my quiet celebration.
I keep my pantry simple: nut flours, starches, eggs, xanthan gum, and measured sweeteners. I weigh ingredients, lower oven temps, and add minutes to baking time for reliable texture.
Save this as your go‑to list for recipes and quick victories like chocolate peanut butter bars or a fruit‑topped yogurt tart. Follow the steps—prep, weigh, mix, bake, cool—and the results repeat.
Key Takeaways
- Start with flourless classics and simple no‑bake recipes for dependable results.
- Use nut flours, starches, binders, and a digital scale for accuracy.
- Lower oven temperature and extend baking time to prevent gummy centers.
- Measure, mix, and cool fully—these steps make texture consistent.
- Once you know ingredients and methods, every recipe becomes repeatable and proud to serve.
My Gluten-Free Baking Mindset: Flavor First, Gluten Nowhere in Sight
I always start by asking: will this recipe sing in the mouth? That single question keeps me focused on flavor before any swap or trick.
I pick desserts whose core texture doesn’t need gluten—pavlova, crème brûlée, and chocolate soufflé prove great taste doesn’t require flour. Choosing naturally flourless bases means I get indulgent mouthfeel without complicated fixes.
I plan structure using eggs, nut butters, and custards. These build creaminess or chew without sacrificing taste. I avoid one-for-one flour swaps for complex cakes unless the recipe was designed for gluten-free results.
- I deepen flavor with roasted nuts, brown-butter notes, citrus zest, and real vanilla.
- I keep ingredient lists clean so chocolate, fruit, and caramel tones shine.
- I test sweetness lightly, picking sweeteners that enhance rather than mask flavors.
| Focus | Tools | Outcome |
|---|---|---|
| Flavor-first choices | Roasted nuts, real vanilla | Bakery-grade taste |
| Structure planning | Eggs, nut butter, custard | Creamy or chewy texture |
| Frameworks | Meringues, custards, nut-butter cookies | Reliable, repeatable recipes |
Essential Gluten-Free Pantry: Flours, Binders, and Sweeteners I Rely On
My pantry lists the trusted flours and swaps I reach for when I want reliable texture and bright flavor. I arrange ingredients by function so every recipe gets the right balance of moisture, lift, and taste.
Flour alternatives and starches
- Almond flour: my go‑to for tender crumb and nutty depth; great in cakes and cookies.
- Certified oat flour for chew and structure; measure by weight, not loose cups.
- Coconut flour for moisture absorption—use sparingly; it soaks up batter fast.
- Tapioca or cornstarch adds crisp edges and helps bind fragile batters.
Binders, lift, and sweeteners
- Eggs are my primary binder; baking soda gives lift in quick bakes.
- Xanthan gum only when a recipe needs extra elasticity.
- For sugar swaps I favor monk fruit, dates, ripe bananas, maple, and a touch of honey for flavor depth.
Tip: I weigh ingredients and check cup weights for consistent hydration; a digital scale is always on my counter.
| Ingredient | Use | Performance |
|---|---|---|
| Almond flour | Cookies, cakes | Tender crumb, nutty flavor |
| Tapioca/starch | Binding, crisp edges | Light chew, structure |
| Butter, vanilla, salt, chocolate | Flavor anchors | Rich finish, balanced sweetness |
Storage and practice: I label flours, keep them airtight, and test by cup weight. I also choose recipes built for gluten-free results and lower the oven temp if centers look gummy.
Pro Tips That Make Gluten-Free Baking Easy
I rely on a few clear rules when I want steady, crowd-ready results. These tips keep texture reliable and flavor bright without guesswork.
Time and temperature basics
Lower oven temps and add minutes. I often drop the heat to 320°F (160°C) instead of 350°F (175°C). This steadies rise and stops dark edges with gummy centers.
Measure for consistency
I use a $13 digital scale and weigh both dry and wet ingredients. Consistent ratios prevent dense crumb, runaway spread, and wasted sugar.
Use purpose-built recipes
Pick recipes designed for gluten-free results. Hydration and structure are already tuned, so the first try usually works.
- I extend bake time versus wheat versions and check doneness with a thermometer or a clean edge set.
- I pre-mix dry ingredients so leaveners and starches disperse evenly.
- I cool fully on the pan, then a rack; GF bakes firm up as they cool.
- I note my oven’s hot spots and rotate pans halfway through the minutes listed for even browning.
Quick fact: steadier heat and precise weighing cut repeat attempts and save ingredients.
| Tip | Action | Why it works |
|---|---|---|
| Lower temp | 320°F / 160°C example | Prevents gummy centers, steadies rise |
| Weigh ingredients | Use an affordable digital scale | Consistent ratios, reliable texture |
| Use GF recipes | Follow tested formulations | Hydration and structure already optimized |
Cookies I Bake on Repeat: Flourless, Chewy, Crowd-Pleasing
I love recipes that deliver big taste from a few pantry staples. Below are four of my go-to treats, each with short ingredient lists, one‑bowl steps, and quick notes on texture and bake time.
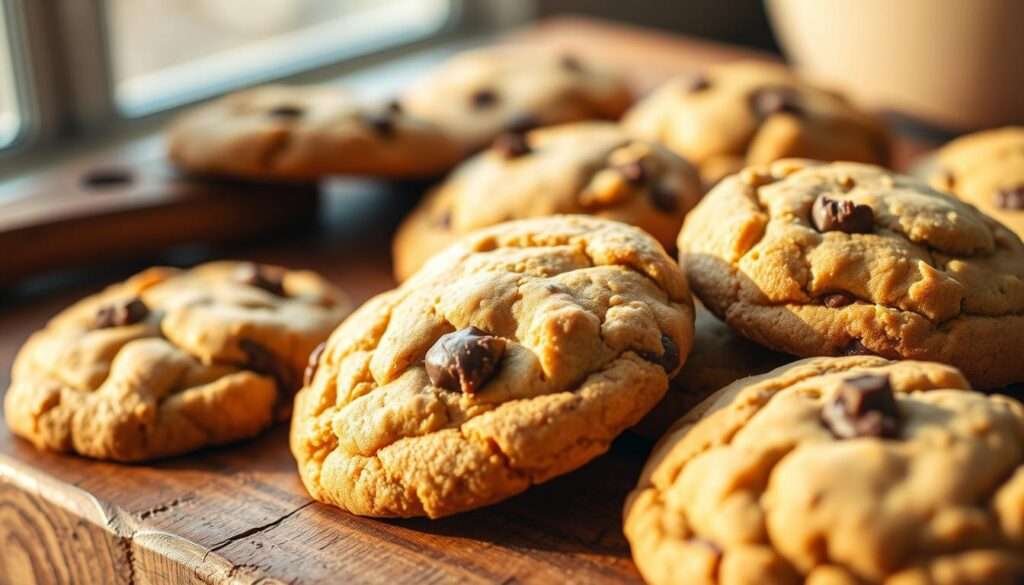
Flourless almond butter chocolate chip
Ingredients: almond butter, egg, sugar or monk fruit blend, vanilla, chocolate chips, salt.
Method: Mix everything in one bowl, scoop onto a sheet, and bake until the edges set but centers stay chewy.
Notes: Soft center, 10–12 minutes bake; press lightly midway if spread worries you.
Flourless peanut butter oatmeal
Ingredients: peanut butter, brown sugar, egg, vanilla, baking soda, tapioca or cornstarch, salt, oats, chocolate chip optional.
Method: Combine in a bowl, drop by spoonfuls, and bake until tops are set for a thick, soft cookie.
Notes: Thick chew, 11–13 minutes; salt on warm cookies brightens peanut butter and chocolate chip flavors.
Easy lace cookies with brown‑butter caramel notes
Ingredients: butter, brown sugar, nuts or oats, a pinch of salt.
Method: Melt butter, stir in sugar and nuts, spoon thin rounds, and bake about 30 minutes for lacy, caramelized edges.
Notes: Thin, crisp edges and deep brown-butter taste; cool on the sheet for the best shape.
Chocolate‑swirled meringue cookies
Ingredients: egg whites, sugar, a little melted chocolate for swirls, salt.
Method: Whip glossy peaks, fold in swirls, pipe or spoon, then bake low and slow until crisp outside and marshmallowy inside.
Notes: Crisp shells, melt-in-mouth centers; move to a rack only after cooling on the sheet.
Quick tip: I store chewy and crisp treats separately in airtight containers with parchment layers to keep texture true.
| Cookie | Bake time | Texture note |
|---|---|---|
| Almond butter chip | 10–12 min | Chewy centers, set edges |
| Peanut butter oatmeal | 11–13 min | Thick, soft bite |
| Lace cookies | ~30 min | Thin, caramelized edges |
| Meringue swirl | Low & slow | Crisp outside, soft inside |
Chocolate Lover’s List: From Flourless Cake to Soufflé
My go-to chocolate recipes cover a range of textures, from truffle-dense slices to light, rising spoons. I keep each formula short and reliable so the focus stays on depth of flavor.

Flourless chocolate cake
- Ingredients highlights: dark chocolate, butter, sugar, eggs, a touch of vanilla.
- Quick steps: melt and whisk in one bowl, fold eggs, bake until just set.
- Texture & time: truffle-like crumb with a glossy top; bake until center slightly jiggles, then cool for tidy slices.
Chocolate soufflé
- Ingredients highlights: chocolate, egg yolks and whites, sugar, pinch of salt (7 ingredients total).
- Quick steps: make a smooth base, whip whites to stiff peaks, fold gently, and bake.
- Texture & time: dramatic rise and airy warmth; serve right from the oven for best lift, usually under 30 minutes.
Dark chocolate almond butter cookies
- Ingredients highlights: almond butter, cocoa, sugar, egg, salt, chocolate chips or chunks.
- Quick steps: stir in one bowl, chill dough 10–15 minutes if loose, then bake until edges set.
- Texture & time: ultra-rich, chewy centers with crisp edges; short bake gives best contrast.
Pro tip: grease and line pans for clean release; serve the cake with softly whipped cream or a dusting of cocoa for balance.
| Dessert | Bake time | Signature texture |
|---|---|---|
| Flourless chocolate cake | 20–30 minutes | Dense, truffle-like |
| Chocolate soufflé | ~20 minutes | Airy, warm spoonfuls |
| Dark chocolate almond butter cookie | 10–13 minutes | Chewy center, crisp edge |
Fruit-Forward Desserts that Shine Without Gluten
Sweet-tart fruit gives my sweets lift without needing a single cup of flour. I choose simple techniques that let natural flavor stand up on its own.

Gluten-free apple crisp with brown-sugar-oat topping
I toss sliced apples with cinnamon, a squeeze of lemon, and a touch of sugar. Then I scatter a crisp oat and brown sugar crumble over the fruit.
Bake until bubbling and golden. The topping becomes crunchy while the apples stay tender. Serve warm with a spoonful of cream or a scoop of ice cream for contrast.
Easy baked apples: individual crisp vibes
I core apples and fill each cavity with a buttery cinnamon-sugar crumble. A short roast makes soft centers and caramelized edges.
These feel like tiny, cozy desserts and plate well with toasted nuts or a drizzle of maple.
Blueberry sauce topping: stovetop, perfect over yogurt or ice cream
I simmer blueberries with a bit of sweetener and lemon until jammy. A pinch of salt balances the fruit and brightens the flavor.
Spoon the sauce over yogurt, ice cream, or a plain cake. It adds quick color and fresh acidity.
Maple vanilla baked pears topped with granola
I halve pears, brush them with maple and vanilla, and roast until tender. A sprinkle of crisp granola gives welcome texture contrast.
For serving, I sometimes add a small drizzle of chocolate for richness. These are elegant, low-effort plates that let the fruit shine.
Note: I use certified GF oat products for crisps and keep sweetness balanced with lemon or salt so the true fruit flavor pops.
| Recipe | Key step | Serving idea |
|---|---|---|
| Apple crisp | Golden oat-brown sugar topping | Warm with cream |
| Baked apples | Stuffed crumble, soft center | Toast or maple |
| Blueberry sauce | Simmer until jammy | Yogurt or ice cream |
| Maple pears | Roast, top with granola | Drizzle chocolate if desired |
How to Bake Gluten-Free and Delicious Desserts at Home
A clear checklist before I start turns nervous baking into calm, reliable results. I use a point-wise plan so each step feels simple and repeatable.
Prep, measure, mix, bake, cool — my sequence
- Prep: line pans, set eggs at room temp, preheat, and weigh dry and wet ingredients.
- Measure: I use a digital scale for flours, sugars, and leaveners so hydration stays steady.
- Mix: whisk dry, beat wet in a bowl, then fold until just combined to avoid a dense crumb.
- Bake: drop oven temp a bit and add minutes if centers look gummy; rotate pans halfway for even color.
- Cool: rest bakes in the pan, then move to a rack so the crumb sets before slicing.
Trusted swaps and a quick weeknight flow
Swaps I trust: almond flour for tender crumb, oat flour for structure, tapioca or cornstarch for binding, and egg whites for lift.
For fast evenings I pick one-bowl recipes or no‑bake fridge bars. That saves dishes, cuts prep time, and still gives a great cake or chocolate finish when guests arrive.
“I keep notes on bake time and texture so the next try is faster and better.”
| Step | Action | Why it works |
|---|---|---|
| Measure | Digital scale | Consistent hydration |
| Bake | Lower temp + add minutes | Prevents gummy centers |
| Weeknight | One-bowl no-bake | Fast cleanup, reliable results |
Bars That Come Together Fast: Oats, Peanut Butter, Chocolate
I trust bars that come together in one bowl and slice clean after a full cool-down. These four recipes use pantry staples and short steps so you get snackable squares without fuss.

Peanut butter banana chocolate chip oatmeal bars (one-bowl)
Ingredients: mashed bananas, peanut butter, oats, egg, sweetener, chocolate chips.
- Stir everything in one bowl until even.
- Press into a lined pan and bake until set; cool fully, then slice.
- Texture: chewy, moist; timing: about 20–25 minutes depending on pan depth.
No-bake chocolate fudge oat bars
Ingredients: melted chocolate, peanut butter, oats, pinch of salt.
- Mix warm chocolate and peanut butter, fold in oats, press into a cup-lined pan.
- Chill until firm for candy-bar vibes; cut after full chilling.
- Texture: dense, fudgy; allow at least 30 minutes chill for clean squares.
Pumpkin chocolate chip oatmeal bars
Ingredients: pumpkin puree, spices, oats, chocolate chips, a little butter or oil.
- Whisk pumpkin and spices, fold in oats and chips, press into pan and bake.
- Texture: soft and snackable; timing: roughly 18–22 minutes.
Healthy berry streusel bars with almond-oat layers
Ingredients: almond meal, oats, mixed berries, a touch of sweetener, butter or oil.
- Layer almond-oat crust, spread berries, crumble remaining dough on top.
- Bake until fruit bubbles and top browns; cool fully before cutting.
- Texture: crisp-tender base with jammy fruit; timing: 25–30 minutes.
“I always line the pan with parchment and scale by the cup so lifting and slicing is tidy.”
| Bar | Key step | Texture | Minutes |
|---|---|---|---|
| PB banana chip | One-bowl mix, bake | Chewy, moist | 20–25 |
| No-bake fudge | Press and chill | Fudgy, candy-like | 30+ chill |
| Pumpkin chip | Whisk wet, fold oats | Soft, snackable | 18–22 |
| Berry streusel | Layer and bake | Crisp-tender + jammy | 25–30 |
No-Bake Classics When I Skip the Oven
When I skip the oven, I still want a dessert that feels indulgent and effortless. These no-bake recipes give rich chocolate textures, bright cream layers, and chewy bites without heat. They’re quick, pantry-friendly, and fun for last-minute guests.

Chocolate peanut butter bars
Ingredients (5): melted butter, peanut butter, powdered sweetener, crushed GF grahams, melted chocolate for topping.
Method: Blend melted butter, peanut butter, and powdered sweetener. Fold in crushed GF grahams, press into a lined pan, spread melted chocolate on top, chill until firm, then slice.
Peanut butter balls — truffle-soft and freezer-friendly
Ingredients: creamy peanut butter, sweetener, a little coconut or almond flour for structure, optional coconut for rolling, melted chocolate for coating.
Method: Mix until thick, scoop and chill, dip in chocolate, then freeze or refrigerate. These freeze well for grab-and-go treats.
No-bake cheesecake jars
Ingredients: crushed GF crackers, softened cream cheese, a touch of sweetener, vanilla, toppings like blueberry sauce, fruit, or chocolate shavings.
Method: Layer crushed crackers, a whipped cream cheese mix, and toppings in jars. Keep chilled and set out a DIY topping bar for guests.
No-bake cookies with certified GF oats
Ingredients (about 8): cocoa, sweetener, fat (butter or coconut oil), milk, certified GF oats, shredded coconut, and salt.
Method: Simmer cocoa, sweetener, fat, and milk briefly, stir in oats and coconut, portion on parchment, and let set until firm.
- Why I love these: an easy make process, zero oven time, luscious cream and chocolate textures.
- Storage: bars and balls stay best chilled; jars keep 3–5 days refrigerated.
- Tweak: add a hint of coconut for aroma and chew where it fits.
Note: use certified GF oats and GF crackers or grahams when needed to keep everything safe and tidy for guests.
| Recipe | Key step | Storage |
|---|---|---|
| Chocolate peanut butter bars | Press base, top with chocolate, chill | Refrigerate 7–10 days |
| Peanut butter balls | Chill, dip in chocolate, freeze | Freeze up to 3 months |
| Cheesecake jars | Layer and chill | Refrigerate 3–5 days |
| No-bake cookies | Portion on parchment, set | Store chilled 5–7 days |
Coconut Treats with Chewy Edges and Big Flavor
I reach for shredded coconut when I want chewy centers with crisp edges in minutes. These three recipes are my go-to for quick, palm-sized sweets that travel well and store cleanly.
Classic macaroons: moist centers, crisp exteriors.
- Ingredients: egg whites, sugar, vanilla, shredded coconut (sweetened or unsweetened).
- Steps: whisk whites and sugar until glossy, fold in coconut, scoop mounds, bake until edges are golden and centers remain moist.
- Doneness & storage: golden edges mark readiness. Cool on the sheet, then store airtight for 3–4 days.
Almond butter macaroons with chocolate and flaky salt.
- Ingredients: almond butter, coconut, egg white, sweetener, dark chocolate, flaky salt.
- Steps: add almond butter for richness, shape, bake, then dip or drizzle with melted chocolate and finish with salt.
- Notes: chocolate lifts the rich butter note; a drizzle refreshes day-two treats.
- Ingredients: cocoa, shredded coconut, binder (condensed milk or syrup), sweetener.
- Steps: mix until holdable, roll into balls, chill or freeze for firm centers.
- Storage: freeze well—serve straight from the freezer for a cool, fudgy bite.
Tip: I keep batch sizes consistent for even browning and always dial flavor with vanilla or almond extract and a pinch of salt.
| Recipe | Key Ingredient | Doneness | Storage |
|---|---|---|---|
| Classic macaroons | Shredded coconut | Golden edges, moist center | Airtight 3–4 days |
| Almond butter macaroons | Almond butter + chocolate | Set edges, rich interior | Airtight 4 days; chocolate day-two refresh |
| Chocolate coconut snowballs | Cocoa + coconut | Firm after chilling | Freeze up to 3 months |
Puddings, Custards, and Creamy Spoon Desserts
Silky custards and quick stovetop puddings are my go-to treats for weeknights. They feel special yet finish fast. Below I share three favorites with clear ingredients, simple steps, and setting tips.
Crème brûlée: six-ingredient, smooth and creamy
Key ingredients: heavy cream, sugar, egg yolks, vanilla, salt, and a little sugar for the top.
- Whisk cream, sugar, and yolks; strain for silkiness.
- Bake in a water bath in the oven until centers jiggle slightly, then chill.
- Caramelize sugar with a torch for a glassy crackle just before serving.
One-pot butterscotch pudding
Ingredients: butter, brown sugar, milk or cream, a thickener, and salt.
- Cook butter and sugar, add milk and whisk in thickener.
- Whisk until glossy—about ten minutes of active stirring—and portion into cups to chill.
Dirt pudding for playful plates
I layer homemade chocolate pudding with certified GF sandwich crumbs and tuck gummy worms inside.
No flour is needed; this dessert feels nostalgic and finishes quickly. Garnish with whipped cream or shaved chocolate for polish.
Tip: I always strain custards and watch time closely—creams overcook fast, so cool before serving for best mouthfeel.
| Dish | Set | Finish |
|---|---|---|
| Crème brûlée | Water bath, chill | Torched sugar top |
| Butterscotch | One pot, 10 minutes | Portion into cups |
| Dirt pudding | Layered, chilled | GF crumbs, gummy worms |
Frozen, Chilled, and Lightened-Up Treats I Love
A small tub of yogurt and a handful of fruit often turn into a freezer-friendly treat in under ten minutes. These three ideas are fridge- or freezer-first, lean on ripe fruit, and come together without fuss.
Blueberry yogurt swirl popsicles — 3 ingredients, protein-packed
Ingredients: Greek yogurt, fresh or frozen blueberries, a touch of sweetener.
- Blend yogurt and half the berries until smooth.
- Pulse remaining berries for texture, spoon both mixes into molds or cups, and swirl for a marbled look.
- Freeze at least 4 hours. Serve with a short thaw for scoopable texture.
3-ingredient strawberry banana pops for summer
Ingredients: strawberries, banana, squeeze of lemon (optional).
- Puree fruit until smooth; taste ripe banana reduces added sugar.
- Pour into popsicle molds or paper cups and insert sticks.
- Freeze until solid. Store in a freezer bag for up to one month.
No-bake Greek yogurt fruit tart with a 3-ingredient crust
Crust: almond meal, a little honey, a pat of butter or coconut oil — press into a tart pan.
- Chill crust until firm.
- Spread sweetened Greek yogurt across the base and top with bright fruit.
- Chill until sliceable. Drizzle a little chocolate over slices for a special finish.
Note: These easy make treats rely on ripe fruit and minimal sweetener. I often use cups as makeshift molds if I’m short on gear. For extra protein or creaminess, choose full-fat Greek yogurt.
| Recipe | Main ingredients | Freeze/chill time | Serve & storage |
|---|---|---|---|
| Blueberry yogurt pops | Yogurt, blueberries, sweetener | Freeze 4+ hours | Short thaw; store 1 month |
| Strawberry banana pops | Strawberries, banana, lemon | Freeze until firm | Freeze in labeled bag; use within 1 month |
| Yogurt fruit tart | Almond crust, Greek yogurt, fruit | Chill 1–2 hours | Keep refrigerated 2–3 days |
Tip: I sometimes finish pops or tart slices with a thin drizzle of chocolate for contrast. For a protein-packed pudding variation, see my favorite recipe here: delicious protein pudding.
Show-Stoppers for Guests: Pavlova, Tarts, and Macarons
A single standout dessert can change the mood of a dinner; I choose recipes that deliver that moment. Below are three favorites I turn to when I want plates that look and taste like a celebration.
5-ingredient pavlova: crisp edges, marshmallow-soft center
Ingredients: egg whites, sugar, vinegar, vanilla, a pinch of salt.
Steps: whip whites to stiff, glossy peaks; shape with a slight well for cream and fruit; bake low and slow until edges are crisp and the center is marshmallowy. Top with whipped cream, vanilla, and fresh fruit for contrast.
Chocolate coconut almond tart: naturally gluten free and vegan
Ingredients (7): almond meal, shredded coconut, maple or syrup, cocoa, melted dark chocolate, coconut milk, a pinch of salt.
Method: press a compact nut-coconut crust into a tart pan, pour warm chocolate-coconut ganache, chill until set. No butter needed; a tight crust gives a clean slice and stable base for serving.
French macarons for beginners: tools, techniques, and success tips
Essentials: sifted almond flour + powdered sugar, egg whites, granulated sugar, piping bag, template mat, steady oven heat.
Tips: fold meringue to a lava consistency, pipe uniform rounds, rest until a skin forms, then bake. Fill with ganache or buttercream and let mature overnight for the best texture. Use flaky salt or a light cocoa dusting to finish chocolate shells.
Note: shape pavlova with a well for fruit juices, press the tart crust firmly for tidy slices, and use templates for uniform macaron shells.
| Dessert | Key bake/chill step | Finish that wows |
|---|---|---|
| Pavlova | Low temp, crisp edges | Whipped cream + fresh fruit |
| Tart | Chill ganache until set | Compact crust, glossy glaze |
| Macarons | Rest shells before baking | Mature filling overnight |
For a quick visual guide and more notes I trust, see this short reference: guest-ready dessert ideas.
Fast Ingredient Guides: Peanut Butter, Almond Flour, Oats, and Chocolate
I start each quick recipe by choosing one main binder, one structure flour, a texturing grain, and a chocolate finish. That framework keeps decisions simple and results predictable.
Peanut and almond butter — I use them for fat, flavor, and binding in many flourless cookies and bars. A pinch of salt sharpens sweetness and helps structure. For fast one-bowl cookies I often measure by weight in a single bowl and mix until just combined.
Almond flour (sifted) gives a tender crumb in cakes and cookies. It browns faster, so I watch edges near the end of baking. For a quick almond base, I press almond meal with a little butter and sugar into a pan for a sturdy crust.
Certified GF oats add chew and reliable structure in bars and crusts. I choose rolled or quick based on desired bite and pulse for a finer crumb when needed.
Chocolate choices — I drop chips for gooey pockets, use cocoa for color and depth, and finish with ganache for glossy tops. Higher cacao reads less sweet, so I lower sugar a touch and boost vanilla for perceived sweetness.
Tip: For a simple tested cookie, try this 3-ingredient almond flour peanut butter cookie and scale ingredients by weight for repeatable results.
| Ingredient | Role | Quick use |
|---|---|---|
| Peanut butter | Binder, fat | One-bowl cookies, add salt |
| Almond flour | Tender crumb | Sift, watch browning |
| Oats | Chew, structure | Roll or pulse for crust |
| Chocolate | Flavor finish | Mix chips, cocoa, or ganache |
Quick How-To: My Point-Wise Method for Three Reader-Favorite Recipes
When I want a fast win, I use a point-wise checklist that keeps steps short and results reliable. Below are three favorites with ingredient lists, brief steps, and quick facts so you can finish with confidence.
Flourless peanut butter oatmeal cookies
Ingredients: 1/2 cup natural peanut butter, 1/3 cup + 1 tbsp dark brown sugar, 1 egg, 3/4 tsp vanilla, 1 tbsp tapioca or cornstarch, 3/4 tsp baking soda, 1/4 tsp salt, 1/2 cup chocolate chips, 1/4 cup shredded coconut, 3 tbsp chopped pecans, 1/4 cup crushed GF Chex, 2 tbsp cacao nibs (optional).
- Mix peanut butter, sugar, and egg in a bowl for 1.5 minutes until creamy.
- Add vanilla, starch, baking soda, and salt; fold in add-ins.
- Scoop, bake 5 minutes at 350°F, press lightly, then bake 4–5 more minutes; cool 4–5 minutes on the sheet.
Peanut butter banana chocolate chip oatmeal bars
I mash one ripe banana, stir in peanut butter, oats, an egg, a pinch of baking soda, a little sweetener, and chocolate chips in one bowl. Spread in a lined pan, bake until the top springs back, cool fully, then slice.
No-bake chocolate peanut butter bars
Combine melted butter, peanut butter, powdered sweetener, and crushed GF grahams. Press into a lined pan, spread melted chocolate on top, chill until firm, then cut into squares. I finish cookies and bars with a light sprinkle of salt to lift chocolate and peanut notes.
| Recipe | Key step | Finish |
|---|---|---|
| Cookies | Press mid-bake | Cool on sheet |
| Bars (banana) | Bake until springs back | Slice after cool |
| No-bake bars | Press & chill | Top with melted chocolate |
“I line pans with parchment and measure by cup or grams so thickness and edges stay consistent.”
Fun Extras I Add for Flavor, Edges, and Texture
A few bold garnishes and quick techniques change texture and flavor instantly. I reach for small, high-impact ingredients that work across bars, cookies, cakes, and chilled desserts.
Finishing add-ins I use:
- I finish chocolate treats with a sprinkle of sea salt flakes to sharpen sweetness and deepen complexity.
- I toast nuts on the stove until fragrant, then fold them into batters for crunchy edges and warm, nutty notes.
- Cacao nibs give a roasty chocolate punch and delicate bite without extra sugar.
- Citrus zest brightens rich plates—lemon with berry, orange with dark chocolate—so each spoonful feels lighter.
“Comes together” tips for minimal dishes
I prefer one-bowl mixes and single-pan bakes when I’m short on time. That keeps cleanup small and momentum high.
I also batch components—make a jarred sauce or a pressed crust ahead—so assembly is fast when guests arrive.
Quick fact: I keep a small stash of roasted nuts and nibs in jars for last-minute sprinkles over warm cookies or chilled bars.
| Extra | Use | Why it works |
|---|---|---|
| Sea salt flakes | Finish chocolate plates | Balances sweetness, boosts flavor |
| Toasted nuts | Fold into batters | Adds crunch, intensifies aroma |
| Cacao nibs | Sprinkle or fold | Roasty bite without sugar |
Conclusion
I want you to leave the kitchen with one clear recipe to try tonight.
Quick recap: stock the right ingredients, weigh by weight, set a smart oven temperature, and always cool fully for best texture. These small steps make a big difference in every recipe.
Pick an approachable option—bars, a simple pudding, or a small cake—and practice the timing cues rather than changing the formula. Lower heat and add a few minutes when centers look soft.
No-bake treats shine when you’re short on time or it’s too hot to run the oven. Flavor-first, naturally flourless plates often match or beat conventional taste and texture.
Try one tonight: one confident finish leads to many more treats you’ll love.