Table of Contents
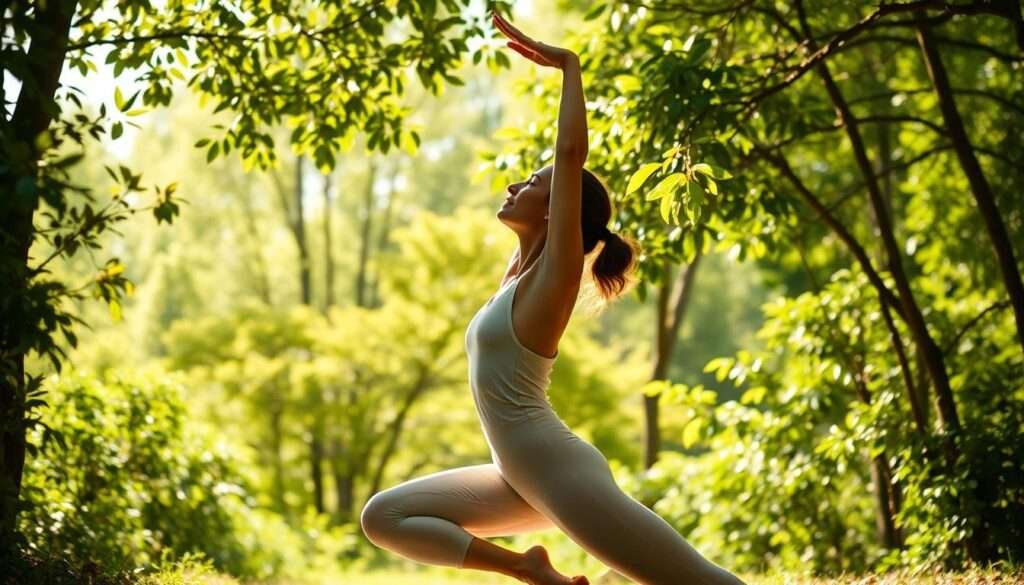
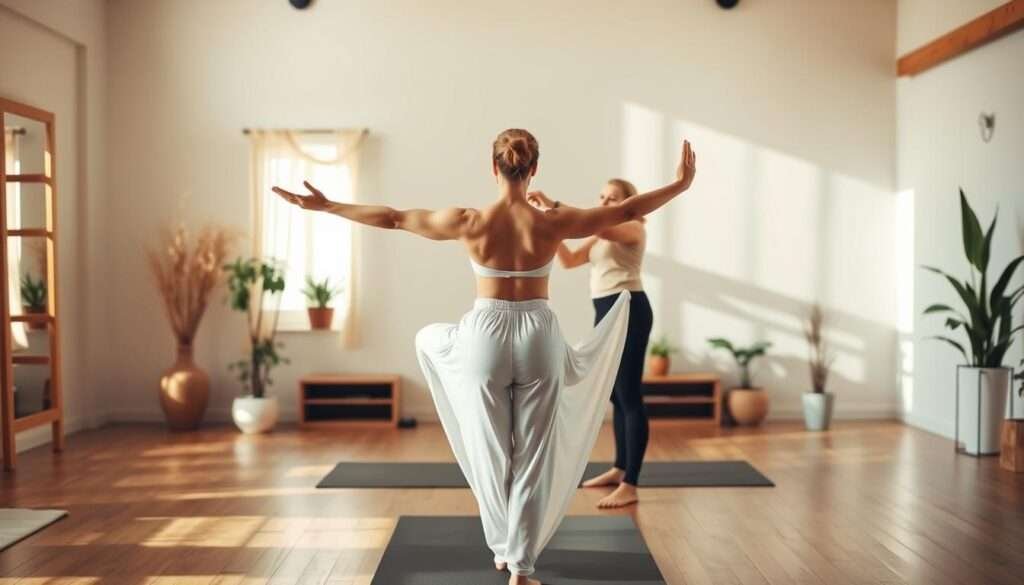
ToggleI remember my first time stepping onto a mat. I felt awkward and unsure, convinced that yoga was only for the naturally flexible. That initial hesitation is something many beginners share.
What I discovered changed everything. This practice isn’t about perfection. It’s about showing up for yourself, exactly as you are today.
These foundational poses build strength gently. They improve flexibility over time without demanding extreme effort. Every body can benefit from this approach.
You’ll find clear instructions for each movement. I’ll share tips to modify positions for comfort. Regular practice brings mental clarity alongside physical benefits.
Start slowly and stay consistent. Even brief sessions create progress. Listen to your body and enjoy this journey toward wellness.
Why I Believe Yoga Is Accessible to Everyone
Many people hesitate to begin their journey with yoga. They imagine complicated postures and extreme flexibility requirements. I want to share a different perspective that changed my own view.
Yoga is fundamentally about connection, not perfection. It welcomes every body type and fitness level. This practice meets you where you are right now.
Dispelling Common Yoga Misconceptions
One major myth suggests you need to be super flexible. That belief kept me from starting for years. The truth is quite different from this assumption.
Yoga poses, or asanas, serve a specific purpose. They prepare the physical body for meditation. This ancient practice focuses on health, not acrobatics.
Yoga is the journey of the self, through the self, to the self.
Another common fear involves not being good enough. I’ve learned that comparison has no place on the mat. Your practice is uniquely yours without competition.
Breathing techniques make every pose more accessible. They calm the mind and help release tension. This approach allows gradual progress without frustration.
How These Poses Benefit All Experience Levels
Simple movements build strength over time. They create a foundation for more advanced work. Every session brings small improvements.
Mental benefits appear alongside physical changes. Reduced stress and improved focus become noticeable. Emotional balance develops through consistent effort.
| Experience Level | Primary Benefits | Recommended Approach |
|---|---|---|
| Beginners | Builds confidence, reduces stress | Short sessions, focus on breathing |
| Intermediate | Increases flexibility, improves focus | Longer holds, explore modifications |
| Advanced | Deepens practice, enhances mindfulness | Focus on alignment, incorporate meditation |
Modifications exist for every movement. They accommodate different abilities and body types. This adaptability makes yoga truly inclusive.
I’ve witnessed transformations across all age groups. People discover new confidence through their practice. The journey brings wellness to everyone who shows up.
Let go of expectations and embrace your progress. This guide supports your personal exploration. Your mat awaits your unique journey.
Essential Benefits You'll Experience from Regular Practice
When I first committed to regular yoga, I noticed changes beyond physical flexibility. The practice works holistically, improving multiple aspects of wellness simultaneously. These benefits accumulate with consistent effort over time.
Physical Improvements: Flexibility and Strength
My muscles gradually became more supple through sustained stretching. Connective tissues release tension, reducing overall stiffness. This process happens naturally without forcing movements.
Building strength emerged as another significant benefit. Core muscles develop to support better posture. Leg and arm strength improves for daily activities.
Stamina increases make physical challenges more manageable. Endurance grows through sustained poses. Weight management becomes easier with boosted metabolism.
Mental and Emotional Benefits
Breathing techniques calm the mind effectively. Anxiety reduces through focused attention. Mental clarity improves with regular meditation practice.
Emotional regulation becomes more consistent. The mind-body connection fosters resilience. Mood stabilization occurs through consistent practice.
| Physical Benefits | Mental Benefits |
|---|---|
| Improved flexibility | Reduced stress levels |
| Increased strength | Enhanced focus |
| Better stamina | Emotional balance |
| Weight management | Mindfulness development |
These advantages build progressively through regular sessions. Even brief practices contribute to long-term results. Tracking small improvements helps maintain motivation.
Yoga offers comprehensive health benefits beyond physical aspects. The practice integrates body and mind wellness. This holistic approach creates sustainable wellbeing.
Must-Have Yoga Equipment for Your Practice
Selecting the right gear transformed my personal journey. Proper equipment creates a safe foundation for growth. It supports your body while exploring new movements.
Quality tools make each session more enjoyable. They help maintain focus on breathing and alignment. Investing in good gear prevents injuries over time.
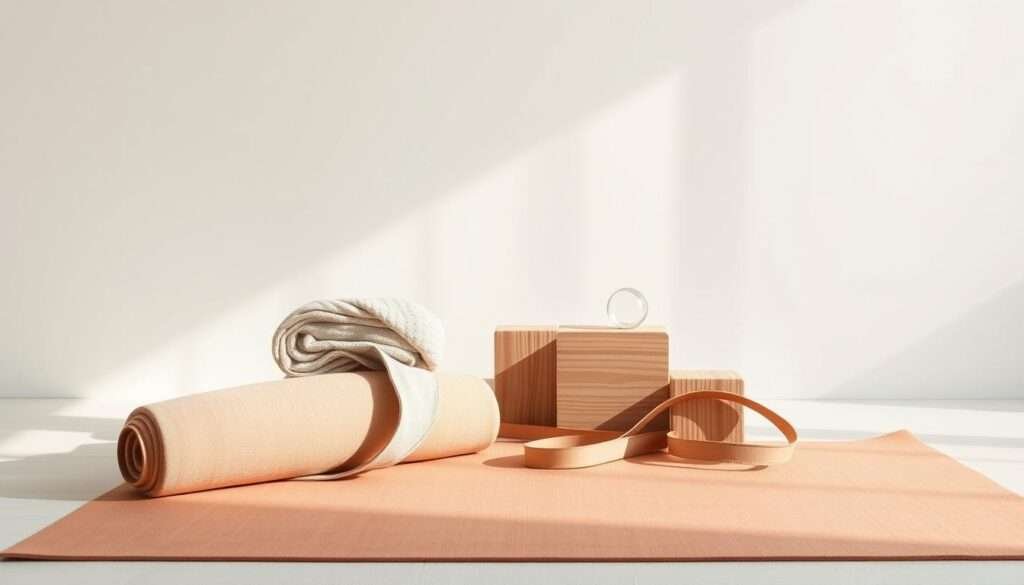
Choosing the Right Yoga Mat
My first mat purchase taught me valuable lessons. Thickness and grip matter for comfort and stability. A good surface protects joints during floor work.
I recommend considering these mat features:
- Durability: Manduka PRO mats last for years of regular use
- Cushioning: Adequate padding supports knees and spine
- Grip: Textured surfaces prevent slipping during poses
Budget options like Amazon Basics work well for starters. Premium choices from Lululemon offer extra luxury. Your mat should feel supportive under full body weight.
Supportive Props for Beginners
I initially resisted using props in my practice. Now I understand their value for all levels. They help achieve proper alignment without strain.
Essential supportive tools include:
- Blocks: Gaiam Yoga Blocks bring the floor closer to your arms
- Bolsters: Perfect for restorative poses and deep relaxation
- Blankets: Provide cushioning for hips and knees in seated poses
These items help modify poses for different abilities. A block under sitting bones opens hips in Cobbler’s pose. Blankets make Child’s Pose comfortable for everyone.
| Product | Brand | Primary Use | Price Range |
|---|---|---|---|
| Yoga Mat | Manduka | Stability & Cushioning | $80-$120 |
| Yoga Mat | Amazon Basics | Basic Practice | $20-$40 |
| Blocks | Gaiam | Alignment Support | $15-$25 |
| Bolster | Hugger Mugger | Restorative Poses | $40-$60 |
| Blanket | YogaDirect | Joint Protection | $25-$35 |
Start with a quality mat and one or two props. Expand your collection as your practice grows. Good equipment makes home sessions on any floor more effective.
Remember that props aren’t just for beginners. They help experienced practitioners deepen their practice. The right tools support your journey in every way.
Mountain Pose (Tadasana): Your Foundation for Standing Poses
My journey with Mountain Pose began when I realized its deceptive simplicity. This foundational position appears basic but builds essential awareness. It teaches proper alignment from the ground up.
This standing posture creates stability for all vertical movements. It engages multiple muscle groups simultaneously. The pose develops both physical and mental focus through stillness.
Step-by-Step Instructions
Begin by standing with your feet together. Keep heels slightly apart with toes touching. Distribute your weight evenly across both feet.
Spread your toes wide for better balance. Engage your thigh muscles by drawing them inward. Keep your arms relaxed at your sides.
Relax your shoulders away from your ears. Inhale deeply to lengthen your spine. Exhale to release any remaining tension.
Beginner Tips for Proper Alignment
Practice against a wall for immediate feedback. This helps maintain straight spinal alignment. The wall supports proper posture development.
Raise your arms overhead during practice sessions. This adds an upper body stretch component. Remember to breathe deeply throughout the movement.
Use a mirror to check your alignment regularly. Ensure your hips remain level throughout. Keep your spine in a neutral position.
Common Mistakes to Avoid
Avoid leaning forward excessively. This disrupts your center of gravity. Instead, engage your core muscles for stability.
Never lock your knees completely. Maintain a micro-bend in your joints. This protects them from strain and injury.
Don’t rush through this foundational pose. Take time to feel connected to the floor. Proper grounding enhances overall benefits.
| Practice Element | Recommended Approach | Benefit |
|---|---|---|
| Duration | 5-10 breaths initially | Builds endurance gradually |
| Frequency | Daily practice | Improves posture consistently |
| Alignment Check | Use wall and mirror | Ensures proper form |
| Mental Focus | Concentrate on breath | Enhances mindfulness |
| Muscle Engagement | Feet to shoulders | Develops full-body awareness |
This pose builds essential foundation skills. It improves balance and posture over time. Regular practice develops body awareness.
Mental benefits include improved concentration. Focusing on breath calms the mind. Body awareness grows with consistent practice.
You can practice this pose anywhere. It requires no special equipment. This makes incorporation into daily life simple.
Remember that proper muscle engagement matters. Activate from your feet upward through your shoulders. This creates full-body integration.
Hold the position for several breaths initially. Gradually increase duration as strength improves. Patience brings the best results.
Always prioritize feeling grounded. Connection to the floor maximizes benefits. This simple pose offers profound rewards.
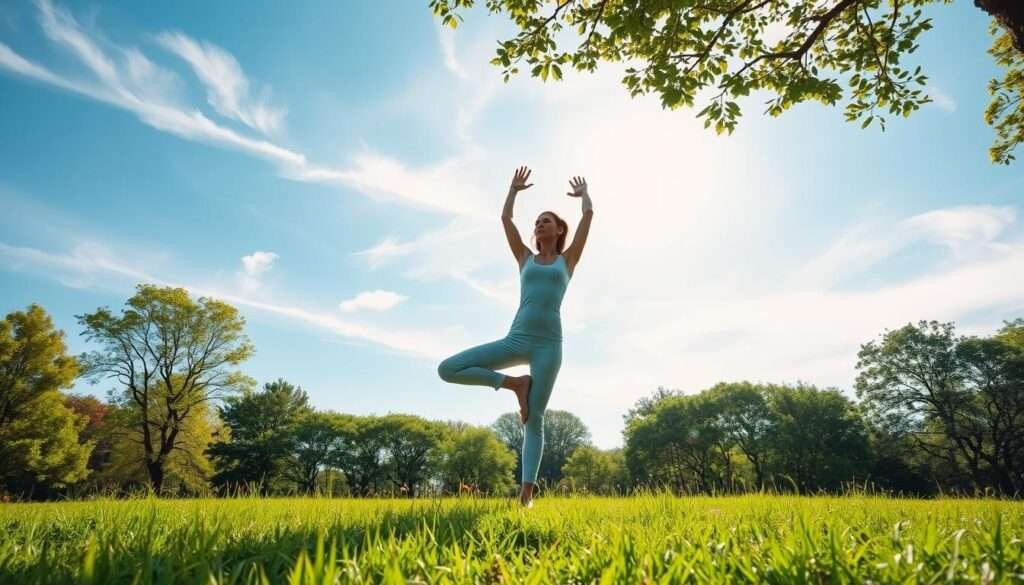
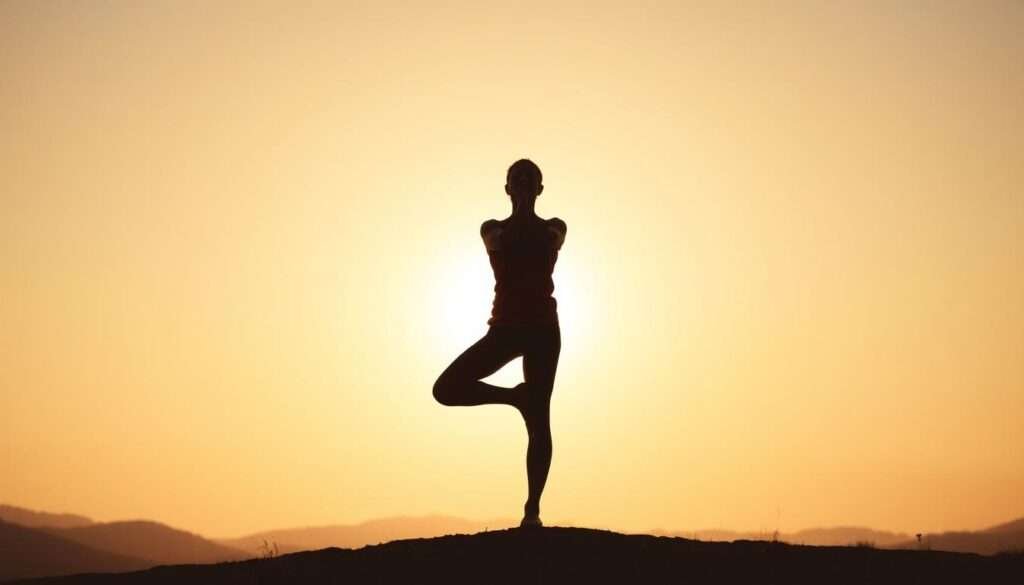
Tree Pose (Vrksasana): Finding Your Balance
My initial attempts at Tree Pose taught me about patience and persistence. This standing balance position challenges both physical stability and mental focus. It represents growth through steady concentration.
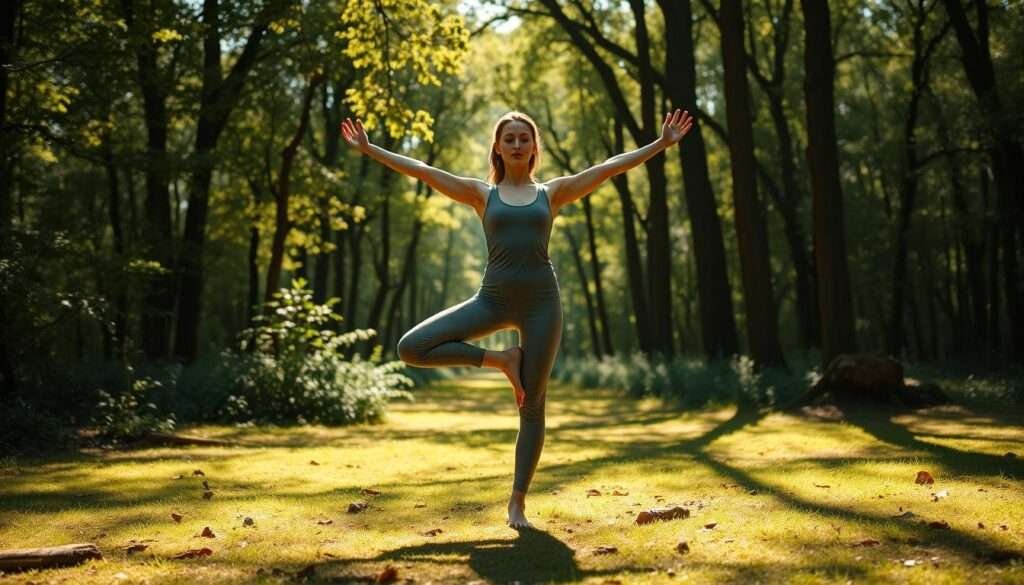
This posture builds lower body strength while improving coordination. The mind learns to quiet external distractions. Regular practice develops remarkable stability over time.
How to Practice Tree Pose Safely
Begin with both feet firmly planted on the floor. Shift your weight gradually onto your left leg. Keep a slight bend in your standing knee.
Place your right foot on your inner left thigh. Avoid placing pressure directly on your knee joint. Press your foot firmly against your thigh.
Bring your hands together at your heart center. Find a fixed point to focus your gaze. Maintain steady breathing throughout the pose.
- Start with toes touching the floor for support
- Engage your core muscles to prevent wobbling
- Keep hips level and facing forward
- Distribute weight evenly through your standing foot
- Breathe deeply to calm your nervous system
Using Walls for Support
I always recommend practicing near a wall initially. This provides security while building confidence. The wall becomes your silent partner in progress.
Place your hand lightly against the surface for balance. Gradually reduce reliance as stability improves. This approach prevents frustration during learning.
Blocks can elevate your foot if flexibility is limited. They help maintain proper alignment without strain. Every body finds its unique way into the pose.
| Support Level | Recommended Approach | Progress Indicator |
|---|---|---|
| Beginner | Full hand on wall, foot on calf | Hold for 5 breaths without swaying |
| Intermediate | Fingertips on wall, foot on thigh | 30-second hold with steady gaze |
| Advanced | No wall support, hands overhead | Minute-long hold with closed eyes |
This pose reveals much about your mental state. Wobbling often reflects scattered thoughts. Steadiness usually indicates focused concentration.
Practice consistently to see noticeable improvements. Track your progress week by week. Celebrate small victories in balance development.
Remember that forcing the pose causes injury. Listen to your body’s feedback signals. Gentle persistence brings the best results.
Triangle Pose (Trikonasana): Opening Your Body
My discovery of Triangle Pose came during a period when I needed more side-body stretching. This foundational posture creates wonderful space throughout your entire torso. It offers both strength building and flexibility benefits simultaneously.
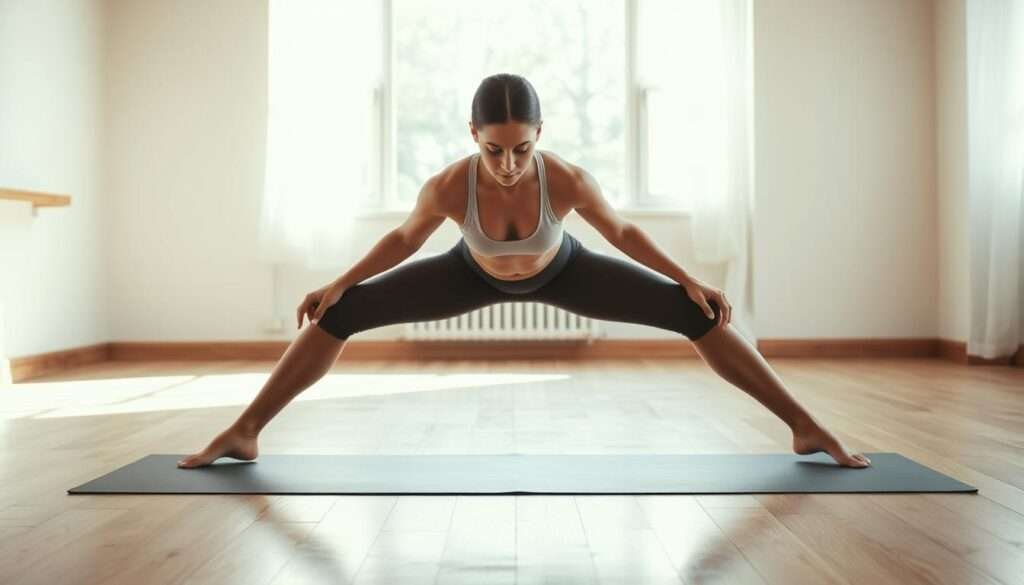
This standing position engages multiple muscle groups effectively. It requires concentration on proper alignment from feet to fingertips. The result is a comprehensive stretch that feels incredibly rewarding.
Proper Form and Alignment
Begin by standing with your feet wide apart. Turn your right foot out ninety degrees completely. Keep your left foot slightly turned inward.
Distribute weight evenly across both feet. Inhale deeply as you extend your arms parallel to the floor. Exhale as you reach your right hand toward your shin.
- Rest your right hand on your shin, ankle, or the floor
- Extend your left arm directly upward toward the ceiling
- Keep your gaze directed toward your top hand
- Maintain this position for five to eight breaths
- Repeat the sequence on the opposite side
Proper alignment prevents unnecessary strain on your joints. Ensure your front knee stays directly over your ankle. Keep your hips squared and your spine elongated.
Breathing Techniques for This Pose
Breath awareness transforms this experience dramatically. Inhale to create length through your entire torso. Exhale to deepen into the stretch gradually.
Use your breath to open your chest and side body. Steady breathing reduces tension throughout the hold. This approach makes the pose feel more sustainable.
I recommend these breathing patterns:
- Inhale to prepare and lengthen your spine
- Exhale to move deeper into the position
- Maintain even breaths during the hold
- Use exhales to release shoulder tension
- Inhale to return to standing position
This pose significantly enhances overall flexibility. It stretches your waist while strengthening your legs. The entire body receives toning benefits through regular practice.
Respiratory health improves through chest expansion. Shoulder openness increases with consistent effort. Lung capacity expands through the deep breathing component.
Beginners might use a block under their bottom hand. This maintains proper alignment when reaching the floor proves challenging. The wall provides excellent support for stability practice.
Avoid collapsing your chest or leaning forward excessively. Instead, keep your chest open and your torso fully extended. This approach maximizes the opening benefits.
Triangle Pose appears in many yoga traditions. Mastering this foundational posture supports progression toward more advanced positions. The investment in proper technique pays lasting dividends.
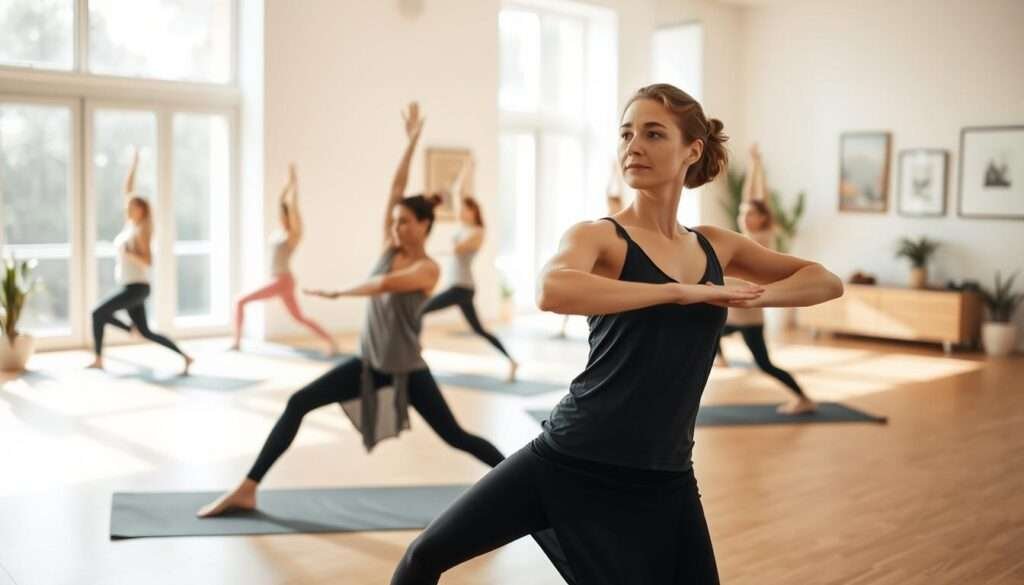
Warrior I (Virabhadrasana I): Building Strength and Confidence
I discovered Warrior I during a challenging period when I needed both physical strength and mental fortitude. This powerful standing pose became my foundation for building resilience on and off the mat. It embodies the perfect balance between stability and expansion.

This position engages your entire body in a unique way. It develops lower body power while opening your hips and chest. The pose demands focus and commitment, mirroring a warrior’s determined spirit.
Detailed Pose Breakdown
Begin in Mountain Pose with your feet together. Step your feet about three to four feet apart. Raise your arms perpendicular to the floor with palms facing inward.
Turn your left foot inward about 45 degrees. Rotate your right foot outward a full 90 degrees. Align your right heel with your left heel.
Exhale as you bend your right knee over your ankle. Keep your thigh parallel to the floor if possible. Hold this position for several steady breaths.
Inhale to straighten your right leg completely. Repeat the sequence on the opposite side. This completes one full cycle of the pose.
Engaging the Right Muscles
Proper muscle activation maximizes benefits and prevents injury. Focus on these key engagement points during your practice.
- Activate quadriceps and glutes in your front leg
- Engage your core muscles to protect your lower back
- Keep your back leg strong and perfectly straight
- Press through all four corners of both feet
- Relax your shoulders away from your ears
This comprehensive engagement builds functional strength. It develops stamina for daily activities and other physical pursuits. The pose also improves hip and thigh flexibility over time.
I recommend using a mirror to check your alignment. Ensure your front knee forms a 90-degree angle. Keep your shoulders relaxed and your chest open.
Lift your pubis toward your navel during the hold. Lengthen your tailbone toward the floor. This maintains proper pelvic alignment throughout the pose.
Hold for five to eight breaths per side initially. Gradually increase duration as your strength improves. Consistent practice develops remarkable lower body power.
Beginners might use a shorter stance between their feet. Advanced practitioners can deepen their lunge slightly. Always keep your front knee behind your toes to prevent injury.
This pose carries deep symbolic meaning from its namesake. Warrior Virabhadra represents overcoming ego and obstacles. The posture embodies this powerful spiritual concept through physical expression.
You’ll notice improved confidence through regular practice. The pose builds mental resilience alongside physical strength. This combination creates lasting benefits beyond the mat.
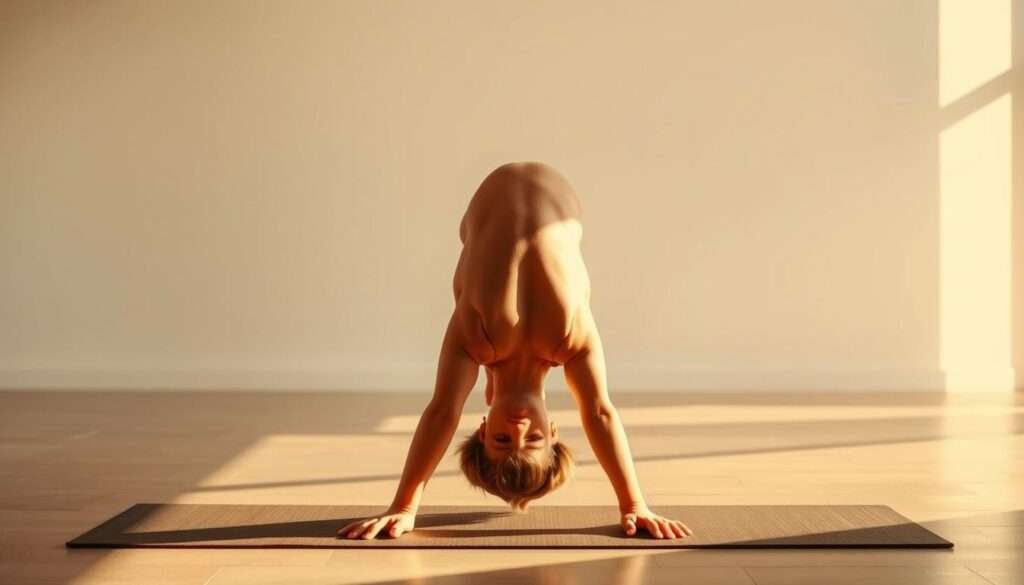
Downward-Facing Dog (Adho Mukha Svanasana): The Ultimate Transition Pose
My relationship with Downward Dog started when I needed a versatile movement between sequences. This foundational position serves multiple purposes in every practice session. It stretches while strengthening your entire frame simultaneously.
This pose offers both active engagement and restorative benefits. It appears frequently in various yoga traditions and styles. Mastering this movement creates a solid foundation for progression.
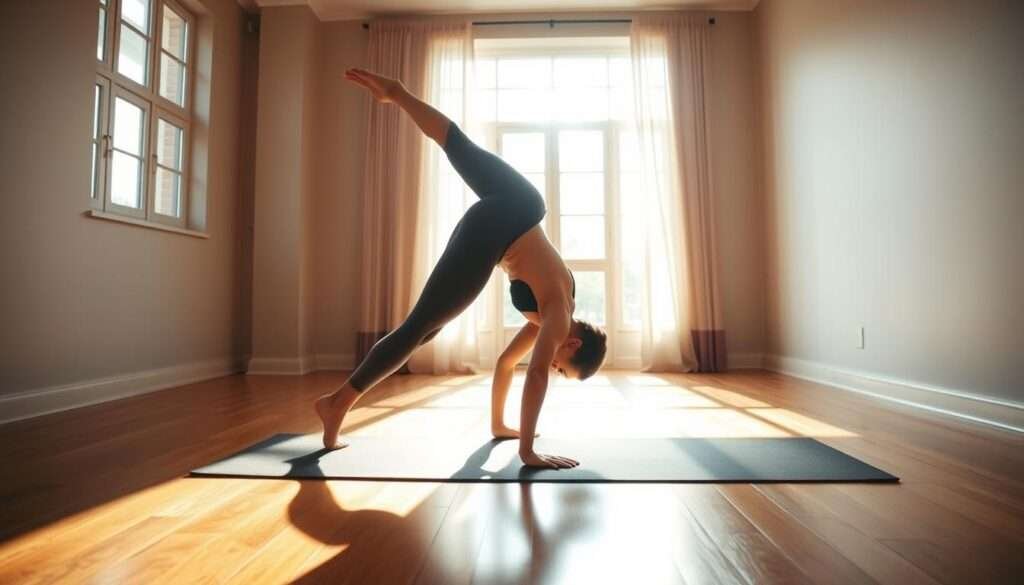
Complete Step-by-Step Guide
Begin on your hands and knees with wrists under shoulders. Position your knees directly below your hips. Spread your fingers wide for better weight distribution.
Move your hands slightly forward from their starting position. Tuck your toes under as you prepare to lift. Exhale deeply as you raise your hips toward the ceiling.
Straighten your legs as much as comfortable without locking knees. Press your heels toward the floor gently. Keep your head positioned between your arms comfortably.
Hold this position for five to ten steady breaths. Maintain even breathing throughout the entire hold. Release gently by bending your knees to return to starting position.
Modifications for Tight Hamstrings
Many practitioners experience tightness in their posterior chain. This common issue requires thoughtful adaptation. Several modifications make the pose accessible immediately.
Keep your knees bent with heels lifted from the floor. Focus on lengthening your spine rather than straight legs. This approach prioritizes proper alignment over depth.
Pedal your feet by bending one knee at a time. This gently stretches each hamstring individually. Alternate sides rhythmically with your breathing pattern.
- Use blocks under your hands to reduce shoulder strain
- Practice near a wall with heels pressing against it
- Try a chair for support if floor practice feels challenging
- Focus on deep breathing to relax into the stretch
- Regular practice gradually increases flexibility over weeks
This pose improves circulation throughout your entire body. It relieves tension in shoulders, back, and legs. The position prepares your frame for other movements.
Downward Dog serves as a transitional rest pose in sequences. It builds strength while providing stretching benefits. This combination makes it essential for every practice session.
Upward-Facing Dog (Urdhva Mukha Svanasana): Chest Opening Backbend
My introduction to Upward-Facing Dog came when I sought deeper chest expansion in my routine. This dynamic backbend creates incredible openness through the front body while building essential strength. It serves as both a standalone pose and a vital transition in flowing sequences.
This position offers profound benefits for modern lifestyles dominated by sitting. It counters the forward hunch many develop from desk work. The pose revitalizes both physical form and mental energy through its expansive nature.
Proper Form to Avoid Neck Strain
Begin by lying face down on your mat with legs extended behind you. Place your palms flat beside your lower ribs with fingers spread wide. Keep the tops of both feet pressing firmly into the floor surface.
Inhale deeply as you press through your hands to lift your torso upward. Straighten your arms completely while keeping your shoulders relaxed. Lift your thighs and hips slightly off the floor as you extend through your spine.
- Draw your shoulders away from your ears to prevent neck compression
- Maintain length through your cervical spine by gazing forward
- Engage your leg muscles to support your lower back region
- Keep your elbows slightly bent if you experience wrist discomfort
- Breathe steadily to maintain the position for several breaths
Proper alignment protects your neck throughout this backbend. Avoid throwing your head backward excessively. Instead, focus on lifting your chest toward the ceiling.
Using Blocks for Support
Yoga blocks make this pose accessible for various ability levels. Place one block under each hand to reduce the depth of your backbend. This modification helps if shoulder flexibility feels limited.
Another option involves placing a block under your thighs for support. This variation reduces pressure on your lower back area. It allows you to experience the chest opening benefits safely.
| Support Level | Block Placement | Primary Benefit |
|---|---|---|
| Beginner | Under hands | Reduces backbend depth |
| Intermediate | Under thighs | Supports lower back |
| Advanced | No blocks | Full expression |
Blocks help build confidence as you develop strength in this pose. They provide stability while you learn proper engagement techniques. Gradually reduce block height as your practice deepens.
This backbend significantly improves spinal flexibility over time. It stretches abdominal muscles while strengthening arm and shoulder muscles. Regular practice corrects posture imbalances from daily life.
Remember to engage your glutes and thigh muscles throughout the hold. This activation protects your lumbar spine from excessive compression. Focus on lifting your chest rather than arching your back dramatically.
Beginners might start with knees on the floor for modified practice. This builds upper body strength gradually before attempting the full pose. Consistency brings noticeable improvements in chest openness.
Upward-Facing Dog often flows smoothly from Downward-Facing Dog. This combination creates a beautiful vinyasa sequence. Deep breathing maximizes expansion through your ribcage during the hold.
Always listen to your body’s feedback during this backbend. Ease out of the pose if you feel any sharp discomfort. Patient practice yields the best results for spinal health.
Seated Forward Fold (Paschimottanasana): Hamstring and Back Release
I found Seated Forward Fold during a period of intense physical tension. This calming posture became my sanctuary for releasing accumulated stress. It offers profound relief for tight hamstrings and a tired back.
This pose works beautifully in two distinct styles. Each approach serves different purposes in your practice. Both methods create deep release when practiced consistently.
Two Approaches: Active and Yin Styles
The active version builds strength while stretching. Keep your legs fully engaged with feet flexed. Use your core muscles to fold forward gradually.
This dynamic method stretches hamstrings effectively. It also strengthens your abdominal muscles. The active approach prepares your body for more challenging poses.
Yin style focuses completely on relaxation. Release all muscular engagement in your legs. Let gravity gently pull your torso forward.
This passive method targets connective tissues. It encourages deep release through longer holds. The yin approach feels meditative and restorative.
The body benefits from movement, and the mind benefits from stillness.
I recommend trying both styles during different sessions. Active folding builds functional strength. Yin folding promotes recovery and flexibility.
Using Props for Comfort
Props make this pose accessible for all bodies. They help maintain proper alignment without strain. Every practitioner can experience the benefits.
Essential supporting tools include:
- Yoga strap looped around your feet if reaching proves difficult
- Bolster placed on your lap to support your torso
- Blanket under your knees if hamstrings feel extremely tight
- Additional blanket under your sitting bones for hip comfort
These adaptations allow gradual progress over time. They prevent straining while still providing stretch. Props support your unique body in this pose.
Forward folds balance backbends in any sequence. They maintain harmony in your physical practice. This counterpose creates overall equilibrium.
Mental benefits include calming your nervous system. Focused breathing during the hold quiets your mind. The pose encourages surrender and acceptance.
Always hinge from your hips rather than rounding your back. Keep your spine long throughout the movement. This alignment protects your lumbar region.
Listen to your body’s signals during practice. Back away from sharp pain immediately. Breathe through gentle tension instead.
Regular practice of this pose brings noticeable changes. Hamstrings gradually release their tightness. Your back feels more supple and relaxed.
This posture remains essential for complete wellness. It offers both physical and mental release. Your practice benefits from its inclusion.
Bridge Pose (Setubandhasana): Gentle Backbend for All Levels
Bridge Pose entered my practice when I needed spinal flexibility without strain. This gentle backbend offers remarkable benefits for various experience levels. It builds strength while providing restorative options through simple modifications.
This position creates space in your chest and shoulders. It strengthens your posterior chain effectively. The pose feels accessible yet challenging in the right way.
Building Core and Back Strength
Lie on your back with knees bent and feet flat. Position your feet hip-width apart near your sitting bones. Press firmly through all four corners of both feet.
Engage your glutes and hamstrings to lift your hips. Keep your knees aligned directly over your ankles. Avoid overarchinging your lower back during the movement.
Interlace your fingers beneath your lifted pelvis. Roll your shoulders underneath your body. Hold this position for eight to ten steady breaths.
Focus on core activation throughout the hold. This protects your spine and maximizes benefits. Lower your hips slowly between repetitions.
- Activate glutes to lift hips evenly
- Keep knees hip-distance apart throughout
- Press shoulders into the floor for stability
- Maintain neck length by relaxing your jaw
- Breathe deeply to enhance the stretch
This pose develops functional strength for daily activities. It improves posture by countering forward bending. Regular practice builds spinal support muscles.
Restorative Variation with Blocks
The restorative version offers deep relaxation benefits. Place a yoga block under your sacrum after lifting your hips. Choose the height that feels supportive for your body.
Completely relax your muscles in this supported position. Allow gravity to gently open your front body. Hold for several minutes to experience full release.
This variation helps relieve menstrual discomfort effectively. It reduces low back tension when practiced regularly. The supported backbend feels soothing and therapeutic.
| Prop Type | Placement | Primary Benefit |
|---|---|---|
| Yoga Block | Under sacrum | Supports pelvic lift |
| Bolster | Under hips | Provides cushioning |
| Blanket | Under shoulders | Adds neck comfort |
Blocks make this pose accessible for all bodies. They allow gradual progression in your backbend practice. Start with the lowest height and increase as flexibility improves.
Incorporate Bridge into your daily routine for posture improvement. It counters the effects of prolonged sitting. This gentle backbend brings both physical and mental relief.
Remember that consistency matters more than height. Regular practice yields better results over time. Listen to your body and enjoy the process.
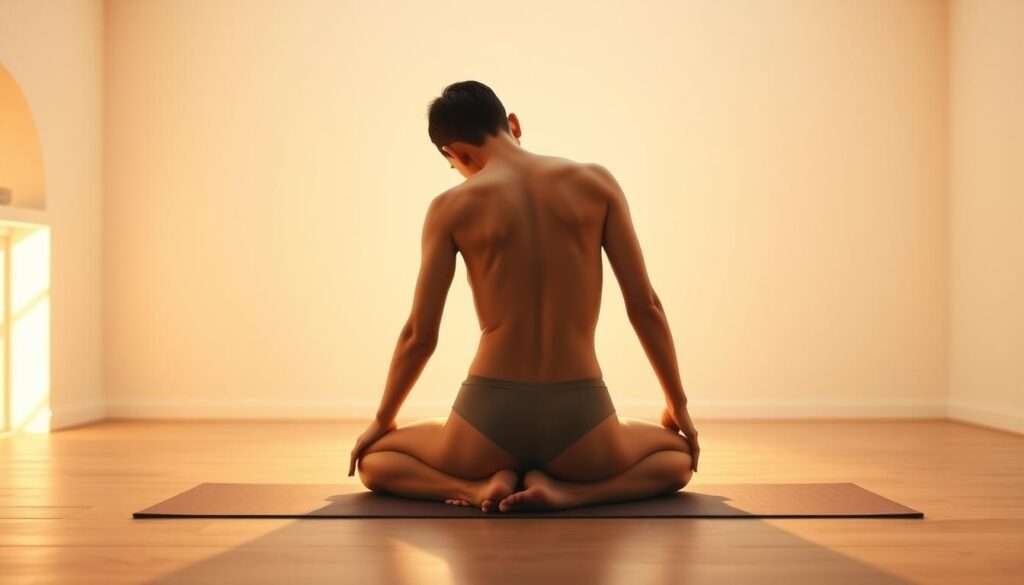
Child's Pose (Balasana): The Perfect Resting Position
I discovered Child’s Pose during a particularly stressful week when I needed instant calm. This humble position became my sanctuary for quick mental resets. It offers profound relaxation in just a few breaths.
This resting pose gently stretches your hips, thighs, and back. It reduces stress and fatigue through supported forward folding. The position feels like a warm embrace for your entire system.
How to Use This Pose for Recovery
Return to this position between challenging sequences. It resets your breath and calms your nervous system effectively. This makes it perfect for recovery moments.
I use it as my home base during practice sessions. It provides safety when feeling overwhelmed or tired. The pose remains accessible to all experience levels.
Sometimes the most advanced practice is knowing when to rest.
Regular use improves flexibility in your hips and back over time. The gentle stretch works gradually without strain. Consistency brings noticeable progress.
Modifications for Comfort
Several adaptations make this pose more comfortable. They accommodate different body types and needs. Everyone can find their perfect variation.
- Place a blanket under your hips, knees, or forehead for cushioning
- Widen your knees during pregnancy for belly space
- Extend your arms forward for a deeper shoulder stretch
- Keep your arms by your sides for complete relaxation
- Use props to enhance therapeutic effects
Breathe deeply into your back body during the hold. Feel expansion and release with each exhale. This amplifies the mental benefits significantly.
The pose promotes mindfulness and introspection through gentle rest. It becomes a moving meditation when practiced regularly. Your mind finds quiet space in this position.
Follow these steps for proper alignment:
Kneel on your mat with big toes touching behind you. Keep your knees hip-width apart for stability. Exhale as you fold forward between your thighs.
Rest your forehead gently on the floor surface. Allow your arms to relax by your sides comfortably. Hold for five to ten complete breaths.
This position serves as a safe haven in many classes. Teachers often use it for moments of regrouping. It represents comfort and acceptance on the mat.
Remember that props make everything more restorative. They help you settle deeper into relaxation. Your practice benefits from their supportive presence.
Corpse Pose (Savasana): Mastering Final Relaxation
My journey with Savasana began when I understood its deceptive complexity. This final resting position appears simple but demands profound mental discipline. It completes every practice by integrating physical and mental benefits.
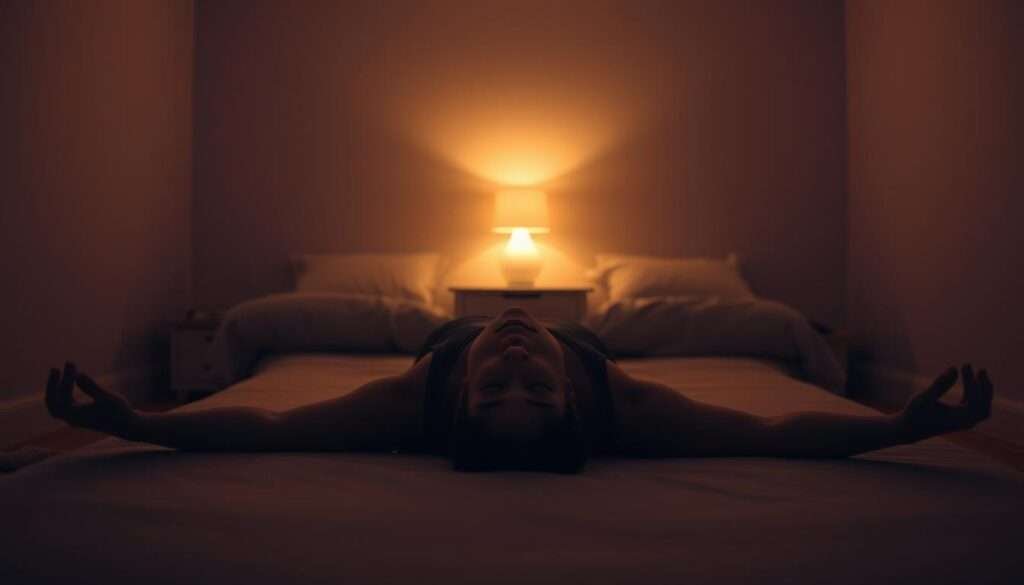
This pose represents the ultimate surrender in your practice. It allows your system to absorb all previous work. The body finds deep restoration while the mind achieves clarity.
Why This Is the Most Challenging Pose
Despite its simple appearance, Savasana requires complete mental stillness. Many find staying present more difficult than physical postures. The challenge lies in releasing control completely.
This practice of non-doing teaches acceptance and inner peace. It transforms your relationship with stillness over time. Consistent effort yields remarkable mental benefits.
- Mental stillness proves harder than physical exertion for most
- Releasing control feels unnatural in our achievement-oriented culture
- The pose demands complete surrender without expectation
- Many practitioners struggle with wandering thoughts during relaxation
- Physical discomfort can distract from mental quietness
Staying Present During Relaxation
Focus on your natural breath without attempting to control it. Notice bodily sensations without judgment or analysis. This mindful awareness anchors you in the present moment.
When your mind wanders, gently return to breath awareness. Use a simple mantra or body scan technique if needed. These tools help maintain focus during longer holds.
Setting a timer eliminates worry about time passing. This allows complete surrender to the resting state. Full relaxation becomes possible without clock-watching.
In the attitude of silence the soul finds the path in a clearer light, and what is elusive and deceptive resolves itself into crystal clearness.
Props enhance the experience significantly. An eye pillow creates darkness for deeper relaxation. A blanket over the body provides warmth and security.
Place a block under your navel for grounding sensation. These supports make longer holds more comfortable. They facilitate deeper states of relaxation.
This pose integrates all benefits from your practice session. It allows the body to process physical changes. The mind assimilates mental clarity gained through movement.
Every yoga session should conclude with this essential pose. It provides closure regardless of practice duration or style. This final integration completes the holistic experience.
Consider practicing Savasana daily outside formal sessions. Even five minutes reduces stress and improves sleep quality. It becomes a valuable tool for modern life challenges.
View this pose as non-negotiable for complete practice. It teaches the art of being rather than doing. This wisdom extends far beyond the mat into daily living.
Follow these steps for optimal benefits:
- Lie supine with legs separated naturally
- Position arms slightly away from your torso
- Turn palms upward in receptive gesture
- Breathe naturally without controlling rhythm
- Remain still for five to ten minutes
- Awaken slowly by deepening breath gradually
This final relaxation offers profound rewards for consistent practitioners. It completes the cycle of effort and release. Your practice finds its perfect conclusion in stillness.
Creating Your Perfect Yoga Sequence
I learned the art of sequencing during my early teaching days. Putting poses together creates a beautiful flow. This approach makes your practice feel like a complete journey.
Good sequencing builds energy gradually. It prepares your body for deeper movements. The right order prevents strain and maximizes benefits.
How to Combine These Poses Effectively
Start with gentle warm-up positions. These prepare your muscles for deeper work. Mountain Pose establishes proper alignment from the beginning.
Move into standing balances like Tree Pose. These build focus and stability. They transition nicely into more dynamic movements.
Include both forward bends and backbends. This creates balance in your practice. Your body appreciates this thoughtful approach.
- Begin with grounding poses to establish connection
- Progress to standing positions for strength building
- Incorporate floor work for flexibility and release
- Always finish with relaxation for integration
- Link movements with conscious breathing patterns
Listen to your body throughout the sequence. Some days call for more vigorous movement. Other times require gentle stretching and rest.
Your breath guides the pace of your practice. Inhale to expand and create space. Exhale to release tension and deepen stretches.
Sample 20-Minute Practice Routine
This short routine fits into busy schedules. It provides comprehensive benefits in limited time. Consistency with brief sessions builds lasting habits.
Practice this sequence two or three times weekly. Regular effort yields noticeable improvements. Even short practices create positive changes.
| Pose | Duration | Focus |
|---|---|---|
| Mountain Pose | 2 minutes | Grounding |
| Tree Pose (each side) | 2 minutes | Balance |
| Downward Dog | 2 minutes | Stretching |
| Warrior I (each side) | 2 minutes | Strength |
| Seated Forward Fold | 2 minutes | Release |
| Bridge Pose | 2 minutes | Opening |
| Child’s Pose | 2 minutes | Rest |
| Savasana | 4 minutes | Integration |
Adapt this routine to your available time. Shorten holds on busy days. Extend durations when you have more space.
Use props at home for additional support. Blocks help with alignment in standing poses. Blankets make floor work more comfortable.
Focus on poses that feel good in your body. Skip movements that cause discomfort. Your practice should leave you feeling better.
Tailor sequences to your specific goals. Strength-focused routines emphasize standing holds. Relaxation sessions feature more restorative positions.
Remember that regularity matters most. Brief daily practice beats occasional long sessions. Build your habit one day at a time.
Common Mistakes and How I Correct Them
Early in my yoga journey, I noticed patterns in how students approach their practice. Small adjustments often create big improvements in safety and benefits. Understanding common errors helps prevent frustration and injury.
Alignment Errors in Standing Poses
Proper alignment protects your joints and enhances results. I’ve seen these frequent mistakes in standing positions.
Many beginners let their knees drift past their ankles in lunges. This strains the knee joint unnecessarily. Keep your front knee directly above your ankle for support.
Another common issue involves hip alignment in Warrior poses. Hips often tilt forward instead of staying square. Engage your core to maintain proper pelvic position.
- Overextending knees: Keep a micro-bend in joints to prevent locking
- Misaligned hips: Use mirrors for visual feedback on positioning
- Uneven weight distribution: Press through all four corners of your feet
- Rounded shoulders: Draw shoulder blades down your back
- Collapsed chest: Lift your sternum toward the ceiling
For forward folds, many people round their spines excessively. This creates tension in the lower back. Instead, hinge from your hips while keeping your spine long.
Props provide excellent support for alignment corrections. Blocks bring the floor closer to your hands. Walls offer stability for balance challenges.
Breathing Mistakes Beginners Make
Breath awareness transforms your yoga experience. Many newcomers hold their breath during challenging poses.
Shallow breathing reduces oxygen flow to your muscles. This increases tension and decreases flexibility. Focus on deep, even inhalations and exhalations.
I recommend practicing ujjayi breath for better control. This technique involves slight constriction in your throat. It creates an ocean-like sound that helps focus your mind.
The breath is the bridge which connects life to consciousness.
Match your breathing to your movements for optimal flow. Exhale when folding forward or twisting. Inhale when expanding your chest or lifting your arms.
These breathing patterns enhance relaxation and depth:
- Inhale to prepare for movement
- Exhale to release into stretches
- Maintain steady rhythm during holds
- Use breath to release muscular tension
- Allow natural pauses between cycles
Recording your practice provides valuable feedback. Notice if you hold your breath during difficult poses. Video review helps identify patterns needing correction.
Remember that mistakes are natural in any learning process. Focus on one correction at a time to avoid overwhelm. Celebrate small improvements in your form and breathing.
Consistent practice brings gradual refinement to your technique. Each session offers opportunities for growth. Your body and breath learn to work in harmony.
Tracking Your Progress and Staying Motivated
I learned about sustainable progress through my own yoga journey. Tracking small improvements keeps motivation strong over months and years. This approach transforms occasional effort into lasting habits.
Consistent practice brings gradual changes that accumulate. Noticeable benefits appear through regular commitment. Even brief sessions create meaningful transformation.
Setting Realistic Expectations
Progress in yoga unfolds slowly and steadily. Focus on showing up rather than achieving perfection. Aim for two or three sessions each week.
Beginners benefit from starting with twenty-minute practices. This manageable approach builds confidence without overwhelm. Regular short sessions yield better results than occasional long ones.
- Focus on consistency over intensity in early stages
- Track your attendance rather than perfection
- Remember that every body progresses at its own pace
- Accept that some days feel easier than others
- Trust the process even when immediate results aren’t visible
Celebrating Small Improvements
I celebrate tiny victories in my personal practice. These moments of progress fuel ongoing motivation. They make the journey enjoyable and rewarding.
Notice when you reach farther in a forward fold. Appreciate holding balance poses for additional breaths. Each small achievement deserves recognition.
Yoga is not about touching your toes, it’s about what you learn on the way down.
Tracking methods help maintain perspective over time:
- Keep a simple journal noting one positive change per session
- Use yoga apps that record your consistency and milestones
- Take monthly photos to observe posture improvements
- Note how clothing fits differently as flexibility increases
- Record breathing capacity changes during meditation
Set specific goals like holding Tree Pose for thirty seconds. Reward yourself when achieving these targets. Small celebrations reinforce positive habits.
Online communities provide wonderful support and inspiration. Join challenges that align with your personal objectives. Shared experiences make the journey more enjoyable.
Mental benefits serve as powerful motivators. Reduced stress and increased mindfulness become noticeable. These changes often appear before physical transformations.
Vary your routines to maintain interest and engagement. Try new poses or sequences when motivation wanes. Fresh approaches reinvigorate your commitment.
Remember that even five minutes of practice counts on busy days. Maintaining the habit matters more than duration. Your body and mind appreciate consistent effort.
This personal journey focuses on how yoga makes you feel. Comparison with others diminishes your unique experience. Your practice belongs entirely to you.
Conclusion: Starting Your Yoga Journey Today
Looking back, I see how small steps led to big changes in my wellness routine. This practice welcomes everyone, regardless of experience or flexibility.
Begin with simple movements at home. Use props for support and focus on your breath. Even short sessions done regularly build strength and calm.
Remember, progress comes with consistency, not perfection. Explore online resources or local classes to deepen your understanding. Each day offers a chance to grow.
Embrace this path with patience and kindness toward yourself. Your mat awaits the unique journey only you can take.