Table of Contents
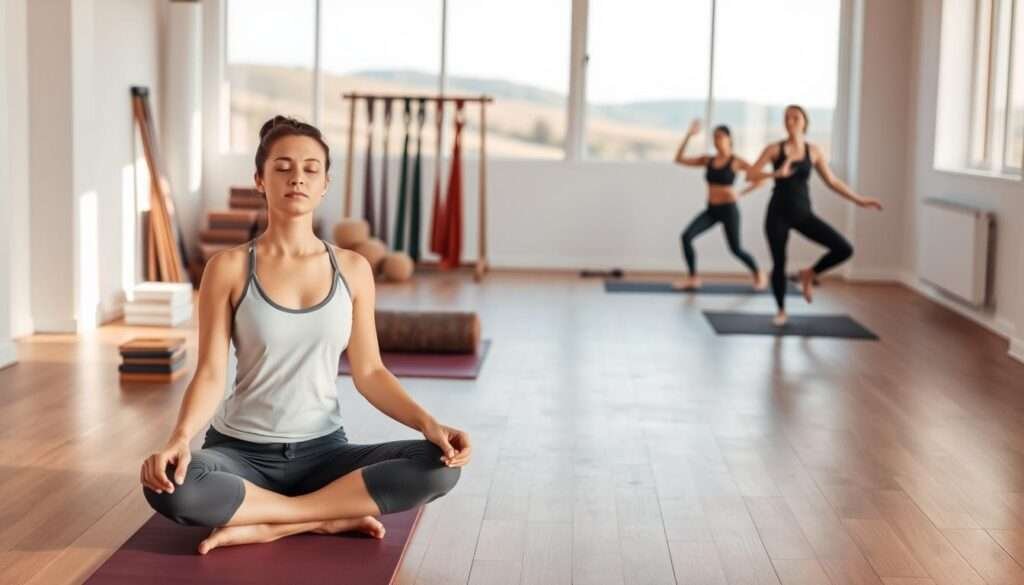
ToggleI remember my first time stepping onto a mat. My body felt stiff, my mind raced, and I wondered if I could ever find that sense of peace others talked about. But with gentle guidance and simple poses, something shifted. I discovered that yoga isn’t about perfection—it’s about showing up for yourself, exactly as you are.
This guide is for anyone who’s ever felt that hesitation. Whether you’re looking to ease back tension or simply find a moment of calm, these basic yoga poses are designed for all bodies and ages. You’ll find step-by-step instructions that make starting easy.
I’ll share the wonderful benefits each pose offers, from strengthening your spine to releasing tight shoulders. You’ll also discover helpful products like supportive mats to enhance your practice. Let’s begin this journey together—one breath, one movement at a time.
Why Yoga is Perfect for Beginners of Any Age
Many people assume yoga requires extreme flexibility, but my experience proved otherwise. This practice welcomes everyone regardless of current fitness level or age. The modifications available make it accessible for all bodies.
I’ve seen remarkable transformations in students who started with limited mobility. The gradual progress builds confidence while respecting individual limits. Let me share what makes this journey so rewarding.
Physical Benefits You'll Experience
Regular practice develops strength in unexpected ways. You’ll notice improvements in daily movements and posture. The physical rewards extend far beyond the mat.
- Builds core strength that supports your entire body
- Increases flexibility in hips, shoulders, and spine
- Improves balance and coordination through standing poses
- Enhances body awareness during movements like bending knees or extending arms
- Relieves lower back tension through gentle arching and lengthening
I recommend a quality mat like the Manduka PRO for optimal support. Proper equipment makes holding poses more comfortable and safe.
Mental and Emotional Rewards
The mental benefits surprised me even more than the physical changes. This practice creates space for emotional release and clarity. The rewards extend into all areas of life.
- Reduces stress through focused breathing techniques
- Improves sleep quality by calming the nervous system
- Boosts self-esteem as you master new abilities
- Enhances concentration through mindful movement
- Creates emotional balance by connecting body and mind
The MentalUP app complements practice with cognitive exercises. I’ve found it helpful for maintaining mental sharpness between sessions.
| Physical Benefits | Mental Benefits | Recommended Products |
|---|---|---|
| Improved flexibility | Stress reduction | Supportive yoga mat |
| Better posture | Enhanced focus | MentalUP app |
| Stronger core | Emotional balance | Comfortable props |
| Pain relief | Better sleep | Breathing timer |
These benefits accumulate with consistent practice. I’ve witnessed students of all ages experience these positive changes. The journey begins with showing up exactly as you are.
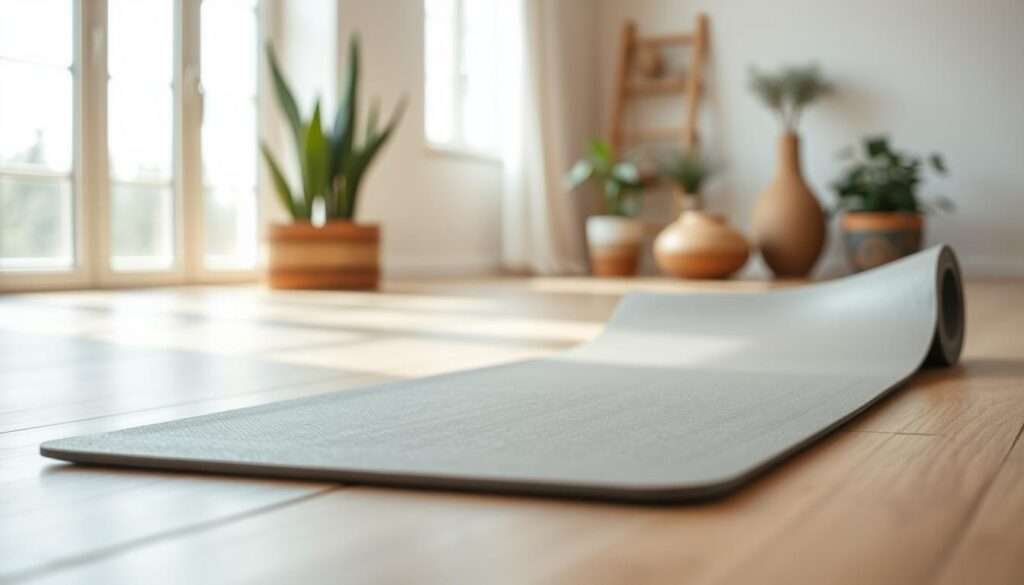
Essential Yoga Equipment for Your Practice
The journey into yoga becomes much smoother when you have a few key items to support your body and practice. I’ve found that proper equipment helps maintain correct alignment and prevents strain on sensitive areas like knees and lower back.
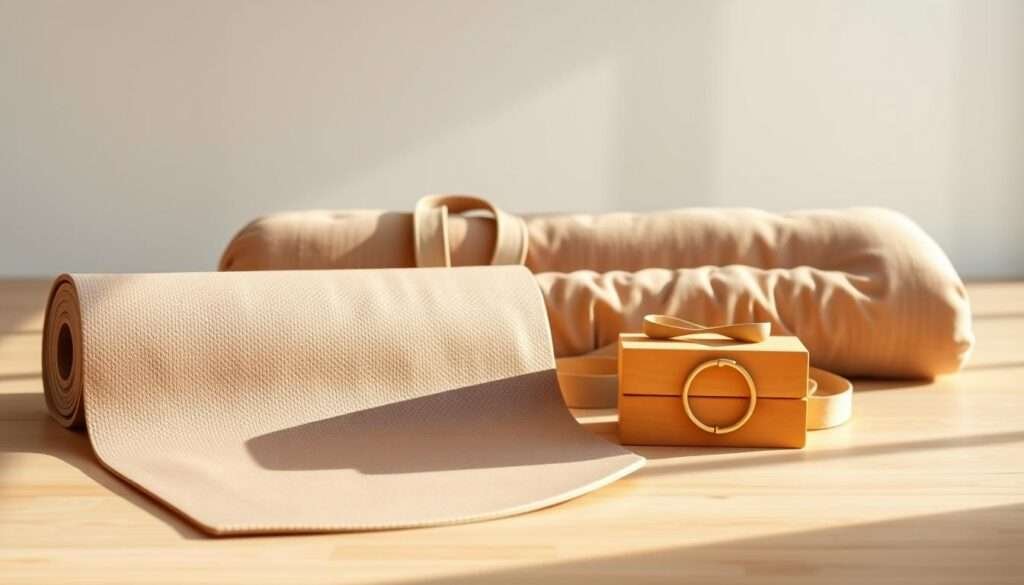
Starting with basic gear builds confidence during those initial sessions on the mat. Let me share what I consider essential for a comfortable beginning.
Must-Have Yoga Gear
Every practice begins with foundation pieces that ensure safety and comfort. These items support your body through various positions and movements.
- Quality Yoga Mat: Provides cushioning for knees and spine while offering grip to prevent slipping during poses
- Comfortable Clothing: Allows free movement without restricting arms, legs, or hips during extension
- Guided Practice App: MentalUP offers animated guides for proper form in basic yoga poses
I recommend trying different mats to find what feels best under your hands and feet. The right thickness protects your joints during floor work.
Nice-to-Have Accessories
These accessories enhance your experience but aren’t strictly necessary for starting. They provide extra support for challenging positions.
- Yoga Blocks: Help bring the ground closer when flexibility limits reaching floor positions
- Strap: Assists with extending arms and legs while maintaining proper alignment
- Bolster: Supports chest and shoulders during restorative poses and deep breathing
Blocks particularly help with poses where you need to place hands on the ground but can’t quite reach. They build confidence while developing flexibility.
| Mat Type | Thickness | Material | Best For | Price Range |
|---|---|---|---|---|
| Basic PVC | 3-4mm | PVC | Budget-conscious beginners | $20-40 |
| TPE Eco-Friendly | 4-5mm | Thermoplastic Elastomer | Eco-aware practitioners | $40-70 |
| Premium Rubber | 5-6mm | Natural Rubber | Joint sensitivity issues | $80-120 |
| Travel Mat | 2-3mm | Microfiber | Practice anywhere | $30-60 |
MentalUP stands out among practice apps with its personalized routines and absence of advertisements. The fitness module features engaging animations that guide proper form for each pose.
You can find these items at sporting goods stores, online retailers, or specialized yoga shops. Many offer beginner bundles that include mat, blocks, and strap together.
Getting Started: Foundation Poses for Every Beginner
Mastering yoga begins with understanding two core elements that transform simple movements into powerful practice. These fundamentals create a safe and effective foundation for all poses.
I learned through teaching that proper technique prevents strain while maximizing benefits. Let’s explore how breath and alignment work together.

Proper Breathing Techniques
Breath acts as your internal guide during practice. Coordinating inhalation and exhalation with movement creates fluidity.
I teach students to breathe deeply through the nose. This calms the nervous system while oxygenating muscles.
- Inhale during expansions like lifting chest or arching back
- Exhale during contractions like bending knees or folding forward
- Maintain steady rhythm rather than holding breath
- Use ujjayi breath (ocean sound) to maintain focus
- Sync breath with transitions between positions
MentalUP’s breathing timer helps develop consistent patterns. I recommend practicing breath work before attempting complex poses.
Basic Alignment Principles
Correct alignment protects joints while engaging the right muscles. I’ve seen students avoid injury by following these guidelines.
Always prioritize safety over depth in any pose. Your body will gradually open with consistent practice.
- Keep knees aligned directly over ankles in standing poses
- Maintain neutral spine by engaging core muscles
- Distribute weight evenly through both feet on the ground
- Relax shoulders away from ears during arm extensions
- Ground through all four corners of each foot for stability
Alignment mats with marked lines help visual learners. They show proper hand and foot placement for various poses.
Remember that every body is different. Modify positions to suit your unique structure and flexibility level.
Warm-Up and Gentle Poses to Begin Your Practice
Starting your session with gentle movements prepares both body and mind for deeper work. These opening positions create space in tight areas while establishing breath awareness.
I always begin my personal practice with these foundational movements. They help me transition from daily activities to focused movement.
Let’s explore two perfect starting positions that anyone can practice. Both offer modifications for different comfort levels.
Cat-Cow Pose (Marjaiasana/Bitilasana)
This flowing movement creates wonderful mobility through your entire spine. I love how it connects breath with motion from the very first repetition.
Begin on hands and knees with wrists under shoulders. Keep knees directly under hips for proper alignment.
- Exhale and gently round your back toward the ceiling like a stretching cat
- Inhale and drop your belly while lifting chest and gaze forward
- Continue flowing between these two positions with your breath
- Complete 5-10 rounds to warm up the spinal muscles
This sequence offers multiple benefits for beginners. It gently massages the spine while releasing tension in neck and shoulders.
Those with sensitive wrists can practice on fists instead of flat hands. A thick mat provides extra cushioning for knees.
Child's Pose (Balasana)
This resting position provides deep release for back and hips. I often return to this pose throughout my practice for moments of rest.
Start kneeling on your mat with big toes touching behind you. Separate knees about hip-width apart for comfort.
- Slowly lower your hips back toward your heels
- Walk hands forward until arms extend fully
- Rest forehead gently on the floor or mat
- Breathe deeply into your back and side body
This pose creates space in your spine while calming the nervous system. It’s particularly helpful for relieving lower back discomfort.
If your forehead doesn’t reach the ground, place a folded blanket under it. Those with knee sensitivity can place padding behind knees.
| Pose Name | Primary Benefits | Modification Tips | Breath Pattern |
|---|---|---|---|
| Cat-Cow | Spinal flexibility, neck release | Use fists for wrist comfort | Exhale on round, inhale on arch |
| Child’s Pose | Hip opening, back relaxation | Padding under forehead or knees | Deep, slow breathing |
Both positions establish the mind-body connection essential for practice. They remind us to move with awareness rather than force.
I recommend holding each position for several breath cycles. This allows your body to fully receive the benefits.
Standing Poses for Balance and Strength
Standing positions form the foundation of many yoga sequences. They build stability while teaching proper alignment.
I’ve found these poses particularly valuable for developing body awareness. They connect you with the ground beneath your feet.

Mountain Pose (Tadasana)
This fundamental position teaches proper standing alignment. It appears simple but offers deep benefits.
Stand with feet hip-width apart. Distribute weight evenly across both feet.
- Keep hands at your sides with palms facing forward
- Spread toes wide to create stable foundation
- Lift chest while relaxing shoulders down
- Engage leg muscles without locking knees
- Breathe deeply while maintaining the position
Benefits include improved posture and better balance. It also strengthens legs and increases body awareness.
Beginners can practice against a wall for feedback. Feel your shoulder blades against the surface.
Chair Pose (Utkatasana)
This powerful pose builds lower body strength. It activates multiple muscle groups simultaneously.
Start with feet together on your mat. Raise arms overhead with palms facing each other.
- Bend knees as if sitting back into a chair
- Keep weight in your heels rather than toes
- Maintain length through your spine
- Hold the position for several breath cycles
- Keep chest lifted and shoulders relaxed
This pose strengthens glutes and engages your core. It also stretches chest and shoulders while building quad strength.
Those with knee sensitivity should bend less deeply. A non-slip mat provides extra stability.
Forward Fold (Uttanasana)
This calming pose releases tension in your back body. It provides a gentle stretch for multiple areas.
Stand tall with feet hip-width apart. Exhale as you fold forward from your hips.
- Allow your head to hang heavily toward the floor
- Place palms on the mat or grasp opposite elbows
- Bend knees slightly if hamstrings feel tight
- Feel your spine lengthen with each exhale
- Relax your neck and shoulder muscles completely
Benefits include hamstring and calf stretching. It also lengthens your spine and calms the nervous system.
This pose can relieve lower back discomfort when practiced gently. Always honor your body’s current flexibility.
Core-Strengthening Poses
Building core strength transforms your entire practice. I’ve watched students develop incredible stability through these foundational positions.
Strong core muscles protect your spine during daily activities. They also improve balance and posture over time.
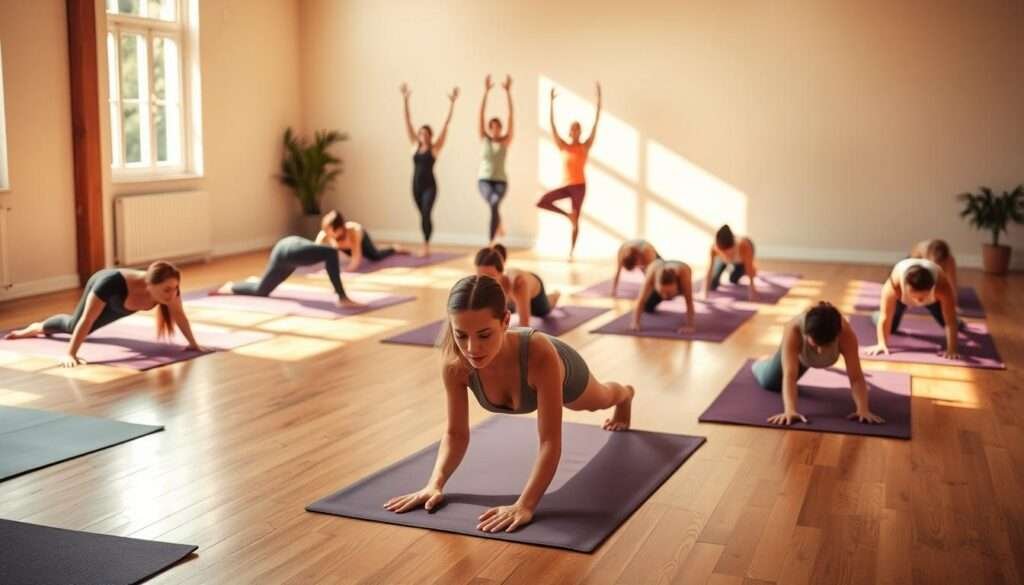
Plank Pose (Kumbhakasana)
This position builds total body strength from head to toes. I recommend starting with short holds and gradually increasing duration.
Begin on all fours with wrists under shoulders. Extend your legs straight behind you.
- Keep your back completely flat like a tabletop
- Engage abdominal muscles to support your spine
- Distribute weight evenly through hands and feet
- Maintain neutral neck alignment by gazing at the floor
- Breathe steadily while holding the position
Benefits include strengthened shoulders, arms, and core muscles. It also teaches proper spinal alignment.
Beginners can modify by dropping knees to the mat. This builds strength while maintaining proper form.
Low Plank (Chaturanga Dandasana)
This challenging movement develops incredible upper body power. I always remind students to move slowly and with control.
Start from plank position with body straight. Bend elbows to lower halfway down.
- Keep elbows close to your sides throughout
- Stop when upper arms become parallel to the floor
- Maintain engaged core throughout the movement
- Push back up to starting position with control
- Keep shoulders away from ears during the motion
This pose stabilizes your core while working triceps and chest. It builds functional strength for daily activities.
Those building strength can practice from their knees. Yoga blocks under shoulders provide extra support.
| Pose Name | Primary Muscle Groups | Beginner Modifications | Recommended Hold Time |
|---|---|---|---|
| Plank Pose | Core, shoulders, arms | Knees on mat | 15-30 seconds |
| Low Plank | Triceps, chest, core | Lower from knees | 5-10 repetitions |
Both positions become easier with consistent practice. I’ve seen students progress remarkably within just a few weeks.
Remember that quality always matters more than duration. Proper form protects your body while maximizing benefits.
20 Yoga Poses for Beginners of Any Age: The Complete Sequence
I often see students light up when they connect poses into a smooth sequence. These four positions flow beautifully together, creating strength and flexibility throughout your entire body.
Practice them in order to experience how one pose prepares you for the next. This builds confidence while developing full-body awareness.
Downward-Facing Dog (Adho Mukha Svanasana)
This classic pose serves as a transitional resting position. It stretches multiple muscle groups simultaneously.
Start from hands and knees on your mat. Tuck your toes and lift your hips toward the ceiling.
- Form an inverted “V” shape with your body
- Press palms firmly into the ground
- Relax your neck and move shoulders away from ears
- Keep knees slightly bent if hamstrings feel tight
- Pedal your feet gently to stretch calf muscles
Benefits include loosening hamstrings and strengthening shoulders. It also lengthens your spine beautifully.
A grippy mat prevents slipping during this pose. I recommend the Lululemon The Reversible Mat for excellent traction.
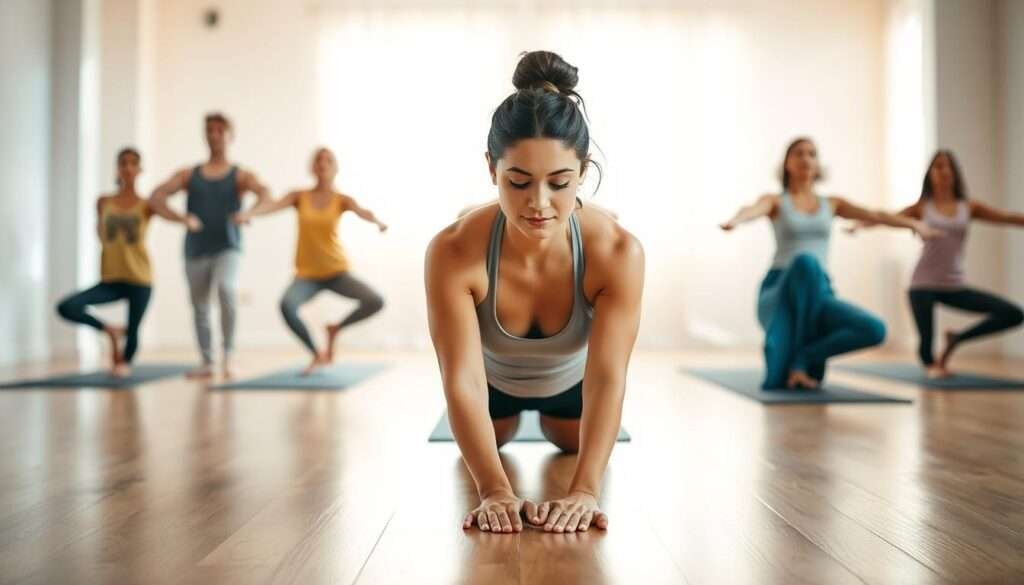
Three-Legged Dog (Tri Pada Adho Mukha Svanasana)
This variation adds hip opening to the traditional pose. It builds balance while increasing flexibility.
From downward-facing dog, lift your right foot toward the ceiling. Keep your hips level and shoulders square.
- Maintain equal weight distribution through both hands
- Engage your core muscles for stability
- Point lifted foot toward the ceiling
- Hold for several breaths before switching sides
- Keep your standing leg strong and engaged
This position works your hamstrings while opening hips. It also strengthens shoulders and improves balance.
Those with tight hips can bend the lifted knee slightly. This modification maintains the stretch while increasing comfort.
Upward-Facing Dog (Urdhva Mukha Svanasana)
This backbend creates wonderful expansion through your chest. It counteracts the forward folding we do daily.
Lie on your stomach with legs extended behind you. Place palms beside your lower ribs.
- Press into your hands to lift your chest forward
- Keep thighs and shins off the floor
- Draw shoulders back and down
- Lengthen through your spine while arching gently
- Gaze forward or slightly upward
Benefits include opening the chest and strengthening the back. It also improves spinal flexibility over time.
If you feel compression in your lower back, reduce the lift. Focus more on lengthening than arching.
Side Plank (Vasisthasana)
This challenging pose builds incredible core and arm strength. It teaches balance while engaging multiple muscle groups.
Begin in plank position on your mat. Shift weight onto your right hand and outer right foot.
- Stack your left foot on top of the right
- Lift your left arm toward the ceiling
- Keep your body in one straight line
- Engage your core muscles throughout
- Breathe steadily while holding the position
This pose strengthens shoulders, arms, and core muscles. It also dramatically improves balance and coordination.
Beginners can modify by bending the bottom knee. Place that knee on the mat for extra support.
| Pose Name | Primary Benefits | Beginner Modifications | Recommended Duration |
|---|---|---|---|
| Downward-Facing Dog | Hamstring stretch, shoulder strength | Bend knees, pedal feet | 5-8 breaths |
| Three-Legged Dog | Hip opening, balance improvement | Bend lifted knee slightly | 3-5 breaths per side |
| Upward-Facing Dog | Chest opening, spine lengthening | Reduce lift if back feels strained | 3-5 breaths |
| Side Plank | Core strength, balance development | Keep bottom knee on mat | 3-5 breaths per side |
Practice these positions in sequence for maximum benefit. They flow naturally from one to the next, creating a mini-practice you can do daily.
Remember that consistency matters more than perfection. Your body will gradually open with regular practice.
Hip-Opening and Flexibility Poses
I’ve always found that poses targeting the hips create a special kind of release. They unlock tightness that accumulates from sitting or standing all day. These positions build both flexibility and stability in your lower body.
Each pose offers unique benefits for your hips and legs. They also improve balance and core strength over time.
Low Lunge (Anjaneyasana)
This gentle pose creates wonderful opening through your hips and thighs. It’s perfect for releasing tension after long periods of sitting.
Start by stepping one foot back from a forward fold. Lower your back knee to the mat gently.
- Bend your front knee to a 90-degree angle
- Keep your front knee aligned over your ankle
- Press your hips forward to deepen the stretch
- Hold for several deep breaths before switching sides
Benefits include improved hip flexibility and better balance. It also stretches your quadriceps and inner thighs beautifully.
If your knees feel sensitive, place extra padding under them. A yoga strap can help maintain proper alignment.
High Lunge (Utthita Ashwa Sanchalanasana)
This powerful variation builds strength while increasing flexibility. It engages your entire body from feet to fingertips.
From low lunge position, lift your torso upright. Raise your arms overhead with palms facing each other.
- Keep your front knee bent at a right angle
- Engage your core muscles for stability
- Press through the ball of your back foot
- Lengthen your spine toward the ceiling
This pose works your quadriceps and hip flexors. It also builds core strength and improves balance.
Those working on balance can use a wall for support. Place your hands on the wall while holding the position.
Warrior II (Virabhadrasana II)
This classic standing pose builds incredible lower body strength. It opens your hips while teaching proper alignment.
Stand with your legs wide apart on your mat. Turn your right foot out 90 degrees.
- Bend your right knee over your right ankle
- Extend your arms straight out to both sides
- Keep your shoulders relaxed away from ears
- Gaze over your right fingertips
Benefits include hip opening and quadriceps strengthening. It also dramatically improves balance and concentration.
Beginners can shorten their stance for better stability. Ensure your bent knee doesn’t extend past your ankle.
Extended Side Angle (Utthita Parsvakonasana)
This pose combines strength with deep side stretching. It challenges your balance while opening your entire side body.
From Warrior II position, tilt your torso to the right. Rest your right forearm on your right thigh.
- Extend your left arm overhead toward the front
- Keep both legs strong and engaged
- Create one long line from your left foot to left hand
- Breathe deeply into your side body
This position stretches your obliques and works your shoulder muscles. It also opens your hips and improves balance.
If you can’t reach the floor, use a block under your hand. This modification maintains the stretch while providing support.
| Pose Name | Primary Benefits | Beginner Modifications | Recommended Duration |
|---|---|---|---|
| Low Lunge | Hip opening, quad stretch | Padding under knees | 5-8 breaths per side |
| High Lunge | Core engagement, balance | Use wall for support | 3-5 breaths per side |
| Warrior II | Hip opening, leg strength | Shorten stance width | 5-8 breaths per side |
| Extended Side Angle | Oblique stretch, shoulder work | Block under hand | 3-5 breaths per side |
These poses work beautifully together in a sequence. Practice them regularly to see improvements in flexibility and strength.
Remember to move slowly and with awareness. Your body will gradually open with consistent practice.
Floor Poses for Deep Stretching
Floor-based positions offer a unique opportunity to release deep tension throughout your entire body. These gentle stretches work wonders for tight muscles and stiff joints.
I love incorporating these poses into my evening routine. They help me unwind after long days while improving flexibility over time.
Wide-Legged Forward Fold (Prasarita Padottanasana)
This standing fold creates incredible length through your spine and legs. It’s one of my favorite ways to release lower back tension.
Stand with your feet wide apart on your mat. Keep your toes pointing slightly inward for stability.
- Bend your knees slightly as you fold forward from your hips
- Bring your hands to rest on the floor beneath your shoulders
- Lengthen your spine with each inhalation
- Relax your head toward the ground between your arms
- Hold for 5-8 deep breath cycles
Benefits include hamstring stretching and spinal relaxation. It also opens your hips and calms your nervous system.
If your hands don’t reach the floor, use blocks under them. This modification maintains the stretch while providing support.
Wide-Legged Forward Fold With Twist (Parivrtta Prasarita Padottanasana)
This variation adds a wonderful rotational element to the basic fold. It engages your core while stretching your shoulders.
From the wide-legged position, place your right palm on the floor. Twist your torso to the left as you extend your left arm upward.
- Keep both feet firmly planted on the ground
- Gaze toward your lifted left hand
- Engage your abdominal muscles throughout the twist
- Maintain length through your entire spine
- Hold for 3-5 breaths before switching sides
This pose stretches your obliques and opens your chest. It also improves spinal mobility and balance.
Beginners can use a block under the bottom hand. This makes the twist more accessible while maintaining proper form.
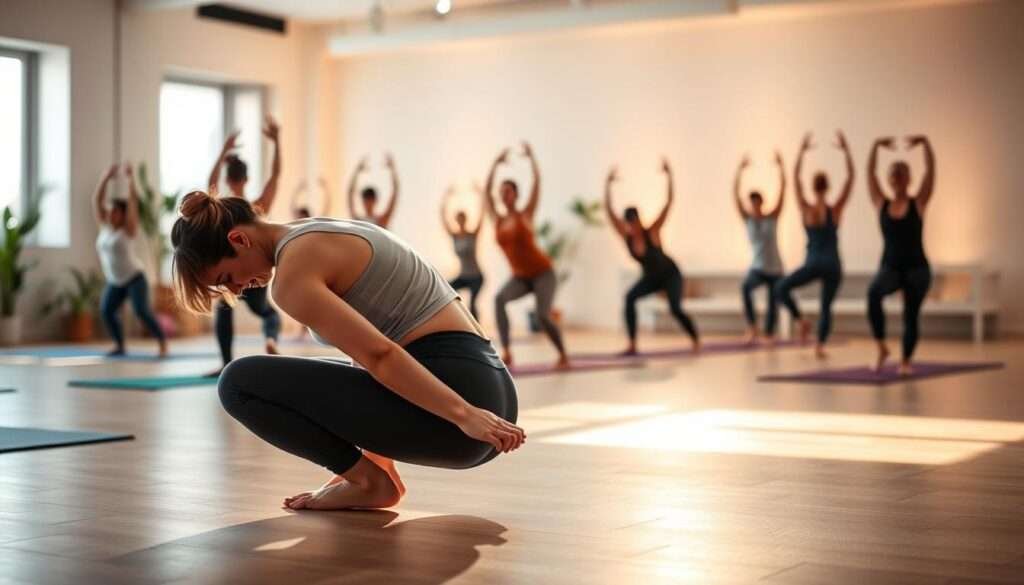
Garland Pose (Malasana)
This deep squat position works wonders for tight hips and stiff knees. I’ve found it particularly helpful for those who sit frequently.
Stand with your feet slightly wider than hip-width apart. Turn your toes out slightly for better comfort.
- Bend your knees and lower your hips toward the floor
- Bring your hands together at your chest in prayer position
- Press your elbows against your inner knees to open your hips
- Keep your spine long and chest lifted
- Hold for 5-8 steady breaths
Benefits include hip opening and improved balance. It also strengthens your ankles and stretches your groin muscles.
If your heels lift off the floor, place a folded blanket under them. This support makes the pose more comfortable.
Happy Baby (Ananda Balasana)
This playful pose creates wonderful release through your hips and lower spine. It’s one of the most relaxing positions in my practice.
Lie on your back with your knees bent toward your chest. Reach for the outer edges of your feet with both hands.
- Gently pull your knees toward the floor beside your chest
- Keep your spine long against the mat
- Relax your shoulders away from your ears
- Rock gently from side to side if it feels good
- Hold for 8-10 deep breaths
This position massages your lower back while opening your hips. It also stretches your hamstrings and inner thighs beautifully.
If you can’t reach your feet, use a strap around your soles. This modification maintains the stretch while being gentle on your body.
| Pose Name | Primary Benefits | Beginner Modifications | Recommended Duration |
|---|---|---|---|
| Wide-Legged Forward Fold | Hamstring stretch, spine relaxation | Blocks under hands | 5-8 breaths |
| Wide-Legged Twist | Core engagement, shoulder opening | Block under bottom hand | 3-5 breaths per side |
| Garland Pose | Hip opening, balance improvement | Blanket under heels | 5-8 breaths |
| Happy Baby | Hip release, lower back massage | Strap around feet | 8-10 breaths |
These floor poses provide deep stretching for your entire body. Practice them regularly to improve flexibility and release tension.
Remember to breathe deeply throughout each position. Your breath helps your muscles relax into the stretches.
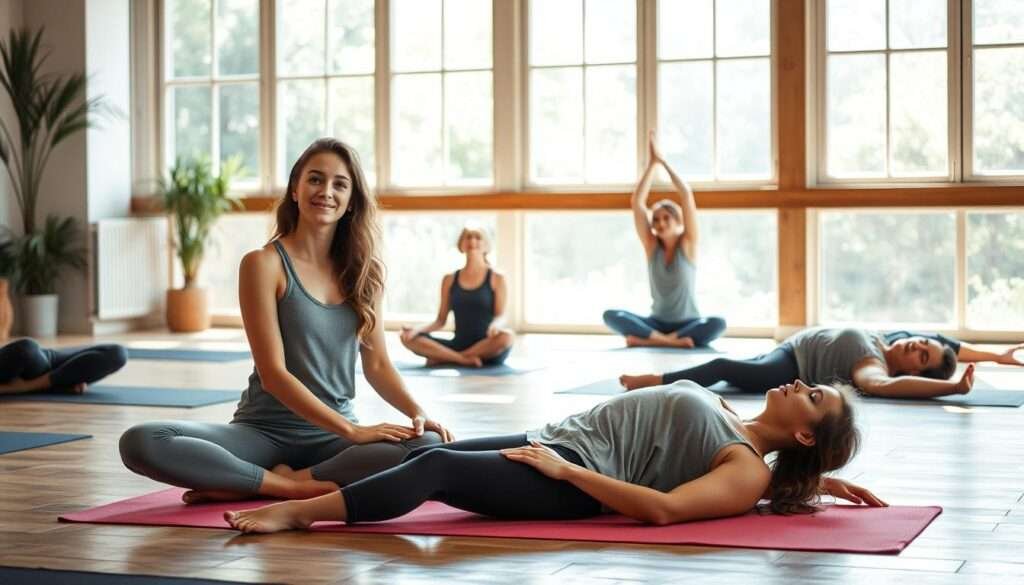
Restorative and Closing Poses
I’ve discovered that the most profound moments often come at the end of practice. These final positions help your body absorb all the benefits from your session. They create space for deep relaxation and integration.
Restorative poses allow your nervous system to settle. They signal your body that the active work is complete. This transition prepares you to return to daily life with renewed energy.
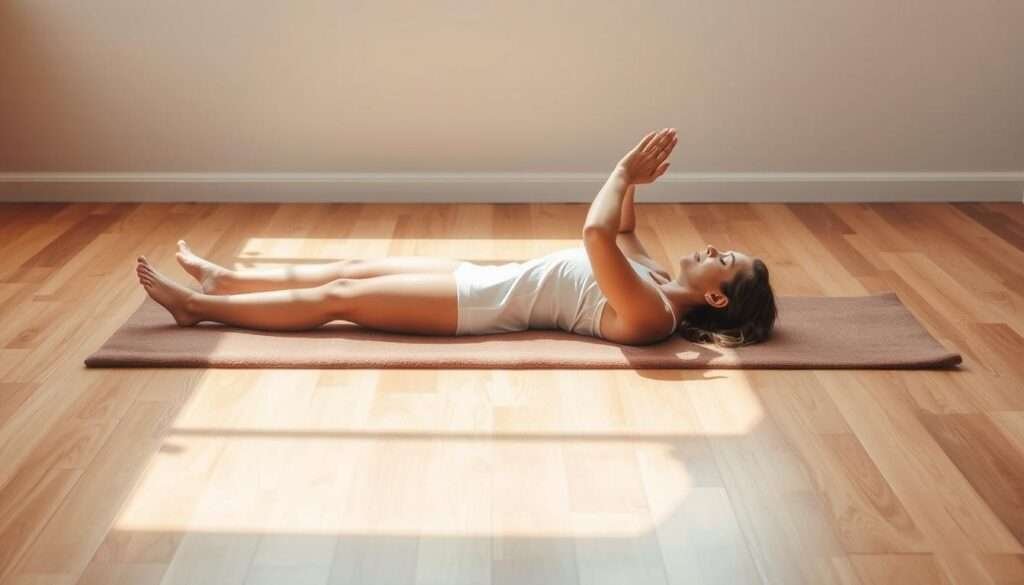
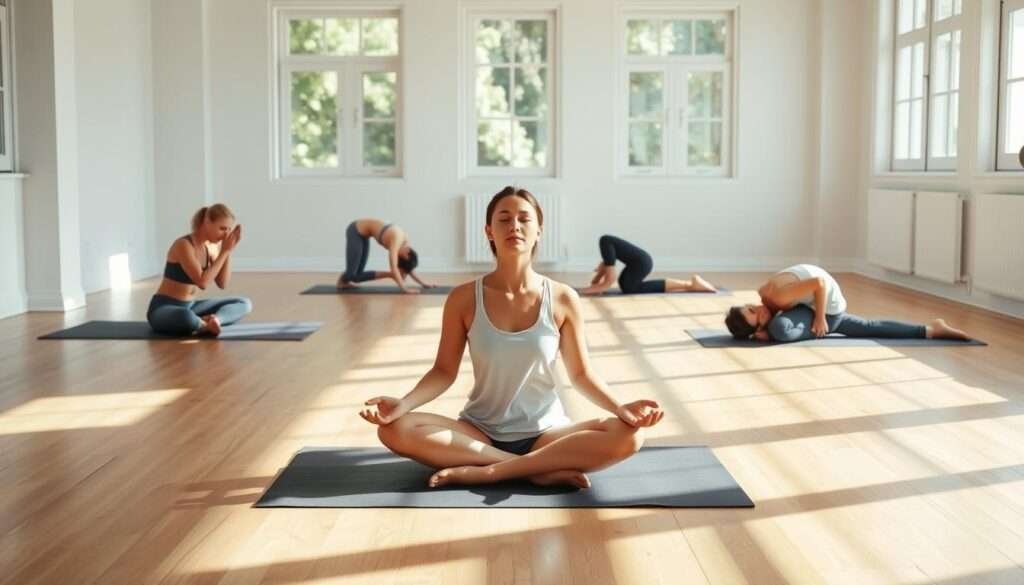
Corpse Pose (Savasana)
This final resting position might look simple, but it offers incredible depth. I’ve watched students experience profound release during these quiet moments. The pose allows your entire system to integrate the practice.
Lie comfortably on your back with legs extended. Place your arms at your sides with palms facing upward.
- Allow your feet to fall naturally to each side
- Close your eyes and release all muscular effort
- Breathe deeply into your belly and chest
- Remain completely still for several minutes
- Let your body feel heavy against the floor
Benefits include reduced stress and lower blood pressure. It calms your nervous system while improving sleep quality. The pose also helps with mental clarity and emotional balance.
I recommend using a bolster under your knees for extra comfort. An eye pillow can deepen the relaxation experience. These small additions make the position even more restorative.
I’ve seen this simple pose transform people’s entire relationship with practice. It teaches the art of complete surrender and acceptance.
| Pose Element | Proper Alignment | Common Mistakes | Enhancement Tips |
|---|---|---|---|
| Body Position | Spine neutral, limbs relaxed | Fidgeting or adjusting | Weighted blanket for grounding |
| Breath Pattern | Natural, effortless rhythm | Holding or forcing breath | Focus on exhalation length |
| Mental State | Aware but not controlling | Falling asleep completely | Soft background music |
| Duration | 5-10 minutes minimum | Cutting time short | Gentle timer sound |
This closing pose serves as the perfect ending to any sequence. It allows your body to fully receive the practice’s benefits. I encourage you to honor this time as much as the active poses.
Remember that true relaxation requires practice like any other skill. Your ability to release deeply will grow with consistency.
Recommended Yoga Products for Beginners
Finding the right gear can transform your practice from frustrating to fantastic. Quality equipment supports your body while helping you maintain proper form. I’ve tested numerous products over the years and want to share what truly works for newcomers.
The right mat cushions your spine during floor work. Supportive props help when you can’t quite reach the ground. Good apps guide you through each movement safely.
Best Yoga Mats for Various Needs
Your mat forms the foundation of every practice session. It should provide cushioning for sensitive areas like knees and lower back. Grip prevents slipping when you sweat during challenging poses.
I recommend considering these excellent options:
- Basic PVC Mat: Affordable choice with decent cushioning for occasional practice
- TPE Eco-Friendly Mat: Recyclable material with good grip and joint protection
- Premium Rubber Mat: Natural material offering superior cushioning and stability
- Travel Mat: Lightweight option that rolls compactly for practice anywhere
| Mat Type | Best For | Thickness | Price Range |
|---|---|---|---|
| Basic PVC | Budget-conscious beginners | 3-4mm | $20-40 |
| TPE Eco-Friendly | Eco-aware practitioners | 4-5mm | $40-70 |
| Premium Rubber | Joint sensitivity issues | 5-6mm | $80-120 |
| Travel Mat | Practice anywhere | 2-3mm | $30-60 |
Thicker mats protect your spine during floor poses. They cushion your knees when you need to bend them. Good grip prevents hands from slipping in downward dog.
Supportive Props and Accessories
These tools help you achieve proper alignment regardless of current flexibility. They bring the floor closer when you can’t reach it with your hands. Props build confidence while you develop strength and mobility.
Essential supportive items include:
- Yoga Blocks: Help bridge the gap between your hands and the floor in standing poses
- Strap: Assists with extending your legs while maintaining proper spinal alignment
- Bolster: Supports your chest and shoulders during restorative positions
- Blanket: Provides padding for sensitive knees and extra support under your hips
Blocks are particularly useful for poses where you need to place hands on the ground. They help maintain length through your spine when flexibility is limited. A strap assists with extending your arms and legs safely.
Yoga Apps and Online Resources
Digital guides help you learn proper form and sequence poses effectively. The MentalUP app stands out with its personalized routines and absence of advertisements. It features engaging animations that demonstrate each movement clearly.
This app supports both physical and mental development through various exercises. The fitness module guides proper form for basic positions. It’s particularly helpful for maintaining consistency in your practice.
Other valuable resources include:
- Video tutorials showing modifications for different body types
- Breathing timers that help develop consistent patterns
- Progress trackers that celebrate small improvements
- Community features connecting you with other beginners
You can find these products at sporting goods stores or online retailers. Many offer beginner bundles that include mat, blocks, and strap together. Investing in quality gear makes your practice more enjoyable and effective.
Tips for Building a Consistent Yoga Practice
I’ve learned that consistency matters more than perfection in any practice. Showing up regularly, even for short sessions, creates lasting benefits for both body and mind.
Building a sustainable routine requires thoughtful planning and self-awareness. Let me share strategies that have helped countless students maintain their practice.
Creating a Routine That Works for You
Establishing a regular schedule makes practice feel natural rather than forced. Start with manageable time commitments that fit your lifestyle.
I recommend these practical approaches:
- Set aside specific times each week for your practice sessions
- Begin with 10-15 minute sessions to build momentum gradually
- Create a dedicated space that feels safe and inviting
- Incorporate fun elements like music or themed sequences
- Use a journal to track progress and celebrate small improvements
- Establish consistency through regular but flexible scheduling
- Promote teamwork by practicing with friends or family members
Choose age-appropriate poses that match your current abilities. The MentalUP app offers personalized routines that adapt to your progress.
Remember that every body has different needs. What works for others might need adjustment for your unique situation.
Listening to Your Body's Needs
Your body provides constant feedback during practice. Learning to interpret these signals prevents strain and injury.
I always encourage students to honor their current limitations. Pushing too hard often leads to setbacks rather than progress.
Key principles for body awareness include:
- Modify poses when you feel sharp pain or discomfort
- Adjust positions to protect sensitive areas like knees and lower back
- Monitor your breathing patterns for signs of strain
- Use props like blocks when you can’t reach the floor comfortably
- Rest when needed rather than pushing through fatigue
- Focus on proper alignment rather than depth in any pose
In standing poses, ensure your feet stay flat on the ground. Bend knees slightly if your hamstrings feel tight.
When arching your back, move slowly and with control. Never force your spine into positions that feel uncomfortable.
These practices create a non-competitive environment where progress happens naturally. Your journey remains personal and unique.
Consistency grows from self-compassion rather than rigid discipline. I’ve seen students transform their practice by embracing this gentle approach.
The benefits accumulate gradually through regular, mindful sessions. Each time you step on your mat, you strengthen both body and spirit.
Conclusion
My journey began with simple movements that built strength and flexibility. This practice welcomes all bodies and ages with gentle modifications.
You’ve discovered poses that support your spine, ease tension, and build confidence. Remember to bend your knees when needed and keep your feet flat on the ground.
Start with just a few minutes daily on your mat. Notice how your body responds to each position.
I encourage you to explore these movements at your own pace. The benefits grow with consistent practice, bringing both physical and mental rewards.