Table of Contents
ToggleI still remember the first weeknight I made this recipe after a long day. I wanted comfort, speed, and a bright, savory flavor that felt like a treat without takeout hassle.
In this intro I’ll tell you what to expect: a fast dinner built from pantry staples—brown sugar, low-sodium soy sauce, sesame oil, and fresh ginger—cooked with ground beef and served over hot rice with green onions and sesame seeds.
I share the exact tools and prep I use, a clear ingredients table, step-by-step cooking, safe temperature notes (cook beef to 160°F), and smart storage tips so this meal stays great all week.
Want more ideas? Try similar bowls and Asian-inspired dinners at similar bowls for swaps, rice basics, and add-on ideas like spicy mayo or crisp cucumbers.
Why You’ll Love This Weeknight Korean Ground Beef Bowl
When dinner time is tight, I turn to one-skillet recipes that deliver big flavor fast. This dish is all about sweet-savory balance and speed, so you can get dinner on the table in minutes without a grocery run.
Sweet-savory flavor in minutes
The sauce combines brown sugar, low-sodium soy sauce, sesame oil, fresh ginger, and garlic. Ground beef browns in about 3–5 minutes, then the sauce simmers 1–2 minutes to glaze the meat. The result is caramelized sweetness and deep umami in very little time.
Packed with pantry staples
Most ingredients live in my pantry, so this meal is budget-friendly and reliable. One skillet means minimal cleanup, and the recipe doubles easily for meal prep or quick lunches.
- Bold flavor fast: caramelized brown sugar meets toasted sesame oil and soy sauce.
- Weeknight-friendly: 3–7 minutes active cooking time from start to finish.
- Customizable: add sriracha or spicy mayo, or top with cucumbers and kimchi.
| Benefit | Typical time | Pantry must-haves |
|---|---|---|
| Fast weeknight dinner | 10 minutes total | Brown sugar, soy sauce, sesame oil |
| Easy cleanup | One skillet | Minimal tools |
| Meal prep friendly | Reheats in minutes | Rice and toppings ready |
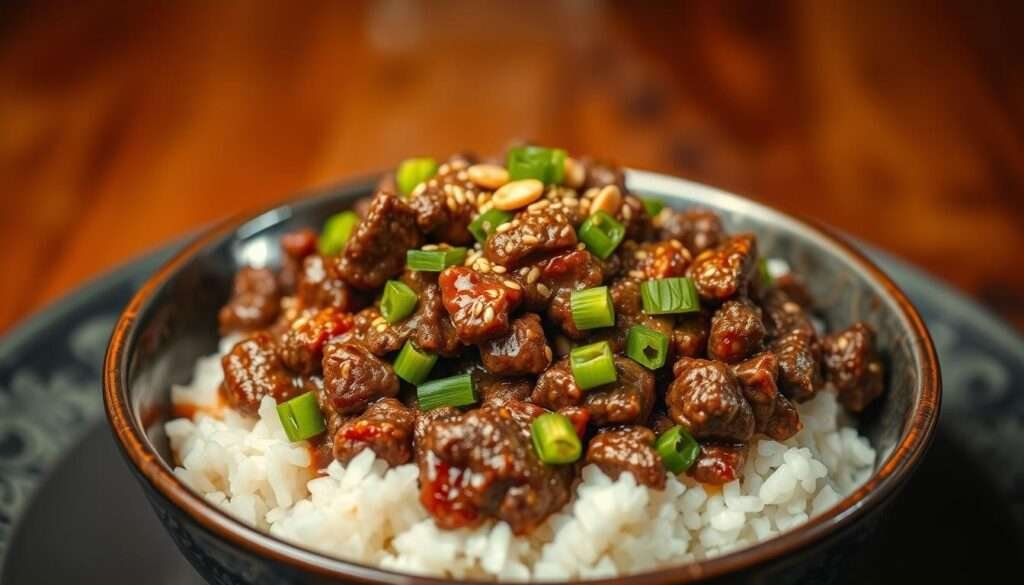
Korean Ground Beef Bowl
A glossy, sweet-savory sauce is what makes this version stand out for me. I mean tender crumbles of meat coated in a quick glaze, served over hot rice for an instant weeknight hit.
I start by browning ground beef with minced garlic until no pink remains. Then I whisk together brown sugar, low-sodium soy, sesame oil, and fresh ginger into a simple sauce and pour it into the skillet.
Shortly after the sauce hits the pan, I let it simmer one to two minutes so the meat soaks up the flavor but stays juicy. The technique is fast, forgiving, and repeatable.
The assembly is easy: rice, the saucy beef, then crisp cucumbers, tangy kimchi, and a drizzle of spicy mayo if I want heat. I finish with chopped green onions and toasted sesame seeds for brightness and crunch.
This streamlined take works with white, brown, or jasmine rice and gives big flavor from pantry staples. It’s a simple entry point into these inspired bowls without a long shopping list.

| Element | Why it matters | Quick tip |
|---|---|---|
| Sauce | Gives sweet-savory depth | Whisk before adding to pan |
| Browning | Locks flavor in crumbles | Don’t overcook the meat |
| Toppings | Add texture and balance | Keep pieces bite-sized |
Tools and Prep: What I Grab Before I Cook
My prep starts with setting a couple of must-have tools on the counter so nothing slows me down. This keeps the flow steady once the pan heats and the rice is on.
Quick prep timeline for busy nights
Start the rice first. While it cooks, mince garlic and grate ginger into a small bowl and whisk the sauce.
Heat a large skillet over medium-high; add a splash of oil only if the meat is very lean. Brown the meat for 3–5 minutes, then simmer the sauce 1–2 minutes so it glazes the crumbles.
Slice green onions and cucumbers while the meat simmers, then assemble over a warm cup of rice and finish with sesame seeds.
Tool Importance & How I Use Each
- I keep measuring spoons and a measuring cup nearby to hit amounts without pausing.
- A heat-safe spatula helps break the meat into even pieces and scrape browned bits.
- Lining up toppings in small dishes speeds assembly and keeps the counter tidy.
| Tool | Why it matters | How I use it | Quick tip |
|---|---|---|---|
| Skillet | Provides steady, even heat | Brown meat over medium-high for 3–5 minutes | Preheat before adding meat |
| Small bowl | Keeps sauce ready and mess-free | Whisk sauce ingredients together, then pour into pan | Whisk just before use |
| Measuring cup & spoons | Ensures balanced flavors | Measure soy, sugar, oil, and a cup of rice water if needed | Set out on the counter so you don’t hunt mid-prep |
| Heat-safe spatula | Breaks meat into crumbles and scrapes fond | Use to turn and brown evenly | Use a gentle scraping motion |
For more make-ahead ideas, see my guide on meal prep unstuffed pepper bowls, which uses a similar mise en place approach.
Exact Ingredients You’ll Need
I like to set out the exact amounts I need so the sauce-to-meat ratio is foolproof. Below is a clear list that helps me shop and prep with confidence.

Amounts for one pan (serves 3–4)
| Category | Ingredient | Amount | Notes |
|---|---|---|---|
| Protein | Beef (80/20 or lean) | 1 lb | Gives best texture and sauce balance |
| Sauce | Brown sugar | 1/4 cup packed | Sweetens and helps glaze the meat |
| Sauce | Soy sauce | 1/3–1/4 cup low-sodium | Start low; adjust after simmering |
| Sauce | Sesame oil | 2 tsp | Toasted flavor |
| Flavors | Garlic | 3 cloves, minced | Fresh gives best aroma |
| Flavors | Ginger | 1 tsp fresh or 1/4 tsp ground | Fresh boosts brightness |
| Base | Rice | 2 cups cooked | White, brown, or jasmine |
| Toppings | Green onions & sesame seeds | 3 sliced; 1/2 tsp seeds | Adds crunch and brightness |
| Optional | Sriracha | 1 tsp (or to taste) | Start small for a gentle kick |
| Optional | Spicy mayo | 1/4 cup mayo + 2 tsp Sriracha + 2 tsp lime | Mix until smooth |
I specify 1 pound of beef so the sauce-to-meat ratio comes out right. For the sauce, I whisk brown sugar with soy sauce and sesame oil, then add garlic and ginger for warmth.
Cook two cups of rice for serving and prep thinly sliced cucumbers and kimchi if you like. I measure everything ahead so the cooking step moves without pauses.
How to Cook It: Step-by-Step Instructions
Make the sauce ahead in a small bowl so the cooking step is fast and uninterrupted. I whisk brown sugar, low-sodium soy, toasted sesame oil, Sriracha, fresh ginger, and minced garlic until the mixture is smooth and ready.
Then I heat a medium skillet over medium-high and add the ground beef. I break it into small crumbles with a spatula so it browns evenly. Cook 3–5 minutes until the meat is just browned, then drain any excess fat.
- Pour the prepared sauce into the hot pan and stir to coat every crumble. Let the mixture simmer 1–2 minutes so the sauce thickens and clings to the meat.
- For safety and juiciness, I check doneness; the USDA safe temp for ground protein is 160°F. Remove from heat and sprinkle thinly sliced green onions and a pinch of sesame seeds.
- To assemble, spoon warm rice into bowls, top with the saucy meat, and add sliced cucumber and kimchi. Drizzle spicy mayo if you want creamy heat.
I often add quick-pickled veggies or a soft-boiled egg for texture. Taste and adjust: more Sriracha for heat, extra onions for brightness. Serve right away for the best contrast of glossy sauce and fresh toppings.

| Step | Action | Timing |
|---|---|---|
| Whisk | Whisk sauce in a small bowl | 2–3 minutes |
| Brown | Brown ground meat in skillet over medium-high heat | 3–5 minutes |
| Simmer | Add sauce, stir, and simmer to thicken | 1–2 minutes |
| Assemble | Top rice with meat, cucumber, kimchi, and spicy mayo | Ready to serve |
Pro Tips for Big Flavor with Minimal Effort
A few smart shortcuts let me get restaurant-level flavor on a tight weeknight schedule. These tips keep the meat juicy, the sauce balanced, and the prep painless.

Heat management and doneness
I keep the pan at medium-high only while browning. Once the crumbles are just cooked, I move on so the meat stays tender.
If the pan runs dry, a tiny splash of water loosens fond before I add the sauce. I never walk away during this short time.
Balancing sweet, salty, and heat
I taste the sauce and tweak it fast: a pinch more sugar for sweetness, a dash of soy for salt, or extra Sriracha for heat. A quick simmer is enough—too much time reduces and can make it too sticky.
- Use 80/20 for richer depth or choose lean to cut fat and drain as needed.
- Measure sesame oil; it adds aroma but can overpower if you pour too much.
- Finish with green onions and sesame seeds for contrast, and reheat gently to keep juiciness.
| Focus | Why it matters | Quick fix |
|---|---|---|
| Heat | Prevents dryness | Medium-high, then lower |
| Time | Keeps texture | Brown 3–5 minutes |
| Balance | Builds flavor | Taste; add sugar or soy |
Toppings, Swaps, and Variations
I like keeping a handful of go-to toppings and swaps ready so every bowl feels new. Small changes let me match tastes, diets, and pantry odds without reworking the method.

Low-carb and grain alternatives
For a low-carb option, I serve the meat over cauliflower rice. If I want extra fiber, quinoa or classic brown rice works well.
Protein swaps: ground turkey or chicken
Ground turkey or chicken are easy swaps that keep the same cooking steps and shave calories. For vegetarian nights, I use firm tofu or a plant-based ground substitute.
Milder or spicier options
To suit heat-sensitive friends, I cut the Sriracha in the sauce and offer extra on the side. For more depth, a spoon of gochujang raises the heat and adds savory richness.
- I top bowls with sliced cucumber, kimchi, and green onions for crunch and brightness.
- A sprinkle of sesame and seeds adds nutty aroma and a little crunch.
- Swap soy with coconut aminos for a soy-free option; use tamari if you need gluten-free soy flavor.
- Regular mayo plus a dash of rice vinegar mimics Kewpie if you don’t have it.
- Add-ins like radishes, avocado, a soft-boiled egg, or roasted nori make each bowl feel special.
| Need | Swap | Why |
|---|---|---|
| Low-carb | Cauliflower rice | Fewer carbs, similar texture |
| Higher fiber | Quinoa or brown rice | More nutrients and chew |
| Protein | Ground turkey or chicken | Lighter, same method |
Want a tested alternative? Try this easy weeknight recipe for similar flavor ideas and topping inspiration.
Storage & Reheating Instructions
When I plan ahead, leftovers turn into easy, satisfying plates in minutes. Storing each component separately keeps textures crisp and flavors bright.
I keep cooked beef and rice in separate airtight containers in the fridge for up to 3 days. Toppings like cucumbers, green onions, and kimchi stay in their own containers so they remain fresh.
For longer storage, I freeze both the meat mixture and rice for up to 3 months. I flatten the beef in a freezer bag to chill quickly; rice goes into portioned bags or cups so it reheats fast.

Reheating for best texture
I warm the beef gently in a skillet over medium heat with a splash of water or oil to restore moisture. If I’m in a rush, I use the microwave in 30-second bursts, stirring between each interval so the mixture heats evenly.
Rice reheats best with a teaspoon of water and a cover to trap steam. Frozen rice can be reheated from frozen in the microwave or steamed in a covered skillet until soft.
- I assemble bowls only after the components are hot, then add fresh garnishes for contrast.
- I taste and re-season after reheating; a pinch of soy or squeeze of lime brightens the plate.
- Meal prep tip: cook once, store smart, and enjoy quick meals throughout the week.
| Component | Fridge | Freezer & Reheat |
|---|---|---|
| Cooked beef | Separate airtight container; 3 days | Freeze flat up to 3 months; thaw overnight or reheat from frozen in skillet |
| Rice | Separate container; 3 days | Portion and freeze; reheat with splash of water or steam |
| Toppings | Store fresh in small containers; 3–4 days (kimchi lasts longer) | Most toppings are best kept refrigerated, not frozen |
Final Thoughts & More Recipes to Try from cuisines-corse.com
This recipe wraps simple pantry flavors into a quick, comforting dinner you can make any night. I rely on a hot skillet, a quick whisk in a small bowl, and careful heat control to get the texture right.
Key takeaways: cook ground meat to 160°F, let the sauce simmer 1–2 minutes, and use a 2:1 rice-to-water ratio with a 5-minute rest. Store cooked components in the fridge for 3 days or freeze up to 3 months. Reheat the meat on the stovetop or in short microwave bursts.
Want more? Explore similar recipes on cuisines-corse.com: beef bowls, Asian weeknight dinners, quick beef recipes, rice bowl ideas, spicy mayo tips.
Thanks for cooking with me—now it’s your turn to make weeknights a little tastier with this simple, satisfying recipe.