Table of Contents
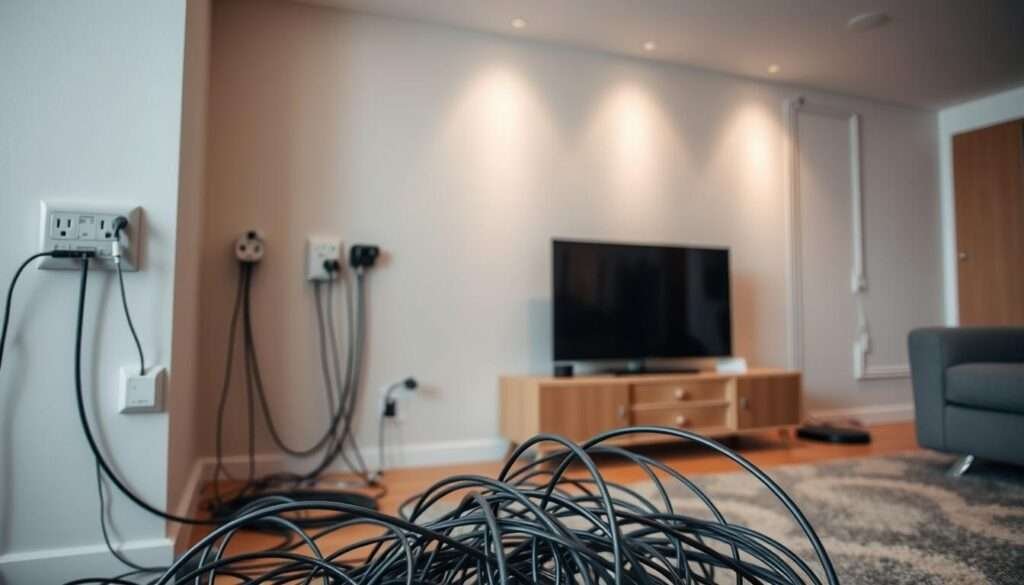
ToggleI remember sitting on a Sunday morning, coffee in hand, staring at a tangle of cords that ruined an otherwise peaceful space. That small irritation pushed me to test simple fixes that respect safety and style.
I promise clear tips I use to turn a busy view into a calm, curated scene. You’ll picture the after before you start – neat lines, hidden power strips, and furniture that works for you.
I sort each cord by use and visibility, solving only what adds visual noise. Expect quick wins, furniture-friendly tricks, in-wall versus on-wall choices, and smart styling that honors your decor and safety.
Whether you rent or own, these small steps make your living room feel larger and more intentional. I’ll show a practical playbook that keeps access easy and hazards away while boosting the look of your home.
Visualize the Calm: Set the Scene for a Minimalist, Cord‑Free Living Room
I once paused in a sunlit room and realized the single cord trailing behind the TV ruined the whole mood. That small detail taught me that visual order matters as much as furniture choices.

I commission a hero image that shows a neutral palette, soft daylight, clean lines, and gentle textures. The goal is clear: make the absence of visible wiring feel intentional, part of the decor, not an afterthought.
- I aim for soft textures, balanced negative space, and routes that follow architectural lines so cords vanish into the design.
- Loose cords break rhythm by adding dark diagonals that pull focus from sofa, table, and art.
- Simple moves—paintable adhesive covers, routing along baseboards, and tucking cables behind furniture—preserve the calm and improve safety.
I suggest taking a quick phone photo, zooming out, and spotting where cords interrupt the visual flow. Use that snapshot to target the back runs and corners first; small changes yield a room that reads larger, cozier, and more intentional.
Safety and Planning First in the Living Room
Before I move a single piece of furniture, I map every plug and device so nothing surprises me later. The serene end result depends on smart planning that keeps safety and sightlines equal parts important.
I check each electrical outlet and note where power needs to reach. I walk traffic paths to spot tripping risks near doorways and play areas.
Assess outlets, traffic, kids, pets, and heat
I test routes with furniture pulled forward, then push it back to confirm no cords peek out. I avoid bundling cords near heat sources and keep ventilation for warm devices.
Quick checks: keep cords off floors in high-traffic zones, secure loose ends, and protect access where children or pets can reach.
Renter-friendly vs. in‑wall: choosing the right path
I decide early whether I ’re looking for a no-drill solution or a permanent in‑wall run. For rentals, paintable cord covers and command hooks let me run cables neatly along a wall without damaging finishes.
- I cluster power at one hub to reduce long runs and strain.
- I label plugs so reconnection is simple after any change.
- I write a short checklist: no strain on plugs, avoid cords under heavy furniture, and allow airflow for power components.
| Solution | Best for | Pros | Cons |
|---|---|---|---|
| In‑wall wiring | Homeowners wanting clean TV install | Hidden cords, sleek look, permanent | Costly, not renter-friendly, needs electrician |
| Paintable cord covers | Renters and DIYers | Removable, paintable, affordable | Visible on close inspection |
| Command hooks & silicone clips | Furniture runs and temporary fixes | No drilling, flexible routing, pet-safe | Not for heavy or hot power strips |
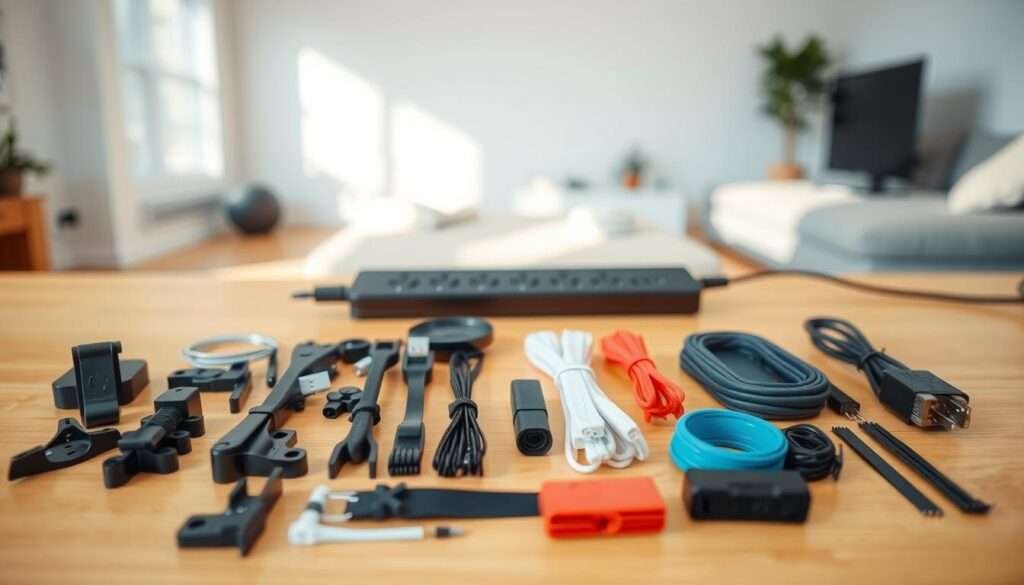
My Essential Cable Management Kit
My kit grew into a compact set of tools I reach for whenever cords threaten the room’s look. I curate items that keep lines tidy while staying renter-friendly and safe.
Core items I always have:
- Zip ties and Velcro wraps for quick bundling and adjustable loops.
- Silicone cable clips and Command hooks to route cords along furniture edges.
- A low-profile power strip and wall-mount surge protector tucked behind or inside a cabinet.
- Paintable cord covers and raceways that I cut, snap in, and paint to match the wall.
I rely on zip ties for fast shortening—sometimes I even zip a cord to itself to remove slack. Velcro wraps live where I need regular access so I can reopen bundles without cutting.
I label both ends of cables and stash spare ties and clips in a small bin in the media cabinet for instant fixes. I also choose a Sleek Socket style cover when I need plugs to sit flat against the wall.
| Item | Use | Why I choose it |
|---|---|---|
| Zip ties | Permanent bundle and shorten single cords | Cheap, tidy, low profile |
| Velcro wraps | Adjustable bundles for frequent access | Reusable, gentle on cables |
| Silicone clips & Command hooks | Furniture runs and underside routing | Renter-friendly, nearly invisible |
| Paintable cord covers | Long vertical drops and wall runs | Seamless when painted, cuts to size |
From Clutter to Calm: How to Hide Wires and Electronics in Your Living Room
Quick fixes—zip ties, labels, and clever placement—often stop cords from stealing the room’s focus.
I start by grouping cords together by device and shortening excess with zip ties or Velcro. I label each end so reconnecting is fast after any change.
I run cables along the back edge of a piece furniture and use silicone clips so nothing droops or gets grabbed. That route follows wall lines and keeps the look minimalist.
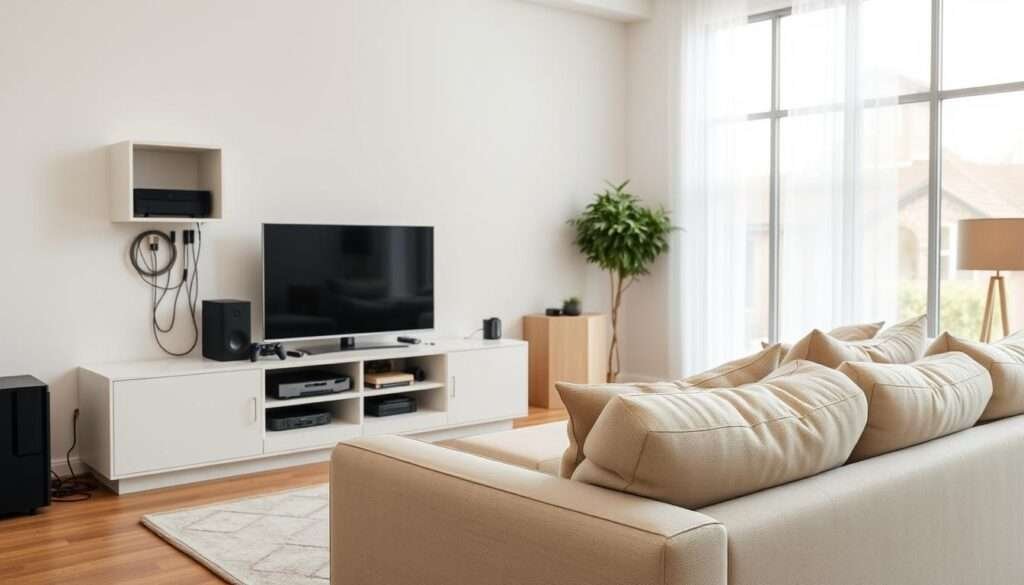
Strategic placement: media console, lamps, and charging zones
I place the media console where it covers long runs and keeps the shortest path to the outlet. Inside the cabinet, a mounted power strip hides a lot of clutter.
For a lamp, I pick an accessible but hidden plug point so the lamp cord never interrupts the sightline. One central charging zone means fewer loose cords across the room.
| Action | Where | Benefit |
|---|---|---|
| Bundle and label | Behind console and devices | Faster changes, neater look |
| Route along back edges | Under tables, along baseboards | Out of sight, safer traffic paths |
| Hide power strip | Inside cabinet door | Reduces visible plugs and vertical drops |
| Choose low-profile adapter | Between furniture and wall | Allows furniture to sit flush without pinching cord |
I keep a small envelope of spare ties and labels in the media console so I can fix any drift right away. These simple ideas balance aesthetics and access—everything powered, nothing messy.
Hide TV and Media Console Cords Like a Pro
C) The trick I use most is choosing a single vertical line for every drop of cables behind the TV.
I decide early whether to run cables in the wall or use a surface raceway. In‑wall runs give the cleanest look but are not renter-friendly. Paintable cord covers work well and can match the wall for a near-invisible finish.
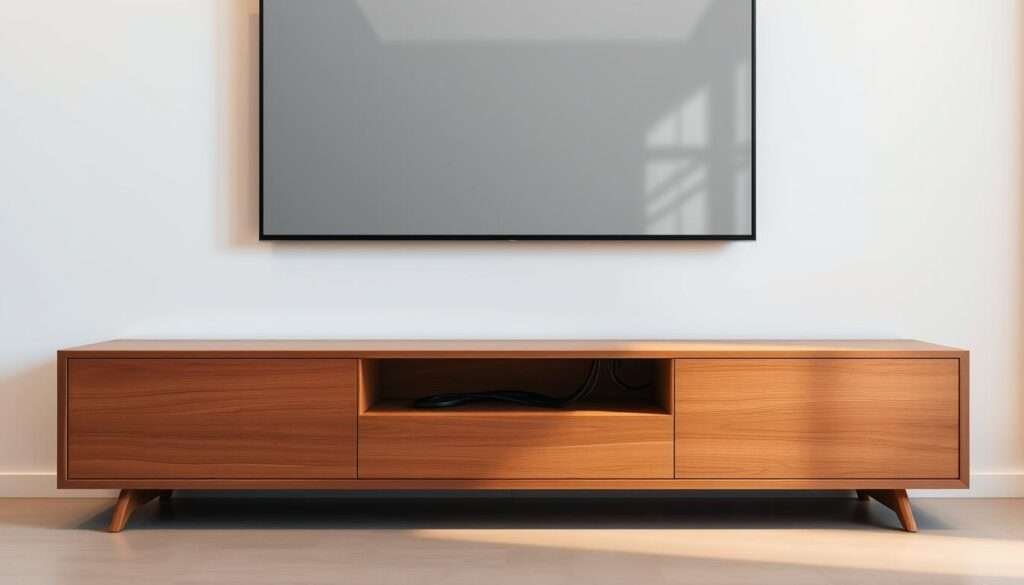
If the TV is wall-mounted: in-wall runs vs. paintable cord covers
In‑wall hides cords completely; raceways are cheaper and temporary. I paint raceways to blend with the wall and keep vertical drops straight down so the eye sees one quiet seam.
Leggy media cabinets: mounting power strips and snaking cords underneath
I mount a low-profile power hub behind or inside the media console. For leggy cabinets, I snake cords underneath and anchor bundles so nothing sags when doors open.
Inside-the-cabinet tricks: sleek socket to power strip hidden behind doors
I use a Sleek Socket cover at the outlet so the console sits flush. Hiding the power strip behind a door keeps plugs out of sight while leaving airflow and access to the reset switch.
Managing multiple devices: group with zip ties and anchor with clips
I group streaming boxes and consoles by shelf and secure each group with a labeled zip tie bundle. I anchor every bundle with discreet clips and allow small service loops so devices pull forward safely.
| Problem | Solution | Why it works |
|---|---|---|
| Visible vertical drop | Paintable raceway | Blends with wall, quick install |
| Messy console interior | Mounted power hub inside cabinet | Hides plugs, keeps reset accessible |
| Multiple device cords | Labeled zip tie bundles + clips | Organized groups, no sagging |
Furniture‑First Fixes for Lamps, Sideboards, and Entry Tables
A stray lamp cord once drew my eye every time I walked into the hall, so I learned to route lines where they belong. I keep surfaces styled and airy by running cords along the back and underside of each piece of furniture.

Command hook pathways along the back and underside
I create a hidden pathway with command hooks along the back rail and underside so cords never droop beneath the furniture line. I often use Command adhesive and small silicone clips on the back of consoles and tables to keep cables taut and invisible.
Wrapping excess cord out of sight without tangling
Excess length gets wrapped neatly along the back and secured with small clips so there’s no tangle and nothing visible from the front. A final hook low on the wall under the table captures slack and keeps the run tight to the surface.
- Stabilize a lamp by anchoring its cord so kids or pets can’t tug it; the trick is to keep it taut and out of reach.
- Use small zip ties or a single zip tie as low‑profile anchors where adhesive clips won’t stick.
- Test drawer and door swings on sideboards so the path never snags during daily use.
- Keep a few spare ties in the top drawer for instant fixes and to maintain balance instead of relying on baskets.
| Problem | Quick fix | Why it works |
|---|---|---|
| Drooping cords | Command hooks + clips | Keeps cords hidden along the back and underside |
| Excess length | Wrap at the back, secure with clips | No tangles, serviceable and neat |
| Lamp tug risk | Anchor cord taut, out of reach | Prevents pulls and improves safety |
Desk and Charging Stations That Don’t Ruin the View
I transformed a chaotic workspace into a quiet corner with a few trays, clips, and a single cable box. The goal was simple: keep the workstation visually quiet so the living area feels cohesive.
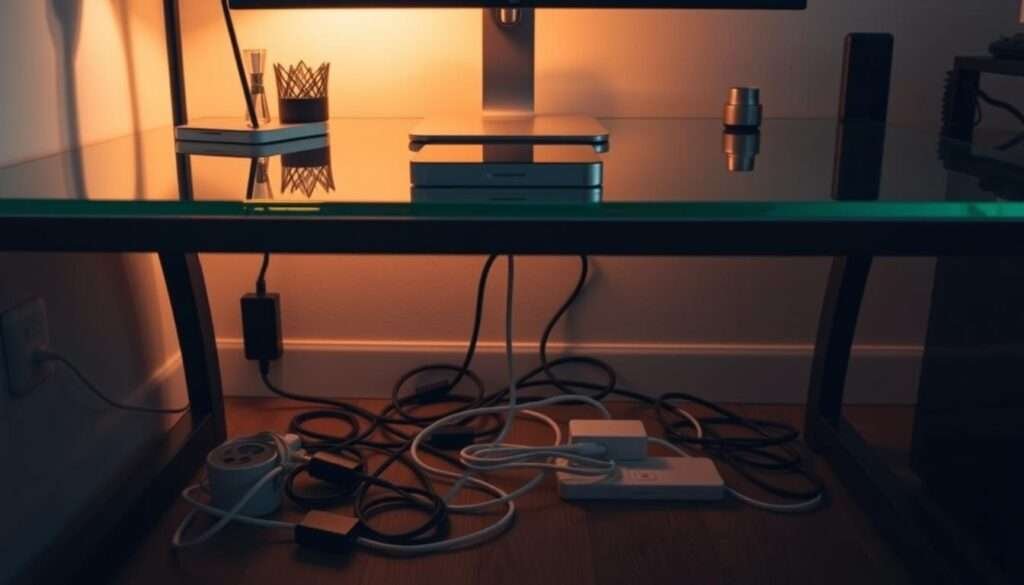
Under-desk trays corral chargers and monitor leads so nothing dangles to the floor. I mount a cable management tray beneath the desk to hold adapters and power bricks and leave a small gap for airflow.
- I place a modern cable box on the floor or credenza and drop the power strip inside, routing cables through side slots for a sleek finish.
- I use a docking station to reduce individual cords and keep the desktop minimal; labeled leads help everyone plug into the right port fast.
- I clip vertical runs to the desk leg so cables follow a straight, discreet line down to the box and add soft bumpers where they might rattle.
Small habits matter. I keep a microfiber pouch for spare adapters and review the setup from the living area vantage point so the station blends into the shared space. When I include product sources, I note affiliate links only for items that truly disappear visually in a shared home.
| Solution | Where | Benefit |
|---|---|---|
| Cable management tray | Under desk | Holds adapters, keeps floor clear |
| Cable box + power strip | Floor or credenza | Conceals plugs, routes cables tidily |
| Docking station | Desktop | Reduces separate chargers, speeds access |
For more small space tips that make a big visual difference, see my note on compact setups for optimized living areas.
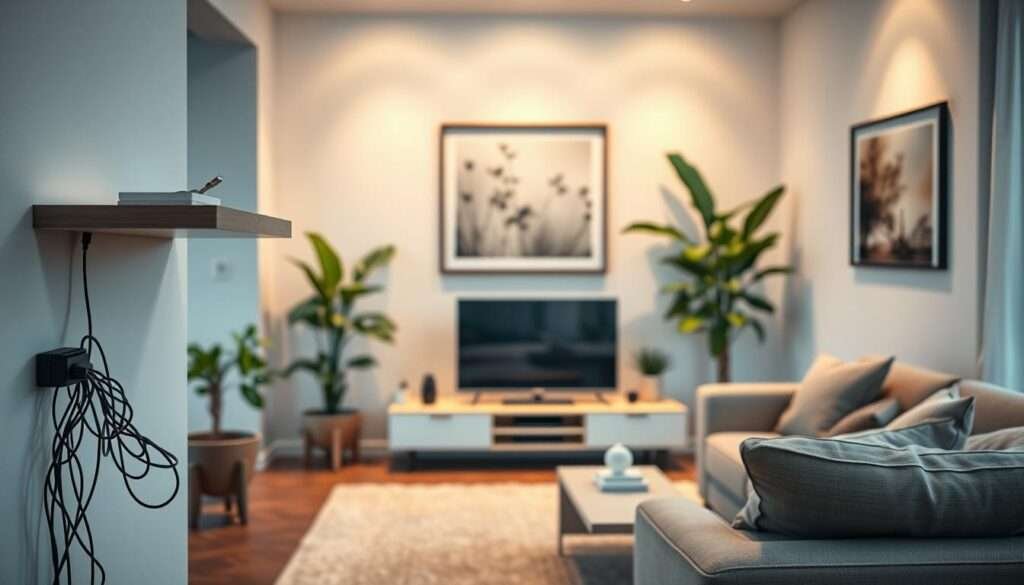
Style, Camouflage, and Smart Cover‑Ups
A small, well-placed cover can turn a noisy cable run into a quiet line that reads like trim. I prefer solutions that respect the room’s palette so tech fades and texture stays central.
Paintable raceways and color‑matched cords
I choose paintable raceways and match cords to the wall color so long drops look intentional. Ends get insulated and tucked so the finish reads like millwork, not a tech fix.
Decor that actually screens an outlet
I place a basket, ottoman, or large plant to screen an electrical outlet while keeping cords away from damp surfaces. Rugs can hide runs in low‑traffic zones but I avoid heavy paths to reduce wear.
When hiding isn’t possible: covers and playful accents
If a run must remain visible, I convert it into an accent with a macramé sleeve or neat fabric cover. Washi tape works well for reversible color blocking on a cord near a lamp or piece of furniture.
- Camouflage tip: align cables with verticals like bookcases so shadows hide detail.
- Safety note: keep space around power bricks and never cover warm components with textiles.
- Transparency: I share product notes and use affiliate links only for items that truly look as good as they function.
| Solution | Best for | Why it works |
|---|---|---|
| Paintable raceway | Long vertical drops | Blends with wall, low visual weight |
| Decor screens (baskets/plants) | Outlets and short runs | Softens tech, keeps access |
| Fabric/macramé covers | Visible cords | Turns cables into a styling element |
Keep It Serene: Maintenance Tips, Safety Checks, and Seasonal Resets
A ten-minute sweep each month saves time and keeps the space photo-ready.
I run a quick checklist: tug-test cords, check that nothing is pinched by furniture, and confirm no device feels warm near a power strip or outlet.
I dust behind the console and along the wall so adhesive clips hold tight. I retighten bundles with a fresh zip tie or swap to zip ties where anchors failed.
After new devices arrive I add a label, adjust the tray, and route any new cable so daily life stays simple. I keep a tiny maintenance kit in the media cabinet so the way keep order is always within reach.
Small, regular care keeps wires cords out of sight and your home feeling calm.