Table of Contents
ToggleI remember coming home hungry from practice and finding a warm pan bubbling on the stove. That smell—onion, garlic, and melting cheese—made the whole house feel safe. I started making this as a quick, pantry-friendly bake for weeknights and it became a family favorite.
In this intro I’ll tell you why you’ll love the recipe: creamy sauce, melty cheese, and savory ground beef that works for picky kids and busy adults. I tested a one-pot method that cooks rice in broth and a shortcut using already cooked grains so you can match your available minutes.
You’ll get exact ingredient amounts, simple tool notes (skillet or Dutch oven, 9×13 dish), timing from stovetop to oven, and easy storage tips so leftovers hold up. I’ll also share quick swaps and a few flavor variations to keep dinners interesting.
Comfort in a Casserole: Why I’m Obsessed with This Cheesy Hamburger Rice Casserole
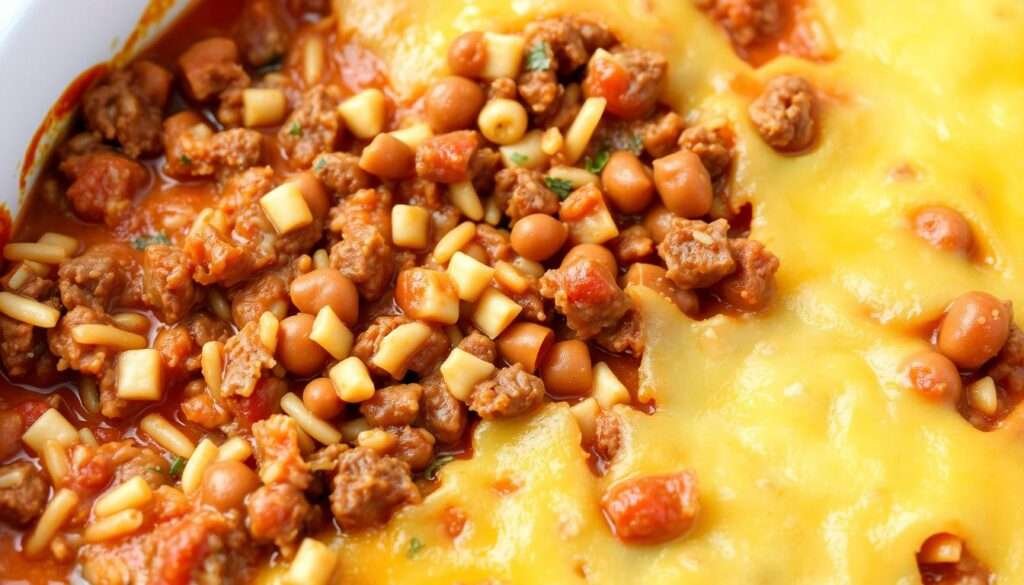
This warm, pantry-friendly bake became my go-to when time and energy ran low. It hits the comfort-food spot with a creamy center, a golden cheese top, and tender long-grain rice that never turns gummy.
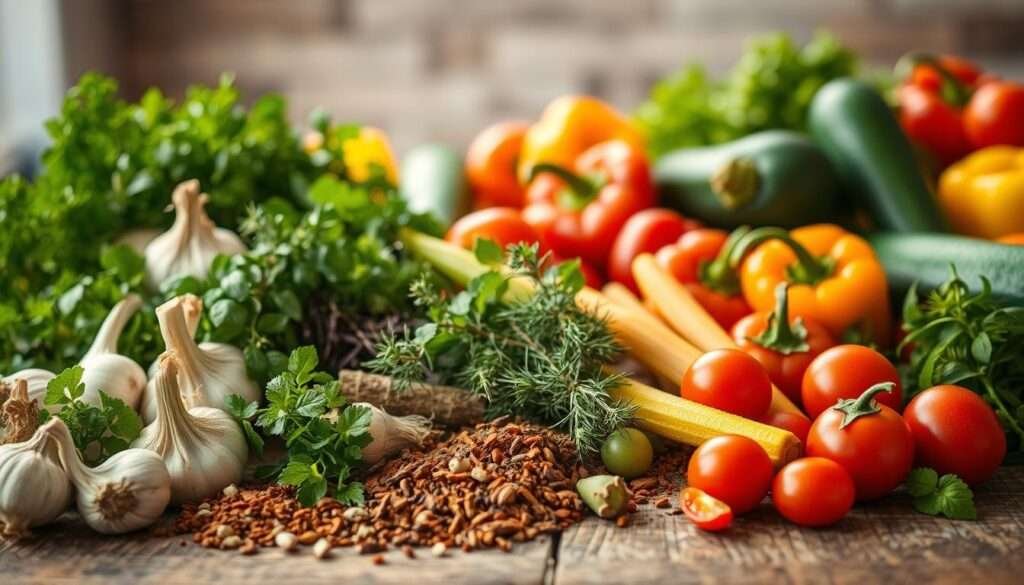
I build the base from staples: cream of mushroom, broth, milk, sour cream, and cheddar cheese. For a from-scratch option I whisk a simple roux instead of opening a can. Small amounts of onions, garlic, and seasoning add depth without stealing the show.
The oven step is flexible. Use the one-pot method and bake at 350°F for about 20 minutes covered, or assemble raw and bake uncovered for roughly 90 minutes until grains are done. Quick stovetop rice finishes faster if you need to save minutes.
- I choose long-grain white for texture and a cheese melted blanket to lock in moisture.
- Add-ins like peas, carrots, or corn sneak in veggies while keeping kid-friendly flavor.
- I sometimes swap Colby Jack for a milder melt when I want a softer finish.
| Method | Key Ingredients | Oven Time | Texture |
|---|---|---|---|
| One-pot (stovetop rice) | Broth, cream soup, cheddar | 350°F, 20 minutes covered | Creamy center, tender grains |
| From-scratch roux | Roux, milk, broth, sour cream | 350°F, 20 minutes covered | Rich, slightly thicker sauce |
| Oven-bake (raw rice) | Dry rice, liquid, seasonings | Uncovered ~90 minutes | Fully baked grains, firmer top |
Why You Will Love This Recipe
I love a recipe that behaves like a comfort classic but adapts to whatever’s in my pantry. It’s mild and creamy so kids eat it without fuss, yet I can turn up the seasoning when adults want more flavor.
Kid-friendly flavors and simple veggie swaps
The base is intentionally gentle: a creamy sauce, tender ground beef, and long grain rice for a fluffy bite. I fold in mild veggies—peas, corn, or diced carrots—to boost color and nutrition without changing the taste kids expect.
If we want more zip, I sprinkle Italian blend, ranch mix, or taco seasoning. A single cup of add-ins like broccoli or mushrooms brightens each scoop.
Busy-day simplicity: three easy build paths
I use three approaches depending on time. From-scratch sauce starts with butter, onion, garlic, flour, cream, and broth for the richest result.
Semi-homemade swaps in mushroom gravy plus milk. Quick mode uses condensed soup and cooks faster. Instant rice or brown rice need adjusted liquid and time, but the structure stays the same.
| Approach | Key Ingredients | Time | Best For |
|---|---|---|---|
| From-scratch | Butter, onion, garlic, flour, cream, broth | About 45–60 min | Deeper flavor, weekend nights |
| Semi-homemade | Mushroom gravy, milk, ground beef | 30–40 min | Balanced flavor, fewer steps |
| Quick | Condensed soup, instant or cooked rice | 20–30 min | Busy weeknights, minimal prep |
Cheesy Hamburger Rice Casserole: Key Details at a Glance
Weeknights taught me to value clear timing and a dependable pan that feeds everyone without fuss. Below I give quick facts so you can plan dinner and sides with confidence.
Prep, bake time, and yield for weeknight success
I use a one-pot route: brown the ground, sauté aromatics, add rice and simmer—about 10 minutes plus 5–10 more until mostly tender, then let stand 10 minutes. Finish in the oven at 350°F for 20 covered bake minutes to set the cheese.
The oven-bake-from-raw-rice route bakes uncovered at 350°F for about 90 minutes for fully cooked grains and a slightly crisp top.

Rice type matters: long-grain white for best texture
I recommend long grain white; it keeps grains separate and avoids a sticky result when baked. If you use pre-cooked rice, plan on about 3 3/4 cups to replace the uncooked portion and skip extra broth.
| Method | Pan | Yield |
|---|---|---|
| One-pot + 20 covered bake minutes | 9×13 pan | Family-sized, seconds likely |
| Raw rice, bake ~90 minutes uncovered | 9×13 pan | Same yield, firmer top |
Adjust cups of liquid if you swap rice types, watch for bubbly edges, and plan your time so the beef rice casserole is hot when everything else is ready.
Tools and Preparation
Before I preheat the oven I set out the pans and tools I’ll need. That small step saves time and keeps the cook calm.
Essential cookware I actually use
- I reach for a large, heavy skillet or Dutch oven to brown the ground beef evenly and to sauté onions and garlic without crowding.
- A 9×13 baking dish gives consistent thickness and even heat; I keep a sturdy sheet of foil nearby for the quick-bake method.
- Measuring cups, spoons, and a wooden spoon live at my station for safe stirring of hot sauce and for precise ingredients.
Prep-ahead pointers to streamline your cook
I prep veggies and aromatics—onion, garlic, mushrooms, or carrots—first so everything hits the pan in order.
I pre-shred cheese when I can; it melts more smoothly. I also measure broth, milk, and seasonings in small bowls so I’m not guessing mid-cook.
Safety tips when working with raw beef and hot dishes
Wash hands before and after touching raw beef and never use the same utensils for raw and cooked foods.
Don’t leave food at room temperature for long, and never leave the stovetop or oven unattended while cooking. I preheat the oven (350°F or 400°F for a ranch variant) and position the rack in the middle for even heat.
Let the dish rest a few minutes after baking so the rice and cheese settle. Keep pot holders handy to protect your hands and forearms when moving a hot casserole from oven to counter.
| Tool | Use | Note |
|---|---|---|
| Skillet / Dutch oven | Brown ground beef, sauté aromatics | Heavy-bottomed prevents hot spots |
| 9×13 baking dish | Bake and set the casserole | Consistent thickness, even finish |
| Measuring cups & spoons | Accurate liquid and seasoning amounts | Helps balance salt, pepper, and powder |
Importance of Each Tool & Usages Table
After a few test bakes I learned which tools actually change the final result. The right items save time and prevent common mistakes while I build the mixture of flavors.

Tools & Uses Table
Below I list the tools I reach for, what they do, and simple tips so every cup of finished casserole comes out reliable.
| Tool | Primary job | Why it matters | My tip |
|---|---|---|---|
| Large pot / heavy skillet | Brown ground beef and simmer rice in one pot | Even browning builds flavor and lets the mixture cook without extra pans | Use medium-high heat and deglaze with broth for depth |
| 9×13 baking dish | Oven finish and melting surface | Spreads heat evenly so the cheese melts across the dish | Cover with foil for shorter bakes; uncover to brown |
| Measuring cups & liquid cup | Measure broth, milk, and seasonings | Precise cups prevent under- or over-moist rice and set sauce texture | Level off dry measures and pour liquids at eye level |
| Cutting board & sharp knife | Prep onions, garlic, and veggies | Clean cuts help aromatics cook evenly and release flavor | Keep a small board for quick dicing to save time |
| Aluminum foil, airtight container, thermometer | Covering, storing, and checking doneness | Foil keeps moisture; airtight container locks freshness; thermometer confirms hot center | Store leftovers in an airtight container and reheat to a hot-and-bubbly center |
I also use a wooden spoon or silicone spatula to stir without scratching, a colander when I rinse mushrooms, and oven mitts by the oven so moving a hot dish is safe.
Exact Ingredients in Table Format
I measure everything before I cook to avoid last-minute improvisation. Below is the exact list I use so shopping and prep are fast and reliable.
| Ingredient | Amount | Notes |
|---|---|---|
| Ground beef (85% lean) | 1 lb | Brown before adding liquids |
| Uncooked long‑grain white rice | 1 1/4 cups | Or 3 3/4 cups cooked rice |
| Beef broth | 2 1/2 cups | One‑pot method liquid |
| Butter | 3 tbsp (divided) | For sauté and roux if making from scratch |
| Onions | 3/4 cup, diced | Aromatics |
| Garlic | 1 tbsp, minced | Small but important |
| Cream of mushroom soup | 10.5 oz | Classic creamy element |
| Milk | 1/2 cup | Stretches the cream |
| Sour cream | 1/2 cup | Adds tang and silkiness |
| Cheddar cheese (shredded) | 2 cups (divided) | Half inside, half for top |
| Mushrooms or mixed veggies | 8 oz mushrooms or 1 cup peas/carrots/corn | Pick one or mix |
| Italian seasoning, salt & pepper | 1.5 tsp; to taste | Season in layers |
From-scratch, Semi-homemade, and Quick-swap Notes
From-scratch: make a quick roux with butter and flour, then whisk in cream and chicken broth to replace the canned soup.
Semi-homemade: whisk mushroom gravy with milk for a faster but still rich sauce.
Quick: use condensed soup and pre-cooked rice when time is tight. For the full method and variations, see my ground beef rice recipe.
Step-by-Step Instructions
I walk through clear steps so the dish finishes hot, creamy, and reliable in the oven. Follow the one-pot route for speed or the separate-rice method when you want firmer grains.
Brown the beef and aromatics
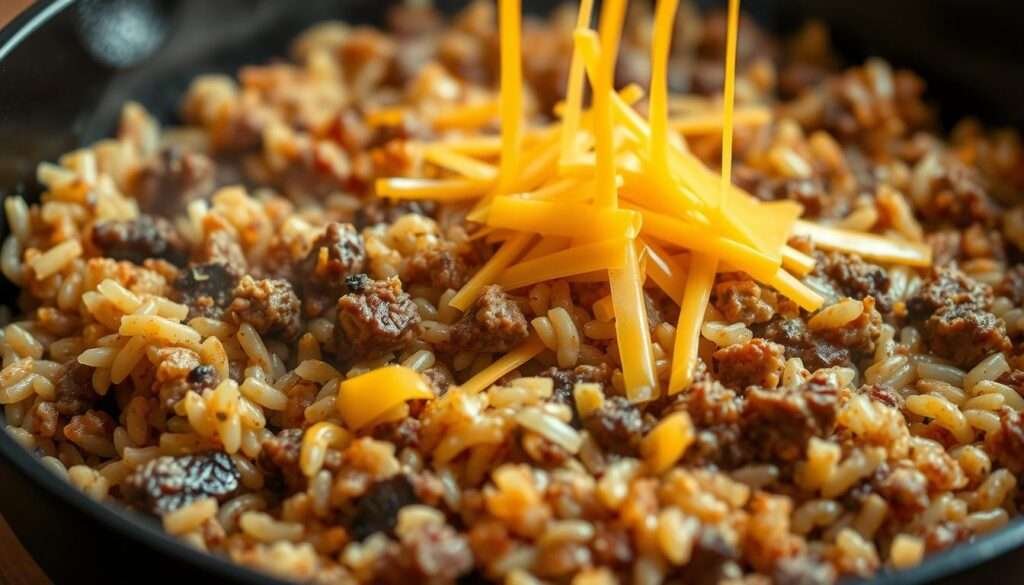
- I heat a large skillet over medium-high and brown the ground beef with a pinch of salt, pepper, and Italian seasoning. Drain excess fat for a cleaner sauce.
- In the same pan I melt 2 tbsp butter, sauté onions about 5 minutes until soft, then add garlic for 1 minute to bloom the flavor without burning.
One-pot rice vs. separately cooked rice
For the one-pot method I add the beef broth and remaining butter, stir in long grain rice, bring to a boil, then simmer covered 10 minutes. Add mushrooms and cook 5–10 more minutes, then turn off the heat and rest 10 minutes. This yields tender grains with less hands-on time.
If using pre-cooked rice, measure about 3 3/4 cups cooked, skip the simmer step, and fold it in at the end so textures stay distinct.
Build the creamy base
I stir the browned beef into the hot rice, then mix in cream of mushroom soup, milk, sour cream, and half the cheddar until the mixture is even and creamy. For a from-scratch sauce I make a quick roux, whisk in cream and chicken broth, then combine with the beef and rice.
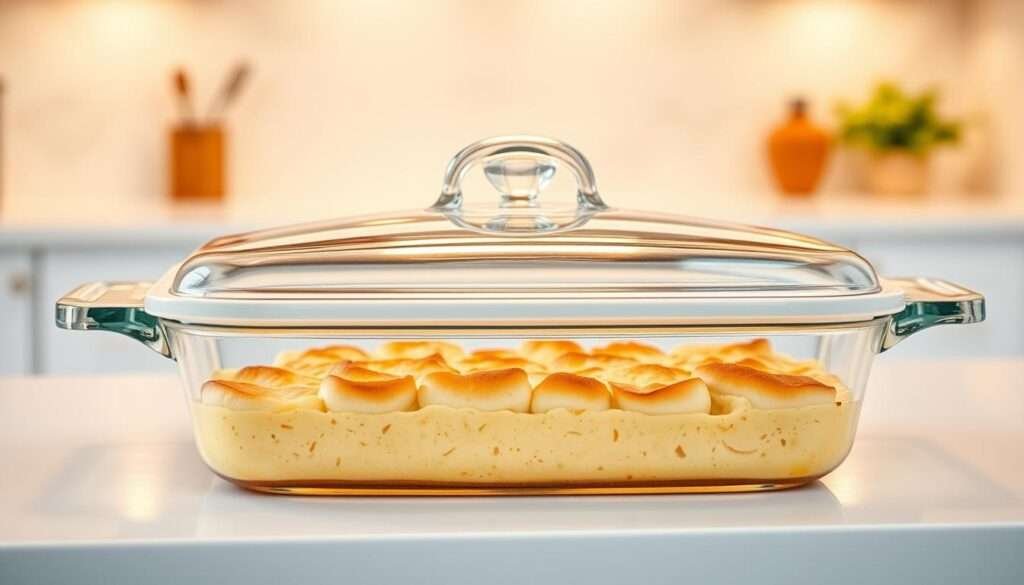
Assemble and bake
Transfer the mixture to a greased 9×13, top with remaining cheddar, cover with foil, and bake at 350°F for about 20 minutes until hot and cheese melted. From cold (make-ahead) add 5–10 minutes and bake 25–30 minutes so the center is bubbly.
Quick variations and timing notes
To bake raw, uncooked rice with liquids, assemble uncovered and bake about 90 minutes at 350°F. For a ranch spin with pre-cooked rice, stir in a ranch packet and a little cream cheese, then bake at 400°F for 15–18 minutes for a faster finish.
| Method | Time | Result |
|---|---|---|
| One-pot (simmer then rest) | About 20–25 minutes prep + 20 minutes bake | Tender grains, creamy mixture |
| Pre-cooked rice | 10–15 minutes prep + 20 minutes bake | Firm texture, quick finish |
| Raw rice in oven | Uncovered ~90 minutes bake | Fully baked grains, firmer top |
Pro Tips, Variations, and Troubleshooting
When dinner needs to be fast and forgiving, I turn to small tweaks that keep flavor high and fuss low.
I boost seasoning with an Italian herb blend, a ranch packet for tang, or taco powder for a south-of-the-border spin. I finish with a light sprinkle of salt and pepper so the sauce sings. A little garlic in the sauté goes a long way.
Veggie and cheese swaps
I fold in veggies like peas, corn, broccoli florets, or mushrooms after the sauce is built so they warm through without overcooking. For cheese, I alternate sharp cheddar for bite or Colby Jack for extra melt.
Rice and moisture fixes
If grains are undercooked, long-grain white is safest; brown rice needs more broth and extra bake time. Instant rice calls for reduced liquid and a gentler heat. If the bake looks dry, stir in a splash of milk or broth and keep it covered during the final bake to trap steam.
Protein swaps and lower-carb options
I swap ground chicken or pork using the same method—watch fat and adjust seasoning. For a lower-carb twist, I use briefly cooked cauliflower rice and cut back on liquid so the mix isn’t soggy.
- I make a ranch version with a cream cheese stir-in and a ranch packet for body and tang.
- For a taco riff, I add taco powder and a can of rinsed black beans, then top with cheddar and serve with sour cream.
- To avoid clumpy cheese, I grate my own and split it: half mixed in, half on top for a glossy melt.
| Variation | Key tweak | Result |
|---|---|---|
| Ranch | Ranch packet + cream cheese | Tangy, creamy finish |
| Mexican | Taco powder + black beans | Spiced, hearty plate |
| Low-carb | Cauliflower rice, less liquid | Lighter texture, fewer carbs |
Storage & Reheating Instructions
I learned to treat leftovers like a second round of cooking—small steps make a big difference.
I cool the dish slightly, then divide portions and pack them into an airtight container. I refrigerate for 3-4 days to keep the rice and beef safe and tasty.
For longer storage I freeze portions for up to 3 months. I label each container with the date and simple reheating notes so weekday meals are easy.
- I reheat from chilled in the oven at 325°F for about 15–20 minutes until hot and bubbly and the cheese melted on top.
- If reheating frozen, I thaw overnight in the fridge first for even heat and predictable minutes.
- Microwave single servings in 60–90 second bursts, stirring between rounds and adding a splash of milk if it looks dry.
- Keep the dish covered loosely with foil in the oven to trap steam and avoid over-browning.
- If I want a fresh top, I sprinkle a handful of shredded cheese before the final few minutes of reheating.
| Storage | Timeline | Thawing | Reheat (minutes) |
|---|---|---|---|
| Refrigerator (airtight container) | 3–4 days | Not needed | 15–20 min at 325°F |
| Freezer (sealed) | Up to 3 months | Overnight in fridge | 15–25 min after thawing |
| Microwave (single serving) | Use within 3–4 days | Not needed | 60–90 sec bursts, stir then repeat |
Prompt storage keeps food safe—don’t leave it out for hours. A gentle reheat preserves creaminess and prevents the rice from drying, so your leftover ground beef rice tastes close to the first night.
Final Thoughts and More Cozy Casseroles to Cook Next
Over time I found this dish checks every box: flexible, budget-friendly, and reliably satisfying. I turn to these recipes when I want a warm beef casserole that feeds a crowd or makes smart use of pantry rice. The base with ground meat and a creamy sauce scales easily for guests or batch-cooking.
Give the bake a short rest after it comes from the oven; that time helps the mixture set so slices hold their shape. You can cut the amount of cheese or cream to lower fat while keeping the meal comforting. Swap in extra veggies to boost fiber and change the flavor without fuss.
Keep a few staples on hand and you are one step from a cozy dinner. For more ideas, browse related recipes and riffs at cuisines-corse.com: https://cuisines-corse.com/?s=casserole, https://cuisines-corse.com/?s=gratin, https://cuisines-corse.com/?s=riz, https://cuisines-corse.com/?s=boeuf, https://cuisines-corse.com/?s=fromage.
I recommend pairing your next beef casserole with a crisp salad, or doubling the batch for reliable leftovers. Bookmark this page, try small tweaks, and enjoy turning this base into many fast, family-friendly meals.